Home Blog

How to Raise Volume on Sharp TV Without Remote: Simple Fixes

0
Person confused by Sharp TV volume issue
Adjusting Sharp TV Volume Without Remote

Losing your Sharp TV remote can be frustrating, especially when you need to adjust the volume. Whether it’s missing, broken, or out of batteries, you can still raise the volume on your Sharp TV. This guide provides easy, step-by-step methods to control your TV’s sound without a remote. We’ll cover using physical buttons, a universal remote, a smartphone app, and contacting support. All information is verified and up-to-date as of December 2024.

Methods to Raise Volume Without a Remote

1. Use Physical Buttons on Your Sharp TV

Most Sharp TVs have physical buttons on the side, bottom, or back. These buttons control basic functions like power, volume, and channels.

Steps to raise volume:

  1. Locate the buttons on your Sharp TV. Check the edges or refer to your TV’s manual online.
  2. Find the volume up button, usually marked “VOL +” or “+.”
  3. Press the button to increase the volume to your desired level.

Note: Some models use a single joystick or multi-function button. You may need to press and hold or combine it with another button. Check your model’s manual for specifics.

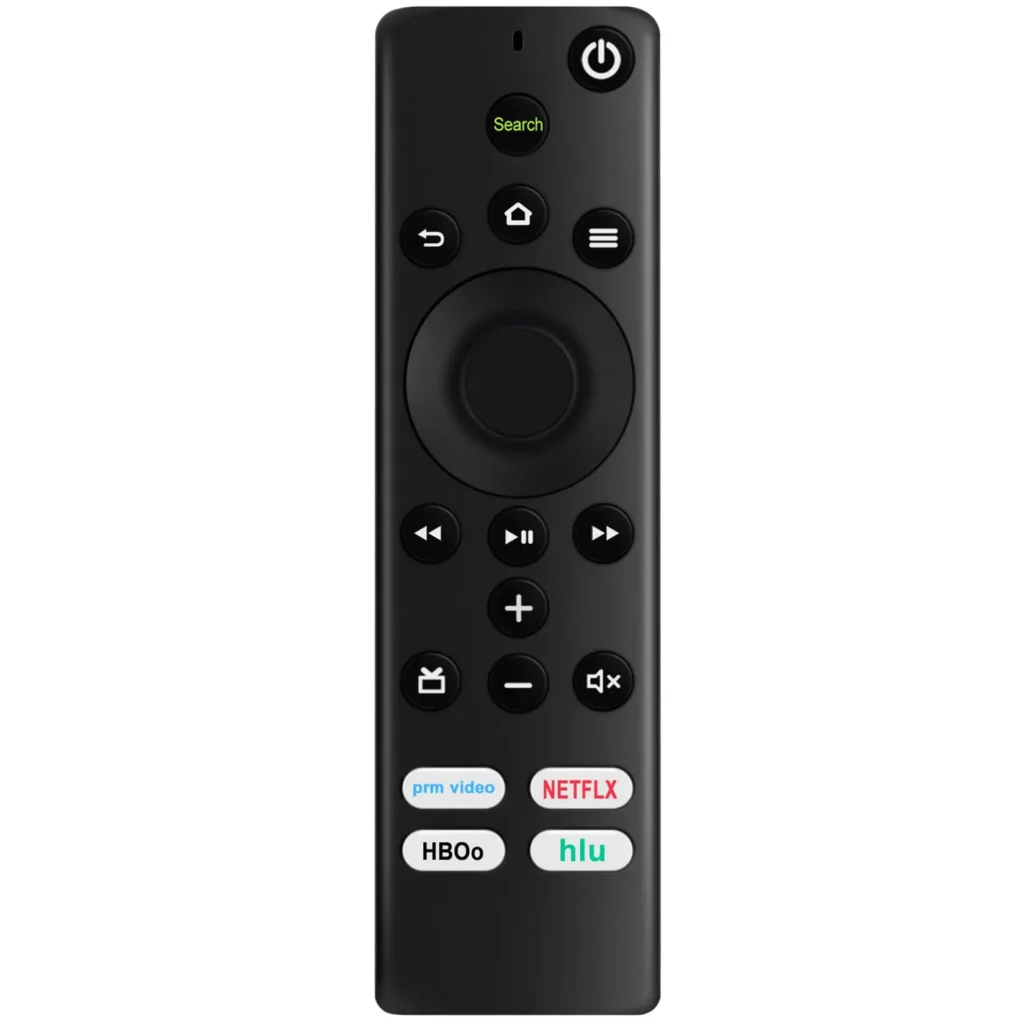
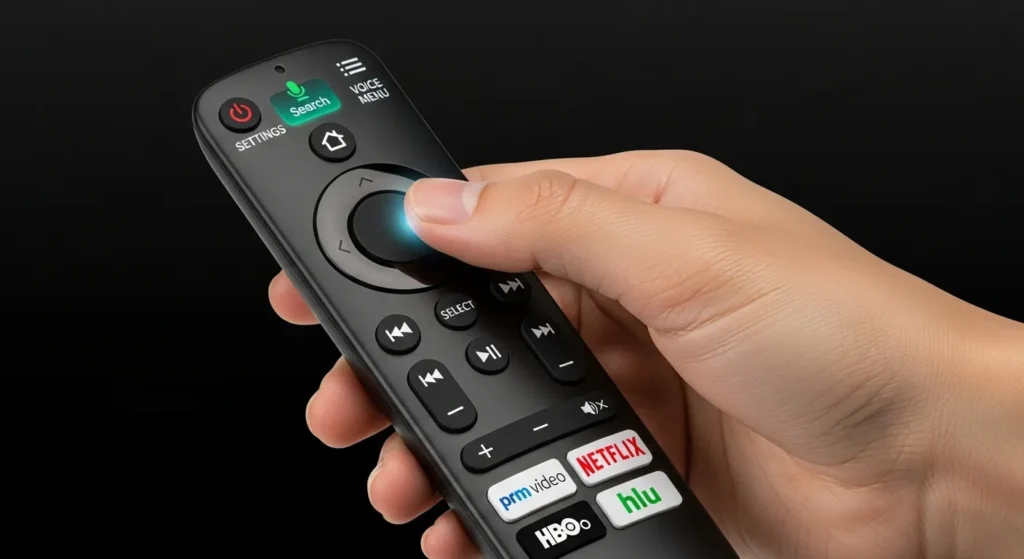
2. Use a Universal Remote

A universal remote is a great solution if you don’t have the original Sharp remote. These remotes work with most Sharp TVs and are easy to set up.

Steps to set up:

  1. Purchase a universal remote compatible with Sharp TVs. Check the packaging or online for compatibility.
  2. Follow the remote’s instructions to program it. This usually involves entering a code for Sharp TVs.
  3. Once programmed, press the “Volume +” button to raise the sound.

Tip: If the first code doesn’t work, try other codes listed for Sharp TVs. You can find codes on the remote’s manual or online.

Related Article: Programming Universal Remote Codes for Sharp TV

Universal remote controlling Sharp TV volume
Universal remote for Sharp TV

3. Control Volume With a Smartphone App

Many Sharp smart TVs, especially those with Android or Roku OS, can be controlled via smartphone apps. This requires your TV to be Wi-Fi-enabled.

Steps to use an app:

  1. Confirm your Sharp TV supports app control. Check the manual or Sharp’s website.
  2. Download a compatible app like “Sharp SmartCentral” or “Roku – Official Remote Control” from the App Store or Google Play.
  3. Ensure your phone and TV are on the same Wi-Fi network.
  4. Open the app and pair it with your TV by following the prompts.
  5. Use the app’s volume up button to adjust the sound.

Note: Older Sharp TVs may not support app control. If your TV lacks Wi-Fi, this method won’t work.

4. Use Voice Assistants (Google Assistant or Alexa)

Some Sharp smart TVs support voice assistants like Google Assistant or Amazon Alexa. This works if your TV is compatible and already set up.

Steps to use voice commands:

  1. Ensure your TV is connected to a voice assistant device or has built-in support.
  2. Say commands like “Hey Google, increase TV volume by 10%” or “Alexa, turn up TV volume.”
  3. Adjust to your preferred level using specific commands like “Set volume to 50%.”

Note: You may need to enable this feature in the TV’s settings beforehand.

5. Contact Sharp Support

If none of the above methods work, Sharp’s customer support can help. They may guide you through troubleshooting or provide a replacement remote.

Steps to get support:

  1. Visit Sharp’s Customer Support (verified December 2024).
  2. Provide your TV’s model and serial number for quick assistance.
  3. Ask about volume control options or order a new remote.

Tip: If your TV is under warranty, you may qualify for a free remote replacement.

Related Article: How to Find TV Serial Number

Troubleshooting Common Volume Issues

Sometimes, you may face issues even when using these methods. Here are quick fixes for common problems:

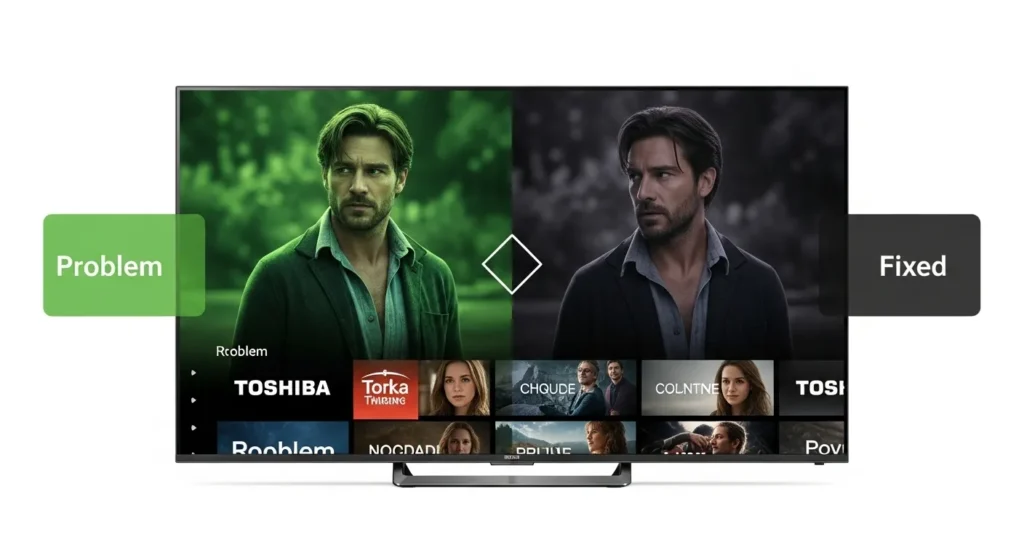
  • Low volume at maximum setting: Check audio settings in the TV menu. Set “Output Select” to “Fixed” if using internal speakers. Update firmware via “Settings > System > Software Update” to fix software bugs.
  • Buttons not responding: Unplug the TV for 60 seconds and plug it back in to reset it. If buttons still don’t work, there may be a hardware issue—contact Sharp support.
  • App not connecting: Ensure your TV and phone are on the same Wi-Fi network. Restart both devices and try pairing again.

Related Article: Fix Sharp TV Flashing Red Light

FAQs

Can I control my Sharp TV without any buttons or remote?

If your TV lacks physical buttons, use a smartphone app or voice assistant if supported. Otherwise, you’ll need a universal remote.

Why won’t my Sharp TV volume go louder?

Check audio settings, update firmware, or inspect for hardware issues. A soundbar can boost volume if needed.

Can I use a Chromecast to adjust volume?

Chromecast can’t directly control volume, but you can use the Google Home app with CEC-enabled TVs to adjust settings.

How do I know if my Sharp TV supports app control?

Check your TV’s manual or Sharp’s website for Wi-Fi and app compatibility details.

What if my TV’s buttons are broken?

Use a universal remote, smartphone app, or contact Sharp support for repair options.

Can a gaming console adjust Sharp TV volume?

Yes, some consoles like PS5 or Xbox allow volume control if connected via HDMI. Check your console’s settings.

Conclusion

Raising the volume on your Sharp TV without a remote is simple with the right method. Use physical buttons, a universal remote, a smartphone app, or voice assistants to get the sound you need. If all else fails, Sharp support is there to help. Try these steps and enjoy your TV again. Have questions? Drop a comment below or share this guide!

How to Press Allow on Samsung TV Without Remote

0
Person using smartphone to control Samsung TV.
Controlling Samsung TV without a remote.

Need to press “allow” on your Samsung TV but don’t have the remote? This often happens when pairing a device, like a smartphone or streaming stick, or when an app needs permission. Don’t worry—there are several ways to control your TV without the remote. This guide provides clear, step-by-step methods to help you select “allow” and get back to enjoying your TV. These solutions work for most Samsung smart TVs, though some steps may vary by model.

Why You Need to Press “Allow”

When you connect a new device to your Samsung TV, such as a phone via Smart View or a streaming device, the TV may display a prompt asking you to press “allow” to grant permission. Apps like Netflix or YouTube may also request access to certain features. Normally, you’d use the remote to navigate and select “allow.” Without a remote, you can use alternative methods like physical buttons, a smartphone app, or other devices.

Method 1: Using the TV’s Physical Buttons

Most Samsung TVs have physical buttons that let you control basic functions, including navigating menus and selecting options like “allow.”

Step 1: Locate the Physical Buttons

The buttons’ location depends on your TV model. Check these common spots:

  • Back of the TV: Usually in the bottom right corner.
  • Front panel: In the middle or on the side, often under the Samsung logo.
  • Side of the TV: Near the edge, sometimes hidden.

Look for a joystick or a set of buttons (up to five on some models). If you’re unsure, check your TV’s user manual at Samsung Support.

Samsung TV physical buttons location.
Physical control buttons on a Samsung TV.

Step 2: Understand Button Functions

The buttons usually include a central button (often the power button) that also navigates menus:

  • Single press: Highlights options or brings up the menu.
  • Long press: Turns the TV on or off, or selects an option.
  • Joystick movement (if applicable): Moves up, down, left, or right.

Step 3: Navigate to “Allow”

When the “allow” prompt appears on the screen:

  1. Press the central button to highlight options.
  2. Use the joystick or directional buttons to move to the “allow” option.
  3. Press the central button again (or hold it) to select “allow.”boostvision.tv

Tip: Navigation varies by model. It may take some trial and error. If the prompt doesn’t respond, try a long press or consult your user manual.

Method 2: Using the Samsung SmartThings App

The Samsung SmartThings app lets you control your TV from your smartphone, making it a great remote alternative.

Step 1: Download the App

Step 2: Set Up the App

  1. Open the app and sign in or create a Samsung account.
  2. Ensure your TV and smartphone are on the same Wi-Fi network.

Step 3: Add Your TV

  1. Tap the “+” icon in the app.
  2. Select “Device,” then “TV,” and choose “Samsung.”
  3. Tap “TV” again and select “Start.”
  4. Choose a location and room for your TV, then tap “Next.”
  5. Follow the on-screen instructions to connect.

Note: For TVs made before 2020, you may need a PIN displayed on the TV screen. Use the physical buttons (Method 1) to enter it.boostvision.tv

Step 4: Press “Allow”

When the “allow” prompt appears, use the app’s remote interface to navigate and select “allow.” The app mimics a standard remote, letting you control menus easily.

Method 3: Using a USB Keyboard or Mouse

If your TV has a USB port, a keyboard or mouse can help you navigate menus and select “allow.”

Step 1: Connect the Device

  1. Find the USB port on your TV (usually on the side or back).
  2. Plug in a USB keyboard or mouse.

Step 2: Navigate the Menu

  1. Use the arrow keys (keyboard) or mouse cursor to move to the “allow” option.
  2. Press the Enter key or click the mouse to select it.

Note: Not all Samsung TVs support USB keyboards or mice. Check your model’s compatibility at Samsung Support.

Method 4: Using a Universal Remote

A universal remote can be programmed to work with your Samsung TV, acting as a full replacement for the original remote.

Step 1: Get a Universal Remote

Purchase a universal remote compatible with Samsung TVs, available at retailers like Amazon.

Step 2: Program the Remote

  1. Follow the remote’s instructions to program it for your TV.
  2. This may involve entering a code or using an auto-search feature.

Step 3: Press “Allow”

Use the programmed remote to navigate to the “allow” option and select it, just like with the original remote.

Troubleshooting Tips

If these methods don’t work, try these steps:

  • Check Your TV Model: Some older models may have different button layouts or app compatibility. Find your model number (usually on the back of the TV) and check the manual at Samsung Support. See our guide on how to find TV serial number for help.
  • Restart the TV: Unplug the TV for 5 minutes, then plug it back in and try again.
  • Check Wi-Fi Connection: Ensure your TV and smartphone are on the same Wi-Fi network for the SmartThings app to work. See how to connect Samsung TV to Wi-Fi without a remote for guidance.
  • Contact Samsung Support: Reach out for model-specific advice at Samsung Support.
  • Consider a Replacement Remote: If you often need a remote, a replacement or universal remote is a good investment. Check out how to add apps to Samsung smart TV for more control options.

Comparison of Methods

MethodRequirementsEase of Usecompatibility Notes
Physical ButtonsNoneModerateVaries by model; may require practice
SmartThings AppSmartphone, Wi-FiEasyNeeds initial setup; PIN for older TVs
USB Keyboard/MouseUSB device, TV USB portModerateNot all models support USB devices
Universal RemoteCompatible universal remoteEasyRequires purchase and programming

People Also Ask

How do I find the buttons on my Samsung TV?

Check the back, bottom, or side of the TV. Look for a joystick or a set of buttons, often near the Samsung logo or bottom right corner.

Can I use any smartphone with the SmartThings app?

Yes, as long as it supports the app and is on the same Wi-Fi network as your TV.

What if my TV doesn’t have physical buttons?

Most Samsung TVs have buttons, but if yours doesn’t, use the SmartThings app or a USB device.

How do I know if my TV supports a USB keyboard?

Check your model’s specifications on Samsung Support.

Conclusion

You can press “allow” on your Samsung TV without a remote using physical buttons, the SmartThings app, a USB keyboard/mouse, or a universal remote. Start with the physical buttons or SmartThings app, as they require no extra purchases. If those don’t work, a USB device or universal remote can help. Always check your TV model for specific instructions, as features vary. With these methods, you’ll be able to grant permissions and enjoy your TV without the original remote.

How to Sync a New Remote to Your Toshiba Fire TV

0
Thumbnail for syncing Toshiba Fire TV remote
Syncing a New Remote to Toshiba Fire TV

Syncing a new remote to your Toshiba Fire TV is simple when you know the steps. Whether you have a Bluetooth or Infrared remote, this guide covers everything you need to pair your remote and troubleshoot issues. All information is accurate as of July 21, 2025, based on reliable sources like Amazon and Toshiba support pages.

Understand Your Toshiba Fire TV Remote

Toshiba Fire TVs use either Bluetooth or Infrared remotes. Knowing which type you have is the first step to syncing it correctly.

Bluetooth vs. Infrared Remotes

  • Bluetooth Remotes: These have a microphone button for voice control. They need to pair with the TV and work without a direct line of sight.
  • Infrared Remotes: These lack voice control and require a clear line of sight to the TV’s IR sensor. They don’t need pairing but have limited features.

Check your remote for a microphone button. If it has one, it’s Bluetooth. If not, it’s likely Infrared. For example, the Insignia Fire TV Replacement Remote for Toshiba Fire TVs uses Bluetooth for pairing but can also function as Infrared after setup.

Toshiba Fire TV remote control
Toshiba Fire TV Remote

Pair a Bluetooth Remote to Your Toshiba Fire TV

Most Toshiba Fire TV remotes are Bluetooth and require pairing. Here’s how to do it.

Standard Pairing Method

  1. Turn on your Toshiba Fire TV and go to the home screen.
  2. Insert fresh AAA batteries into the remote, ensuring correct polarity.
  3. Press and hold the Home button for 10 seconds.
  4. Look for a blinking LED on the remote (if available).
  5. Wait up to 60 seconds for an on-screen message saying “New Remote Connected.”
  6. Test the remote by navigating the menu.
Hand pressing Home button on Toshiba Fire TV remote
Pressing the Home Button to Pair

Pairing with the Fire TV App

If you don’t have another working remote, use the Fire TV app to navigate and pair your new remote. This is especially useful after a TV reset.

  1. Download the Fire TV app from the App Store or Google Play Store.
  2. Connect your phone and TV to the same Wi-Fi network.
  3. Open the app and select your Toshiba Fire TV.
  4. Go to Settings > Controllers & Bluetooth Devices > Amazon Fire TV Remotes > Add New Remote.
  5. Press and hold the Home button on your remote for 10 seconds.
  6. Wait for the app to confirm pairing with an on-screen message.

Table: Bluetooth Remote Pairing Steps

StepActionNotes
1Turn on TVEnsure the home screen is displayed.
2Insert batteriesUse fresh AAA batteries, check polarity.
3Hold Home buttonPress for 10 seconds until LED blinks (if applicable).
4Wait for pairingLook for “New Remote Connected” message.
5Use Fire TV appNavigate to Settings > Controllers & Bluetooth Devices > Add New Remote if needed.

Troubleshoot Remote Pairing Issues

If your remote doesn’t pair, try these solutions.

  • Check Distance: Keep the remote within 10 feet of the TV.
  • Verify Batteries: Use fresh batteries and ensure correct placement.
  • Restart TV: Unplug the TV for 30 seconds, then plug it back in and try pairing.
  • Soft Reset Remote: Remove batteries, wait 10 seconds, reinsert, and try pairing.
  • Factory Reset Remote: Press and hold the Left, Menu, and Back buttons for 12 seconds, then try pairing again.
  • Update Firmware: Go to Settings > My Fire TV > About > Check for Updates.
  • Avoid Interference: Move other Bluetooth devices or electronics away from the TV.

If these don’t work, the remote might be defective. Contact Toshiba TV Support or Amazon Fire TV Support. Some users on Reddit reported defective remotes as a common issue.

Use an Infrared Remote

Infrared remotes don’t need pairing but require a direct line of sight to the TV’s IR sensor, usually located near the bottom or side of the screen. According to Reddit discussions, they’re limited after a factory reset.

To use an Infrared remote:

  1. Turn on your Toshiba Fire TV.
  2. Point the remote at the TV’s IR sensor.
  3. Press buttons to control basic functions like power or volume.

Limitations:

  • Needs clear line of sight with no obstructions.
  • Lacks voice control and some app features.
  • May not work during initial setup, which requires a Bluetooth remote.

Use a Universal Remote

Some universal remotes work with Toshiba Fire TVs. Check the manual for compatibility. For example, the Logitech Harmony 650 can be programmed with codes like 10156 or 11156 for Toshiba TVs.

To pair a universal remote:

  1. Turn on your Toshiba Fire TV.
  2. Hold the “Setup” button on the universal remote until the indicator light turns on.
  3. Enter a Toshiba TV code (e.g., 10156, 11156, or 1356).
  4. Test the remote for basic functions like power and volume.

People Also Ask

Here are answers to common questions from Google’s ‘People Also Ask’ and ‘Related Searches’:

How do I know if my remote is Bluetooth or Infrared?

Check for a microphone button. Bluetooth remotes have one; Infrared remotes don’t.

Why won’t my remote pair?

Ensure fresh batteries, stay within 10 feet, and avoid interference. Use the Fire TV app if needed.

Can I use a universal remote?

Yes, if it supports Fire TV. Check the manual for codes and setup instructions.

How do I reset my remote?

Hold the Left, Menu, and Back buttons for 12 seconds, then pair again.

What if my TV doesn’t respond?

Try resetting the TV. See How to Reset Toshiba TV.

Additional Tips

  • HDMI-CEC Control: Enable HDMI-CEC in Settings > System > HDMI CEC Control to use your TV’s remote for Fire TV functions.
  • Buy Genuine Remotes: Purchase from trusted retailers like Amazon to avoid fakes.
  • Keep Firmware Updated: Regularly check for updates in Settings > My Fire TV > About > Check for Updates to prevent issues.

Conclusion

Syncing a new remote to your Toshiba Fire TV is straightforward with the right steps. Whether using a Bluetooth remote, Infrared remote, or the Fire TV app, you can get back to streaming quickly. For more help, check related guides like Turn On Toshiba TV Without Remote or Fix Toshiba TV Won’t Turn On. If issues persist, contact Toshiba Support.

How to Mirror Your iPhone to a TCL TV: Easy Step-by-Step Guide

0
iPhone and TCL TV with mirroring icon for blog thumbnail.
Step-by-step guide to mirror your iPhone to a TCL TV.

Mirroring your iPhone to a TCL TV lets you share photos, videos, or apps on a bigger screen. Whether you want to watch a movie or show a presentation, this guide covers simple methods to connect your iPhone to any TCL TV. We’ll explain how to use AirPlay, an HDMI adapter, or third-party apps, depending on your TCL TV’s operating system (Roku, Google TV, Android TV, or Fire TV). Follow these steps to get started.

Determine Your TCL TV Type

TCL TVs use different operating systems, which affect how you mirror your iPhone:

  • TCL Roku TV: Supports AirPlay for easy wireless mirroring.
  • TCL Google TV/Android TV: May need third-party apps for full screen mirroring or use Chromecast for app-specific casting.
  • TCL Fire TV: Likely requires third-party apps, as AirPlay isn’t natively supported.

Check your TV’s manual or settings to identify its operating system. For AirPlay, many TCL Roku TVs (like models 43S431, 55S535, or 65R635) support it.

iPhone and TCL TV showing identical screens.
iPhone mirroring a photo to a TCL TV.

What You Need

Before you start, make sure:

  • Your iPhone runs iOS 12 or later (check in Settings > General > About).
  • Your TCL TV is powered on and updated to the latest software.
  • Both devices are on the same Wi-Fi network for wireless methods.
  • For wired connections, you have an HDMI cable and an adapter (Lightning for iPhone 5-14, USB-C for iPhone 15 or later).

If you need help updating your TV, see our guide on how to update Vizio TV firmware.

Method 1: Using AirPlay (TCL Roku TV)

AirPlay is Apple’s wireless mirroring feature, ideal for TCL Roku TVs. Many models, like the 4-Series, 5-Series, 6-Series, and 8-Series, support AirPlay if running Roku OS 9.4 or later. Here’s how to use it:

  1. Check AirPlay Support: On your TCL Roku TV, go to Settings > Apple AirPlay and HomeKit. Ensure AirPlay is turned on. If you don’t see this option, your TV may not support AirPlay. Check TCL’s support page for compatible models.
  2. Connect to Wi-Fi: Ensure your iPhone and TCL TV are on the same Wi-Fi network. Learn more in our Wi-Fi troubleshooting guide.
  3. Open Control Center: On your iPhone, swipe down from the top-right corner (or up on older models) to open the Control Center.
  4. Tap Screen Mirroring: Look for the icon with two overlapping rectangles.
  5. Select Your TCL TV: Choose your TV from the list of devices.
  6. Enter Passcode (if prompted): Type the code shown on your TV screen.
  7. Start Mirroring: Your iPhone screen will appear on the TV.

To stop mirroring, open Control Center, tap Screen Mirroring, and select Stop Mirroring.

Method 2: Using an HDMI Adapter (All TCL TVs)

An HDMI adapter provides a wired connection that works with any TCL TV, no Wi-Fi needed. This method is reliable for all models, including those without AirPlay.

  1. Get the Right Adapter: Use an Apple Lightning Digital AV Adapter for iPhone 5-14 or a USB-C to HDMI adapter for iPhone 15 and later.
  2. Connect the Adapter: Plug the adapter into your iPhone’s charging port.
  3. Attach an HDMI Cable: Connect one end to the adapter and the other to an HDMI port on your TCL TV.
  4. Select HDMI Input: On your TCL TV, use the remote to switch to the correct HDMI input (e.g., HDMI 1 or 2).
  5. Mirror Your Screen: Your iPhone’s display should appear on the TV automatically.
Diagram of iPhone, HDMI adapter, and TCL TV connection.
Connecting an iPhone to a TCL TV with an HDMI adapter.

Method 3: Using Third-Party Apps (Non-AirPlay TVs)

If your TCL TV (Google TV, Android TV, or Fire TV) doesn’t support AirPlay, third-party apps can enable mirroring. Two popular options are DoCast and AirDroid Cast.

Option 1: DoCast

DoCast is a free app that works with many TCL TVs, including Roku models. It’s available on the App Store.

  1. Download DoCast: Install the app on your iPhone.
  2. Connect to Wi-Fi: Ensure your iPhone and TCL TV are on the same Wi-Fi network.
  3. Launch DoCast: Open the app and follow the prompts to select your TCL TV.
  4. Start Mirroring: Choose the screen mirroring option to display your iPhone’s screen.

Option 2: AirDroid Cast

AirDroid Cast works with TCL Google TV, Android TV, or Fire TV by using a web browser on the TV.

  1. Download AirDroid Cast: Get the app from the App Store.
  2. Open TV Browser: On your TCL TV, go to webcast.airdroid.com using the TV’s web browser.
  3. Connect Devices: On your iPhone, open AirDroid Cast and scan the QR code or enter the cast code shown on the TV.
  4. Start Mirroring: Allow the connection, and your iPhone screen will appear on the TV.

Troubleshooting Common Issues

If mirroring doesn’t work, try these fixes:

  • AirPlay Issues:
    • Confirm both devices are on the same Wi-Fi network. See our Wi-Fi troubleshooting guide.
    • Ensure AirPlay is enabled in your TCL TV’s settings.
    • Restart your iPhone and TCL TV.
    • Update your TV’s software via Settings > System > Software Update.
  • HDMI Issues:
    • Check that the HDMI cable and adapter are securely connected.
    • Select the correct HDMI input on your TV.
    • Try a different HDMI port or cable.
  • Third-Party App Issues:
    • Update the app to the latest version.
    • Visit the app’s support page (e.g., DoCast Support or AirDroid Support).
    • Restart devices and ensure a stable Wi-Fi connection.

If you need help accessing TV settings, check our guide on how to access TCL TV settings without a remote.

Benefits of Each Method

MethodBenefitsRequirements
AirPlayWireless, easy setup, no extra costTCL Roku TV, same Wi-Fi network
HDMI AdapterWorks with any TCL TV, no Wi-Fi neededAdapter, HDMI cable
Third-Party AppsWorks with non-AirPlay TVs, flexibleApp download, Wi-Fi network

People Also Ask

Does my TCL TV support AirPlay?

Check your TV’s model number (e.g., 55S535) against TCL’s supported list or look for AirPlay in Settings > Apple AirPlay and HomeKit. Visit TCL’s support page for details.

Can I mirror my iPhone to a TCL TV without Wi-Fi?

Yes, use an HDMI adapter for a wired connection. No Wi-Fi is required.

What if my TCL TV doesn’t support AirPlay?

Use third-party apps like DoCast or AirDroid Cast, or connect via an HDMI adapter.

How do I stop screen mirroring?

Open Control Center on your iPhone, tap Screen Mirroring, and select Stop Mirroring.

Can I use Chromecast to mirror my iPhone to a TCL TV?

Chromecast supports casting from apps like YouTube on TCL Google TV or Android TV, but for full screen mirroring, use AirPlay or third-party apps.

Conclusion

Mirroring your iPhone to a TCL TV is simple with the right method. Use AirPlay for TCL Roku TVs if available, an HDMI adapter for a universal wired solution, or third-party apps like DoCast or AirDroid Cast for other TCL TV types. Each method has its strengths, so choose based on your TV model and setup. Enjoy your content on the big screen!

Related Posts

How to Connect a Cable Box to a TV: Simple Steps

0
Thumbnail of TV and cable box with HDMI cable.
Connecting a cable box to a TV.

Setting up a cable box with your TV lets you watch channels, movies, and shows. This guide covers three main ways to connect them: HDMI, coaxial cable, and AV cables. Each method is easy to follow, and we’ll share fixes for common problems. Let’s get started.

Why Connect a Cable Box to Your TV?

A cable box delivers cable TV channels and on-demand content. Without connecting it to your TV, you can’t access your subscription. This guide makes the process clear and quick.

What You’ll Need

Before starting, gather these items:

  • Cable box from your provider
  • TV with available input ports
  • HDMI cable, coaxial cable, or AV cables (red, white, yellow)
  • TV remote
  • Power cords for both devices

Three Ways to Connect Your Cable Box

You can use one of these methods based on your TV and cable box ports:

  1. HDMI – Best for modern TVs with high-quality video and audio.
  2. Coaxial Cable – Ideal for older TVs or basic setups.
  3. AV Cables – Works for older TVs without HDMI.

Method 1: HDMI Connection

HDMI is the most common choice. It delivers clear video and audio through one cable. Most TVs and cable boxes made after 2010 have HDMI ports.

Steps to Connect with HDMI

  1. Find the HDMI port on your cable box, labeled “HDMI Out.”
  2. Locate an HDMI port on your TV, often labeled “HDMI 1” or “HDMI 2.”
  3. Plug one end of an HDMI cable into the cable box.
  4. Plug the other end into the TV’s HDMI port.
  5. Turn on the TV and cable box.
  6. Press the “Input” or “Source” button on your TV remote. Select the HDMI port you used (e.g., HDMI 1).

Quick Tips

  • Turn off both devices before connecting to avoid damage.
  • Note the HDMI port number for easy input selection.
Diagram of HDMI cable linking cable box to TV.
HDMI cable connecting a cable box to a TV.

Method 2: Coaxial Cable Connection

Coaxial cables are older but reliable. They carry video and audio in one cable, perfect for TVs without HDMI.

Steps to Connect with Coaxial Cable

  1. Connect a coaxial cable from the wall outlet to the “Cable In” port on your cable box.
  2. Attach another coaxial cable from the “Cable Out” port on the cable box to the “Cable In” or “Antenna In” port on your TV.
  3. Turn on the TV and cable box.
  4. Use your TV remote to set the channel to 3 or 4.

Quick Tips

  • Tighten coaxial cable ends to ensure a strong signal.
  • If there’s no picture, toggle between channels 3 and 4.

Method 3: AV Cables Connection

AV cables (red, white, yellow) are used for older TVs. Yellow handles video, while red and white carry audio.

Steps to Connect with AV Cables

  1. Plug the yellow, red, and white AV cables into the “Video Out” and “Audio Out” ports on the cable box.
  2. Connect the other ends to the matching “Video In” and “Audio In” ports on your TV.
  3. Turn on the TV and cable box.
  4. Press “Input” or “Source” on your TV remote. Select “AV” or “Video.”

Quick Tips

  • Match colors carefully when plugging in cables.
  • If there’s no sound, check the red and white cables.

Troubleshooting Common Issues

If your setup doesn’t work, try these fixes:

  • No Picture: Ensure the cable box is powered on. Verify the correct TV input is selected. Check all cable connections.
  • Poor Picture Quality: For HDMI, try a new cable. For coaxial or AV, tighten or reseat cables.
  • No Sound: Confirm audio cables are secure. Increase TV volume. For HDMI, check TV audio settings.

For more TV troubleshooting, visit Fix TV No Picture.

Additional Tips for a Smooth Setup

  • Check Cable Box Compatibility: Confirm your cable box works with your TV. Contact your provider if unsure.
  • Update Firmware: Some cable boxes need updates. Check your provider’s website for instructions.
  • Smart TV Note: Smart TVs use the same connection methods. Learn more at How to Connect Smart TV to Alexa.

Final Thoughts

Connecting a cable box to your TV is straightforward with HDMI, coaxial, or AV cables. HDMI is best for modern TVs, while coaxial or AV suits older models. Follow these steps, and you’ll be watching your favorite channels quickly. For related help, see Vizio TV Not Finding Cable Channels Fix.

How to Reset Your Wii Remote: Easy Step-by-Step Guide

0
Wii remote reset guide thumbnail
Reset your Wii remote with our simple guide.

Is your Wii remote not working? It might need a reset or resync. This guide offers clear, simple steps to fix common issues like no response, missing cursor, or blinking lights. Follow these instructions to get back to gaming fast.

Why Your Wii Remote Might Need a Reset

Wii remotes can stop working due to several reasons:

  • No response when pressing buttons.
  • Cursor not showing on the TV screen.
  • LED lights blinking or not lighting up.
  • Connection issues with the Wii console.
    These problems often come from low batteries, syncing errors, or incorrect setup. Let’s start with basic checks before resetting.

Basic Troubleshooting Before Resetting

Try these quick steps to rule out simple issues.

Check the Batteries

  • Use Fresh Batteries: Ensure the two AA batteries are new or fully charged. Weak batteries can cause issues.
  • Correct Insertion: Open the battery cover on the back of the remote. Match the positive (+) and negative (-) ends to the diagram inside.
Wii remote battery compartment
Correct battery placement in a Wii remote.

Verify Console and Sensor Bar Setup

  • TV Input: Ensure your TV is set to the correct input (e.g., HDMI 1 or AV) for the Wii console.
  • Sensor Bar Position: Plug the sensor bar into the back of the Wii. Place it above or below your TV, centered and unobstructed.

If these don’t fix the issue, proceed to reset the remote.

How to Reset Your Wii Remote

Here are two main methods to reset your Wii remote.

Method 1: Remove and Reinsert Batteries

This clears minor glitches in the remote’s connection.

  1. Open the battery cover on the back of the Wii remote.
  2. Remove both AA batteries.
  3. Wait at least one minute.
  4. Reinsert the batteries, ensuring correct polarity.
  5. Wait a few seconds before pressing any buttons.

If this doesn’t work, try resyncing the remote.

Method 2: Resync the Remote with the Console

Resyncing reconnects the remote to the Wii. This is needed if the remote was used with another console or lost its connection.

  1. Turn on the Wii console and wait for the main menu.
  2. Open the SD card cover on the front of the Wii to find the red SYNC button.
  3. Remove the battery cover from the Wii remote to locate its red SYNC button.
  4. Press and release the SYNC button on the remote. The four LED lights on the front will blink.
  5. While the lights are blinking, quickly press and release the SYNC button on the console.
  6. Wait for the LED lights to stop blinking. The leftmost LED should stay solid, showing the remote is connected as player one.

Note: For multiple remotes, repeat these steps for each. The next LED (2, 3, or 4) will light up for additional players.

Advanced Troubleshooting for Persistent Issues

If the remote still doesn’t work, try these steps:

  • Power Cycle the Console: Unplug the Wii from the power source, wait 20 seconds, then plug it back in. Turn it on and resync the remote.
  • Check for Interference: Move devices like cordless phones, infrared lamps, or heaters away from the console, as they can disrupt the signal.
  • Test Another Remote: If you have another Wii remote, sync it to check if the issue is with the remote or the console.
  • Clean the Remote: Use a soft, dry cloth to wipe the pointer lens at the top of the remote. For sticky buttons, gently brush around them with a new toothbrush and a bit of soapy water, then dry thoroughly.
  • Factory Reset the Console (Last Resort): This erases all data. Follow Nintendo’s instructions at Nintendo Support.

For more TV-related fixes, see our guide on fixing a TV with no picture.

Using Your Wii Remote with Other Devices

Wii remotes can also work with other devices.

Syncing with a Wii U

Wii remotes are compatible with Wii U consoles. To sync:

  1. Turn on the Wii U and go to the main menu.
  2. Access the sync screen from the Wii U menu.
  3. Press the SYNC button on the remote, then follow the on-screen instructions.

Connecting to a PC

You can use a Wii remote with a PC via Bluetooth and software like the Dolphin emulator. Steps include:

  • Ensure your PC has Bluetooth.
  • Download the Dolphin emulator from dolphin-emu.org.
  • Pair the remote through your PC’s Bluetooth settings.

Frequently Asked Questions

Why isn’t my Wii remote connecting?

Check batteries, ensure no interference, and confirm the console is on the correct TV input. Resync using the steps above.

How do I fix a missing cursor?

Verify the sensor bar is plugged in and properly placed. Resync the remote and ensure no bright lights are near the TV.

Can I reset a Wii remote without the console?

You can remove the batteries to reset it, but syncing requires the console.

What if my remote still doesn’t work?

It may have a hardware issue. Contact Nintendo Support or consider a replacement.

Can I sync multiple remotes at once?

No, sync each remote one at a time to avoid connection issues.

Does the Wii remote work with a Wii U?

Yes, follow the Wii U’s sync instructions in the console menu.

Why do the LED lights keep blinking?

Blinking lights mean the remote is trying to connect. Ensure batteries are good and press the console’s SYNC button while the lights are blinking.

For related troubleshooting, check our guide on syncing a Roku remote without a pairing button.

Conclusion

Resetting your Wii remote is simple with the right steps. Start with checking batteries and resyncing. If issues persist, try advanced troubleshooting or contact Nintendo Support. Keep your console and sensor bar set up correctly to avoid future problems. Get back to gaming today!

How to Fix Green Sidebars on Your Toshiba TV

0
Split view of Toshiba TV with green sidebars and fixed black sidebars
Green to Black: Fixing Toshiba TV Sidebars

Green sidebars on your Toshiba TV can ruin your viewing experience. Instead of black bars, you see green ones, which can be distracting. This guide explains why this happens and provides clear, step-by-step solutions to fix it. Whether it’s a quick settings change or a deeper issue, we’ll help you get your TV back to normal.

Understanding Green Sidebars on Toshiba TVs

Sidebars, or pillar boxes, appear when the content’s aspect ratio doesn’t match your TV’s screen. For example, a 4:3 video on a 16:9 widescreen TV shows bars on the sides to fill extra space. These should be black. If they’re green, it points to a problem with display settings, connections, or hardware.

Why Do Sidebars Turn Green?

Green sidebars can stem from:

  • Incorrect Aspect Ratio: The TV’s settings don’t match the content.
  • Picture Mode Issues: Certain modes enhance green colors.
  • Connection Problems: Faulty HDMI cables or ports.
  • Software Glitches: Outdated firmware causing display errors.
  • Hardware Faults: Issues with the TV’s main board or T-con board.
Toshiba TV with green sidebars compared to fixed black sidebars
Green vs. Black Sidebars on Toshiba TV

Common Causes of Green Sidebars

Here are the main reasons your Toshiba TV shows green sidebars:

CauseDescription
Incorrect Aspect RatioThe TV’s aspect ratio doesn’t match the content’s format.
Picture Mode SettingsModes like “Vivid” may boost green colors.
Outdated FirmwareOld software can cause display glitches.
Faulty HDMI ConnectionsLoose or damaged cables lead to color issues.
Color Settings ImbalanceGreen tint from incorrect color adjustments.
Screen Size MisalignmentWrong screen size or position settings.
Temporary GlitchesSoftware issues causing temporary display problems.
External Device IssuesDevices like cable boxes outputting wrong colors.
Hardware MalfunctionsFaulty main or T-con boards causing green tints.

Step-by-Step Solutions to Fix Green Sidebars

Try these steps in order to fix the issue, starting with the easiest.

1. Adjust Aspect Ratio Settings

An incorrect aspect ratio is a common culprit.

  • Press the “Menu” button on your Toshiba remote.
  • Go to “Picture” or “Display” settings.
  • Find “Aspect Ratio” or “Screen Size.”
  • Set it to “16:9” for widescreen or “Auto” to adjust automatically.

2. Change Picture Mode

Some picture modes can cause green tints.

  • In “Picture” settings, find “Picture Mode.”
  • Try modes like “Cinema,” “Standard,” or “Movie.”
  • Check if the green sidebars disappear.

Also check: Best Toshiba TV Picture Settings for Gaming

3. Update Firmware

Outdated firmware can cause display issues.

Also check: How to Update Vizio TV Firmware (similar process for reference)

4. Check HDMI Connections

Loose or damaged HDMI cables can cause color problems.

  • Unplug the HDMI cable from the TV and device.
  • Check for damage or wear.
  • Reconnect securely or use a different cable/port.

5. Adjust Color Settings

Incorrect color balance can emphasize green.

  • In “Picture” settings, find “Color” or “Advanced Color Settings.”
  • Lower the green color level to reduce the tint.

6. Manually Adjust Screen Size and Position

Some Toshiba TVs allow manual screen adjustments.

  • Look for “Screen Fit,” “Zoom,” or “Position” in the menu.
  • Adjust to ensure the image fills the screen properly.

7. Power Cycle the TV

A power cycle can clear temporary glitches.

  • Unplug the TV from the power outlet.
  • Wait 1-2 minutes.
  • Plug it back in and turn it on.

Relevant: How to Reset Toshiba TV

8. Check External Device Settings

Devices like cable boxes or streaming sticks may cause issues.

  • Check the resolution and aspect ratio on your device.
  • Set them to match your TV (e.g., 1080p, 16:9).

9. Contact a Professional

If none of the steps work, it may be a hardware issue.

  • Reach out to Toshiba support or a local TV repair technician.
  • Describe the steps you’ve tried for faster diagnosis.

Note: If the green tint covers the entire screen, not just the sidebars, it could be a faulty main or T-con board. This requires professional repair, as seen in user reports from 2021.ifixit.com

Additional Tips and Common Mistakes

  • Don’t Stretch the Image: Stretching to remove sidebars can distort the picture. Stick to proper aspect ratio settings.
  • Update Device Software: Ensure external devices have the latest software.
  • Avoid Service Menus: Accessing advanced settings can cause issues or void warranties.
  • Test Other Inputs: Try different sources (e.g., HDMI, cable) to pinpoint the problem.

People Also Ask (FAQs)

Why are there green bars on my TV screen?

Green bars often result from a mismatch in settings or a connection issue. Adjust the aspect ratio or check cables.

How do I change the aspect ratio on my Toshiba TV?

Press “Menu,” go to “Picture” or “Display,” and select “Aspect Ratio.” Choose “16:9” or “Auto.”

What if updating firmware doesn’t fix the issue?

Try adjusting color settings or power cycling. If it persists, contact a technician.

Can a faulty HDMI cable cause green sidebars?

Yes, damaged or loose cables can cause color distortions.

Why do green sidebars appear only with certain content?

This indicates an issue with the content’s resolution or device output. Check the device’s settings.

Check: Fix Samsung TV Not Full Screen (for similar display issues)

Conclusion

Green sidebars on your Toshiba TV are annoying but often fixable. Start with simple steps like adjusting the aspect ratio, changing picture modes, or checking HDMI cables. If those don’t work, update the firmware or power cycle the TV. For persistent issues, a professional technician can diagnose hardware problems. Follow these steps to enjoy your TV without green distractions.

JioTV+ Channel List 2025: The Most Comprehensive Guide

0
JioTV+ 2025 Channel List Thumbnail
JioTV+ 2025: Your guide to over 1000 channels.

JioTV+ is a streaming service by Reliance Jio for Jio Fiber and Jio AirFiber users. It provides over 1000 live TV channels in more than 15 languages through the Jio Set-top Box. The platform includes entertainment, news, sports, movies, kids’ programming, and regional content, catering to diverse viewers across India. Features like 7-day catch-up and HD quality make it a top choice for TV streaming. This guide offers the most complete JioTV+ channel list for 2025, ensuring Soft4led visitors find all the information they need in one place.

JioTV+ Logo
JioTV+ logo, your gateway to 1000+ channels.

Total Number of Channels

JioTV+ offers approximately 1000+ channels in 15+ languages, including Hindi, English, Tamil, Telugu, Kannada, Malayalam, Marathi, Bengali, Gujarati, Odia, Punjabi, Bhojpuri, Assamese, Urdu, and more. The exact count varies by subscription plan and region. Below is an estimated breakdown by language:

LanguageNumber of Channels (Approximate)
Hindi140-150
English70-80
Tamil40-50
Telugu30-40
Kannada20-25
Malayalam20-30
Marathi20-25
Bengali15-20
Gujarati15-20
Odia10-15
Punjabi15-20
Bhojpuri10-15
Others (Assamese, Urdu, etc.)10-20

Note: Channel counts may change due to periodic updates. Check the JioTV+ app for the latest list.

Comprehensive Channel List by Language and Genre

This section lists key JioTV+ channels for 2025, organized by language and genre, based on consolidated data from top-ranking sources. Channels include numbers (where available) and quality (SD/HD). Due to the extensive number of channels, major examples are provided, covering popular and unique offerings. For the full list, use the JioTV+ app.

Hindi Channels

Hindi channels are the largest category, offering entertainment, news, and movies.

Channel NameChannel NumberQualityGenre
Star Plus115SDEntertainment
Zee TV HD143HDEntertainment
Colors HD147HDEntertainment
Sony SAB HD132HDEntertainment
&TV HD137HDEntertainment
Sony Pal174SDEntertainment
Star Bharat121SDEntertainment
Zee Anmol172SDEntertainment
Dangal177SDEntertainment
ABP News602SDNews
Aaj Tak601SDNews
Republic Bharat603SDNews
Zee Cinema HD303HDMovies
Sony Max HD305HDMovies

English Channels

English channels focus on international content.

Channel NameChannel NumberQualityGenre
Comedy Central HD136HDEntertainment
Zee Café HD210HDEntertainment
Colors Infinity HD214HDEntertainment
CNN News 18608SDNews
BBC World News610SDNews
Discovery Channel612SDInfotainment
National Geographic613SDInfotainment
Sony Pix HD410HDMovies

Tamil Channels

Tamil channels offer regional entertainment and news.

Channel NameChannel NumberQualityGenre
Sun TV1503SDEntertainment
Vijay TV1504SDEntertainment
Zee Tamil1511SDEntertainment
KTV1515SDMovies
Sun Music1518SDMusic
News 18 Tamil Nadu1562SDNews

Telugu Channels

Telugu channels are popular for movies and serials.

Channel NameChannel NumberQualityGenre
Star Maa457SDEntertainment
Zee Telugu1403SDEntertainment
Gemini HD1405HDEntertainment
ETV Telugu1406SDEntertainment
Gemini Movies1412SDMovies

Kannada Channels

Kannada channels cater to regional viewers.

Channel NameChannel NumberQualityGenre
Colors Kannada1603SDEntertainment
Zee Kannada1604SDEntertainment
Udaya TV1605SDEntertainment
Suvarna News1620SDNews

Malayalam Channels

Malayalam channels include serials and news.

Channel NameChannel NumberQualityGenre
Surya HD1802HDEntertainment
Asianet1806SDEntertainment
Mazhavil Manorama1808SDEntertainment
Manorama News1843SDNews

Marathi Channels

Marathi channels focus on regional content.

Channel NameChannel NumberQualityGenre
Colors Marathi HD1201HDEntertainment
Zee Marathi HD1203HDEntertainment
Sony Marathi1205SDEntertainment
ABP Majha1255SDNews

Bengali Channels

Bengali channels offer dramas and news.

Channel NameChannel NumberQualityGenre
Zee Bangla1306SDEntertainment
Star Jalsha1309SDEntertainment
Sony Aath1312SDEntertainment
ABP Ananda1360SDNews

Gujarati Channels

Gujarati channels provide regional entertainment.

Channel NameChannel NumberQualityGenre
Colors Gujarati1702SDEntertainment
TV9 Gujarati1720SDNews
Sandesh News1722SDNews

Odia Channels

Odia channels cater to Odisha viewers.

Channel NameChannel NumberQualityGenre
Tarang TV1903SDEntertainment
Colors Odia1905SDEntertainment
OTV1920SDNews

Punjabi Channels

Punjabi channels focus on entertainment and music.

Channel NameChannel NumberQualityGenre
PTC Punjabi2003SDEntertainment
Zee Punjabi2005SDEntertainment
PTC News2020SDNews

Bhojpuri Channels

Bhojpuri channels offer regional movies.

Channel NameChannel NumberQualityGenre
Zee Ganga1102SDEntertainment
Bhojpuri Cinema1119SDMovies
Oscar Movies1118SDMovies

Sports Channels

Sports channels are a key attraction.

Channel NameChannel NumberQualityGenre
Star Sports 1455SDSports
Star Sports 2456SDSports
Star Sports Select 1 HD463HDSports
Jio Cricket 1 HD339HDSports
Jio Football 1 HD342HDSports

Kids Channels

Kids’ channels provide animated content.

Channel NameChannel NumberQualityGenre
Cartoon Network503SDKids
Pogo505SDKids
Nickelodeon507SDKids
Disney Channel509SDKids

Infotainment and Lifestyle

Infotainment channels cover documentaries and lifestyle.

Channel NameChannel NumberQualityGenre
Sadhguru Television337SDInfotainment
Fashion India297SDLifestyle
Luxe TV403SDLifestyle
Swayam Prabha (1-32)384-402SDEducation

Devotional Channels

Devotional channels cater to spiritual viewers.

Channel NameChannel NumberQualityGenre
Aastha701SDDevotional
Sanskar703SDDevotional
Jio Darshan (1-17)VariesSDDevotional

Other Channels

Niche channels include Jio Exclusive HD (275), Crypto TV (284), and NSDC TV (298).

How to Access JioTV+

To watch JioTV+:

  1. Connect your Jio Set-top Box to your TV via HDMI.
  2. Power on and complete the setup.
  3. Log in with your Jio account credentials.
  4. Open the JioTV+ app to browse channels.

The app is pre-installed on the Jio Set-top Box.

Subscription Plans and Pricing

JioTV+ is included with Jio Fiber and Jio AirFiber plans. Higher-tier plans, like the 999 plan, offer 550+ channels and premium OTT apps. Add-ons may apply for some content. Check Jio’s official site for pricing details.

Additional Features

  • 7-Day Catch-Up: Rewatch shows within 7 days.
  • HD Quality: Many channels in HD.
  • Multi-Language Support: Over 15 languages.
  • Single Sign-On: Access OTT apps like JioCinema.
  • Two TVs Support: Jio AirFiber’s 2-in-1 offer supports two TVs.

Frequently Asked Questions

What is the difference between JioTV and JioTV+?

JioTV is for mobile devices, while JioTV+ is for Jio Set-top Box users, optimized for TV.

How many channels are on JioTV+?

Over 1000 channels in 15+ languages, depending on your plan.

Is JioTV+ free?

It’s included with Jio Fiber and Jio AirFiber plans. Premium content may require add-ons.

Can non-Jio users access JioTV+?

No, it’s exclusive to Jio Fiber and Jio AirFiber subscribers.

How often is the channel list updated?

Lists are updated periodically. Check the JioTV+ app for the latest.

Are all channels available in all regions?

Availability varies by region and plan. Verify via the JioTV+ app.

Conclusion

This guide provides the most comprehensive JioTV+ channel list for 2025, covering all major languages and genres. With over 1000 channels, JioTV+ meets diverse viewer needs. For the latest updates, use the JioTV+ app. Soft4led readers can rely on this guide for all JioTV+ information.

Similar Posts:

Airtel Xstream Live TV Channels List 2025

0
Airtel Xstream 2025 live TV channels thumbnail
Airtel Xstream live TV channels on your screen

Airtel Xstream is a leading digital entertainment platform in India, offering over 350 live TV channels, movies, and access to 20+ OTT platforms like Netflix, Disney+ Hotstar, and Sony LIV. This comprehensive guide covers everything you need to know about Airtel Xstream’s live TV channels in 2025, including a sample channel list, how to access the full lineup, plans, pricing, and more. Whether you’re interested in news, sports, entertainment, or regional content, this article ensures you have all the information in one place.

What is Airtel Xstream?

Airtel Xstream, operated by Bharti Airtel, is a streaming service that combines live TV channels, on-demand movies, and OTT content. It’s available through the Airtel Xstream app or Airtel Xstream Box, bundled with Airtel Xstream Fiber or AirFiber plans. The service delivers high-quality streaming, including 4K resolution, across devices like smartphones, TVs, and PCs.

How Many Live TV Channels Does Airtel Xstream Offer?

As of July 2025, Airtel Xstream provides more than 350 live TV channels across various genres and languages. The exact number and specific channels depend on your subscription plan and region. Sources indicate Airtel plans to expand to over 400 channels in the future, but currently, the lineup includes:

  • Hindi Entertainment: Popular channels for dramas and reality shows.
  • Hindi Movies: Bollywood and regional films.
  • Sports: Cricket, football, tennis, and more.
  • News: National and regional news in multiple languages.
  • Kids: Cartoons and educational content.
  • Music: Music videos and live performances.
  • Regional Channels: Content in Tamil, Telugu, Kannada, Malayalam, Marathi, Punjabi, Bengali, and more.
  • English Entertainment & Movies: Hollywood and international shows.
  • Infotainment: Lifestyle, travel, and educational programming.

To get the exact channel list for your plan, check the Airtel Xstream app or contact Airtel customer support at 121 or 9810012345.

Airtel Xstream Live TV Channels List (Sample)

Due to frequent updates and plan-specific variations, Airtel does not publish a complete, up-to-date list of all 350+ channels publicly. Older sources, like Yourfeed and Techchahiye from 2020, listed 147 channels, but this is outdated as Airtel Xstream now offers over 350 channels. Below is an expanded sample list based on available data, covering key genres and languages to give you a clear picture of the diversity of Airtel Xstream’s offerings.

GenreChannel NameChannel Number
Hindi EntertainmentStar Plus HD110
Hindi EntertainmentSony Entertainment Television115
Hindi EntertainmentColors HD118
Hindi EntertainmentZee TV HD120
Hindi EntertainmentStar Bharat124
Hindi EntertainmentSony Pal132
Hindi EntertainmentZee Anmol140
Hindi EntertainmentDD National148
Hindi EntertainmentInvestigation Discovery HD136
Hindi EntertainmentBig Magic124
Hindi MoviesStar Gold HD206
Hindi MoviesZee Cinema HD208
Hindi MoviesSony Max HD210
Hindi MoviesColors Cineplex219
Hindi MoviesZee Action216
Hindi MoviesSony Wah224
Hindi MoviesStar Utsav Movies225
Hindi MoviesZee Anmol Cinema228
SportsStar Sports 1 HD281
SportsStar Sports 2 HD283
SportsSony Sports Ten 1 HD285
SportsSony Sports Ten 2287
SportsDD Sports298
Hindi NewsAaj Tak HD314
Hindi NewsZee News311
Hindi NewsNDTV India317
Hindi NewsNews18 India318
Hindi NewsIndia TV320
Hindi NewsZee Hindustan319
Hindi NewsTez326
Hindi NewsZee Business331
Hindi NewsNews18 Rajasthan335
Hindi NewsDD News401
KidsCartoon Network449
KidsPogo451
KidsNickelodeon453
KidsDisney Channel455
KidsHungama TV457
MusicMTV Beats482
MusicSony Mix491
Music9XM495
MusicZing501
Regional (Marathi)Zee Marathi HD521
Regional (Marathi)Colors Marathi524
Regional (Marathi)DD Sahyadri548
Regional (Punjabi)Zee Punjabi562
Regional (Punjabi)PTC Punjabi565
Regional (Tamil)Sun TV HD571
Regional (Tamil)Star Vijay575
Regional (Tamil)KTV578
Regional (Telugu)Star Maa HD581
Regional (Telugu)Gemini TV584
Regional (Telugu)ETV Telugu586
Regional (Kannada)Colors Kannada HD591
Regional (Kannada)Udaya TV594
Regional (Malayalam)Asianet HD601
Regional (Malayalam)Mazhavil Manorama604
Regional (Bengali)Star Jalsha HD611
Regional (Bengali)Zee Bangla614
Regional (Gujarati)Colors Gujarati621
English EntertainmentStar World631
English EntertainmentColors Infinity HD633
English MoviesStar Movies HD641
English MoviesSony Pix HD643
English MoviesMovies Now HD645
InfotainmentNational Geographic651
InfotainmentDiscovery Channel653
InfotainmentHistory TV18655

Note: This is a sample list based on older data and recent sources. The actual channel lineup may include additional channels or different channel numbers depending on your plan. For the complete and latest list, check the Airtel Xstream app or contact customer support.

How to Access the Full Airtel Xstream Channel List

To view the complete and up-to-date list of all 350+ channels:

  1. Download the Airtel Xstream App:
    • Available on Android, iOS, Android TV, Apple TV, Amazon Fire TV Stick, and Windows PC.
    • Navigate to the “Live TV” section to browse channels by genre or language.
  2. Use the Airtel Xstream Box:
    • Press the “Guide” button on the remote to view the program guide and channel list.
  3. Visit the Airtel Website:
  4. Contact Customer Support:
    • Call 121 or 9810012345, or use the “Chat with Us” feature in the Airtel Xstream app for a tailored channel list based on your plan.

If you’re facing issues finding channels on the app, ensure it’s updated and clear the cache (Settings > Apps > Airtel Xstream Play > Storage).

Airtel Xstream Plans and Pricing

Airtel Xstream bundles live TV channels with high-speed internet and OTT subscriptions. Here are the key plans as of July 2025:

Plan Price (₹/month)Internet SpeedLive TV ChannelsOTT Benefits
49940 Mbps350+Xstream Play (20+ OTTs)
69940 Mbps350+Disney+ Hotstar, Xstream Play
899100 Mbps350+Disney+ Hotstar, Xstream Play
1199100 Mbps350+Netflix, Amazon Prime, Zee5, Xstream Play
1599200 Mbps350+Netflix, Amazon Prime, Zee5, Xstream Play
39991 Gbps350+Netflix, Amazon Prime, Zee5, Xstream Play
  • Additional Benefits:
    • Free Airtel Xstream Box with select plans (₹2000 one-time charge for some plans).
    • Unlimited landline calls on higher-tier plans.
    • No installation charges for AirFiber plans.
  • How to Subscribe:
    • Visit www.airtelxstream.in or use the Airtel Thanks app.
    • Dial 7040069169 for assistance.

How to Watch Airtel Xstream Live TV

You can access Airtel Xstream’s live TV channels through:

  • Airtel Xstream Box: A 4K Android set-top box that connects to your TV. It supports live TV, OTT apps, and Google Play Store apps. No dish antenna is required; channels are delivered via internet.
  • Airtel Xstream App: Stream on smartphones, tablets, smart TVs, or PCs. Supports up to 5 devices with a single login.
  • Airtel Xstream AirFiber: A 5G-based wireless solution for areas without fiber connectivity, offering the same channel lineup.

Additional Features of Airtel Xstream

  • OTT Integration: Access 20+ platforms, including Sony LIV, Zee5, Amazon Prime Video, and Disney+ Hotstar.
  • Catch-Up TV: Watch missed episodes of TV shows.
  • 4K Streaming: Enjoy high-quality visuals on compatible devices.
  • Parental Controls: Restrict content for kids.
  • Offline Viewing: Download movies and shows for offline access.
  • Voice-Enabled Remote: Use Google Assistant for easy navigation on the Xstream Box.

Comparison with Other Streaming Services

Airtel Xstream stands out for its combination of live TV, OTT content, and high-speed internet. Here’s how it compares to competitors like Tata Play and JioTV:

FeatureAirtel XstreamTata PlayJioTV
Live TV Channels350+600+800+
OTT Platforms20+ (Netflix, Disney+ Hotstar)15+ (Netflix, Zee5)10+ (JioCinema, Hotstar)
Internet BundleYes (Fiber/AirFiber)NoYes (JioFiber)
4K StreamingYesYesYes
Starting Price (₹/month)499199398

For a detailed comparison, see our article on Best Streaming Services for Local Channels.

Frequently Asked Questions (FAQs)

Q: How many live TV channels does Airtel Xstream offer in 2025?

A: Airtel Xstream offers over 350 live TV channels, with plans to expand to 400+.

Q: Can I watch regional channels on Airtel Xstream?

A: Yes, Airtel Xstream includes channels in Tamil, Telugu, Kannada, Malayalam, Marathi, Punjabi, Bengali, Gujarati, and more.

Q: How do I find the full Airtel Xstream channel list?

A: Check the Airtel Xstream app, use the “Guide” button on the Xstream Box, or contact customer support at 121.

Q: Does Airtel Xstream require a dish antenna?

A: No, Airtel Xstream delivers channels via internet (Fiber or AirFiber), not a traditional DTH dish.

Q: Are HD channels available on Airtel Xstream?

A: Yes, Airtel Xstream includes HD channels like Star Plus HD, Zee Cinema HD, and Sony Sports Ten 1 HD.

Q: Can I watch Airtel Xstream on multiple devices?

A: Yes, you can stream on up to 5 devices with a single login.

Q: What is the cheapest Airtel Xstream plan with live TV?

A: The ₹499 plan includes 350+ live TV channels, 40 Mbps internet, and Xstream Play access.

Q: Can I watch English news channels on Airtel Xstream?

A: Yes, channels like CNBC TV18 and Republic are available, depending on your plan.

Q: How does Airtel Xstream compare to Tata Play?

A: Airtel Xstream offers 350+ channels and internet bundles, while Tata Play provides 600+ channels but no internet.

Conclusion

Airtel Xstream is a one-stop entertainment solution, offering over 350 live TV channels, 20+ OTT platforms, and high-speed internet. While the exact channel list varies by plan and region, users can access a diverse lineup covering Hindi, English, and regional content. To get the full, up-to-date channel list, use the Airtel Xstream app or contact customer support. With flexible plans starting at ₹499 and features like 4K streaming and catch-up TV, Airtel Xstream caters to all your entertainment needs. Visit www.airtelxstream.in to subscribe today.

Similar Posts:

List of OnePlus Devices Eligible for Android 16 Update

0
List of OnePlus Devices Eligible for Android 16 Update

Introduction to Android 16 and OxygenOS 16

Android 16, codenamed Baklava, launched on June 10, 2025, with features like real-time notifications, improved accessibility, and enhanced security. OnePlus integrates these into OxygenOS 16, expected to roll out soon after Google’s release. OnePlus is known for fast updates, often ahead of Xiaomi but behind Samsung and Google, which offer seven years of updates. This article lists all OnePlus devices eligible for Android 16, based on the company’s software policy.

OnePlus Software Update Policy

OnePlus offers clear software support:

  • Flagship Phones: Four major Android updates and five years of security patches (e.g., OnePlus 11, 12, 13, 13R).
  • Nord Series: Four updates for newer models like Nord 4; three for older models like Nord 3; two for Nord CE models.
  • Foldables: Four major updates for OnePlus Open.
  • Tablets: Three updates for OnePlus Pad and Pad 2; one for Pad Go.

This ensures many devices qualify for Android 16, with OxygenOS 16 expected by July 2025, aligning with OnePlus’s history of releasing updates a month after Google’s stable launch.

List of OnePlus Devices Eligible for Android 16

Based on OnePlus’s update policy and launch dates, here are the devices set to receive Android 16:

Flagship Phones

  • OnePlus 13: Launched with Android 15, eligible for four updates (up to Android 19).
  • OnePlus 13R: Launched with Android 15, gets four updates.
  • OnePlus 12: Four updates promised, Android 16 included.
  • OnePlus 12R: Three updates, Android 16 as the final major update.
  • OnePlus 11: Four updates, Android 16 included.
  • OnePlus 11R: Three updates, Android 16 as the last major update.

Nord Series

  • OnePlus Nord 4: Four updates, Android 16 included.
  • OnePlus Nord 3: Three updates, Android 16 as the final update.
  • OnePlus Nord CE 4: Two updates, Android 16 included.
  • OnePlus Nord CE 4 Lite: Two updates, Android 16 as the final update.

Foldables

  • OnePlus Open: Four updates, Android 16 included.

Tablets

  • OnePlus Pad: Three updates, launched with Android 13, Android 16 as the final update.
  • OnePlus Pad 2: Three updates, Android 16 included.
  • OnePlus Pad Go: One update, not eligible for Android 16.

Note: Older devices like OnePlus 10 series, Nord CE 3, or earlier models have reached their update limit and won’t receive Android 16.

Devices Not Eligible for Android 16

These OnePlus devices will not receive Android 16 due to their update cycle ending:

  • OnePlus 10 series (10 Pro, 10T, 10R).
  • OnePlus Nord CE 3 and earlier Nord CE models.
  • OnePlus Nord 2 and older Nord models.
  • OnePlus Pad Go (limited to one update).

If your device is on this list, consider upgrading to a newer model for Android 16 features.

Android 16 Features Coming to OnePlus Devices

OxygenOS 16, based on Android 16, includes:

  • Real-Time Notifications: Track food deliveries or rides on the lock screen, similar to iOS Live Activities.
  • Improved Accessibility: Use phone microphone for clearer calls with LE Audio hearing aids.
  • Enhanced Security: Advanced Protection against phishing, malicious apps, and scam calls.
  • Material 3 Expressive UI: Fluid animations and cohesive notification cards.
  • Desktop Windowing: Resize and move app windows on foldables and tablets, like Samsung DeX.
  • Gemini AI Integration: Replaces Google Assistant for smarter interactions.
  • AI VoiceScribe: Live captions, summaries, and recording for VoIP calls on apps like WhatsApp.

These features were tested in the Android 16 beta, available for devices like the OnePlus 13 since April 2025.

How to Check for Android 16 Update on Your OnePlus Device

To check for Android 16:

  1. Open Settings on your OnePlus device.
  2. Go to About Device > Version.
  3. Tap Build Number seven times to enable developer mode.
  4. Return to Settings > System Update.
  5. Tap Check for Update to download OxygenOS 16.

Back up your data before updating, as beta versions may have bugs. The stable release is expected by July 2025.

Android 16 Beta Program for OnePlus Devices

OnePlus started its Android 16 beta in April 2025, initially for the OnePlus 13, with the OnePlus 12 and Nord 4 added in May 2025. More devices may join before the stable release. To participate:

  • Visit the OnePlus Community for beta enrollment details.
  • Download the beta ROM from OnePlus’s official website.
  • Follow instructions to flash the update (data wipe required).

Beta versions are for advanced users. Wait for the stable release for a smoother experience.

When Will OnePlus Roll Out Android 16?

OnePlus typically releases updates a month after Google’s stable Android launch. With Android 16 released on June 10, 2025, OxygenOS 16 should begin rolling out by July 2025, starting with flagships like the OnePlus 13 and 12. Nord and tablet models will follow by August 2025. OnePlus’s rollout is faster than Xiaomi’s but slower than Samsung and Google, which prioritize their devices.

Why Upgrade to a Newer OnePlus Device?

If your device isn’t eligible, upgrading ensures access to Android 16 and future updates. Newer models like the OnePlus 13 or Nord 4 offer:

  • Longer software support (up to four updates).
  • Better performance with the latest chipsets.
  • Improved camera and battery features.

Related Android 16 Updates for Other Brands

See how other brands are handling Android 16:

Conclusion

OnePlus users can expect Android 16 with OxygenOS 16, featuring real-time notifications, better accessibility, and AI enhancements. Devices like the OnePlus 13, Nord 4, and OnePlus Open are eligible, while older models like the OnePlus 10 miss out. Check your device’s eligibility and prepare for the July 2025 rollout.