

The Panasonic TV service menu is a hidden diagnostic interface built into every Panasonic television. It gives access to low-level settings that the standard user menu doesn’t show — things like RGB cutoff levels, vertical geometry, audio calibration, and white balance. Technicians use it to calibrate and repair sets. You can use it too, but the process differs by model type, and the wrong button sequence won’t work.
This guide covers service menu access codes for Panasonic LCD, LED, OLED, Plasma, Projector, and legacy CRT models. Every method is listed with exact button sequences. You’ll also find a full breakdown of what each menu parameter does, which settings are safe to adjust, and how to exit without losing your changes.
If your Panasonic TV has a picture problem, geometry issue, or color shift that the standard menu can’t fix — the service menu is where the solution lives. For a broader reference across brands, the complete list of LCD LED TV service menu codes covers all major manufacturers in one place.

What Is the Panasonic TV Service Menu?
The service menu (also called service mode or engineering mode) is a factory-level interface embedded in the TV’s firmware. Panasonic uses it during production to calibrate each unit before it ships. Service technicians access it for repairs and post-repair calibration.
What It Controls
The service menu controls settings that affect the hardware directly:
- White balance — RGB cutoff and drive values that determine color temperature
- Geometry — horizontal and vertical position, size, linearity, and S-correction
- Audio — MTS input level, loudness compensation, separation
- Picture quality — sub-brightness, sub-contrast, color gamma, ABL (Automatic Brightness Limiter)
- Comb filter — how the TV separates luma and chroma signals
- PIP settings — size and position of picture-in-picture
- Option flags — region settings, feature enables/disables
These are not cosmetic adjustments. They control how the TV’s hardware behaves at a signal level. Other brands implement similar systems — Sony, for instance, uses a comparable engineering interface covered in the Sony TV service menu codes guide.
Why Accessing It Carries Risk
Changing the wrong value can cause a blank screen, permanent color shift, or loss of sync. Most changes take effect immediately. Some models don’t have a simple “undo.” This is not like changing the brightness in the regular menu — a wrong value in the C-menu cutoff settings can make the picture unwatchable and hard to reverse if you didn’t write down the original.
That said, millions of people access the service menu safely every year. The key is preparation. If you’re dealing with a dark TV screen or a TV with no picture, the service menu is often the right place to look — but only after ruling out simpler fixes first.
Before You Start — Safety Checklist
Do these three things before entering the service menu on any Panasonic TV.
1. Write down every default value before changing anything. Once you’re inside the service menu, step through every item in every sub-menu and write the numbers down. This takes 10–15 minutes. It’s the only reliable way to undo a mistake.
2. Confirm you have the right remote. Most Panasonic service menu methods require the original Panasonic remote. Universal remotes usually won’t work because they lack specific buttons like REVEAL, RECALL, INDEX, or they don’t send the correct IR codes. If you’ve lost your original remote, a genuine replacement Panasonic remote is the correct fix before proceeding.
3. Don’t save unless you’re sure. On CRT models, you must press STORE after each change. On LCD/LED models, powering off saves automatically. Know which behavior your model has before adjusting anything.
How to Access the Panasonic TV Service Menu — All Methods
The correct method depends on your TV type. Use the section that matches your set.
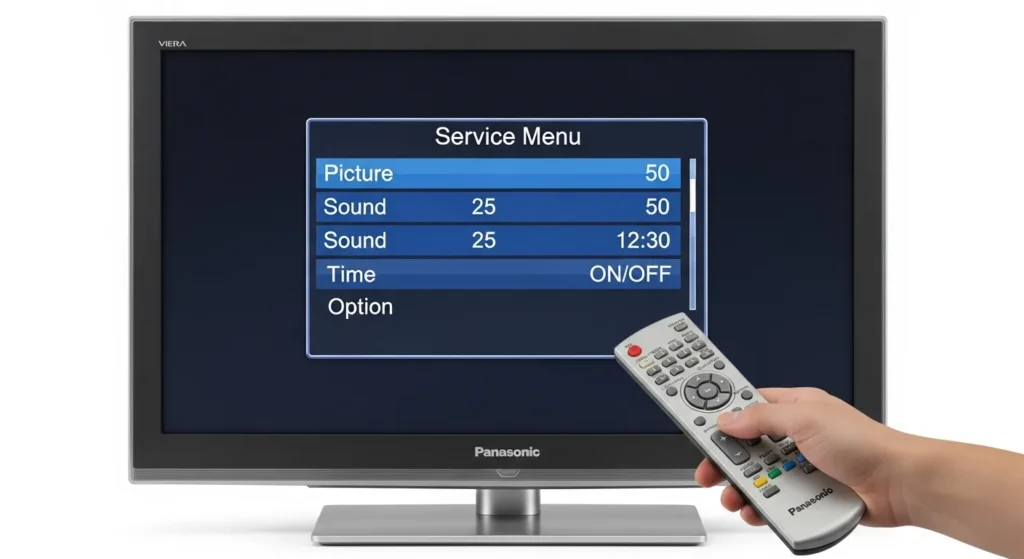
LCD/LED Viera — Method 1 (Menu + 4725)
This is the most widely confirmed method for Panasonic LCD and LED Viera models.
- Turn the TV on.
- Press the MENU button on the remote.
- While the menu is on screen, press 4, 7, 2, 5 in sequence on the remote.
- The service menu opens automatically.
This works on a broad range of LCD Viera models from approximately 2008 through 2018. If nothing happens, try Method 2.
LCD/LED Viera — Method 2 (VOL- + INFO x3)
- Turn the TV on.
- Hold the VOL- button on the TV’s front panel or side panel (not the remote).
- While holding VOL-, press the INFO button on the remote 3 times.
- Release VOL-. The service menu appears.
Navigation inside the menu:
- Press 1 / 2 on the remote to move between main menu items
- Press 3 / 4 on the remote to move between sub-menu items
- Press VOL+ / VOL- on the remote to change a value
- Power off to exit and save
Standard Panasonic TV — Method 1 (VOL- + RECALL or INFO x3)
This method applies to mid-range Panasonic TVs where the front-panel VOL- combines with the remote.
- Hold the VOL- button on the TV body.
- Press the RECALL or INFO button on the remote 3 times.
- The service menu displays on screen.
If RECALL doesn’t work, try INFO. Some remote variants use one or the other.
Standard Panasonic TV — Method 2 (VOL- + 0 x3)
- Hold the VOL- button on the TV body.
- Press the 0 button on the remote 3 times.
- Press EXIT or power off to leave the service menu.
Panasonic OLED TV — Service Menu Access
Panasonic OLED models (JZ, LZ, MZ, Z series from 2019 onward) use a modified approach. The standard Viera LCD methods above often work — particularly Method 1 (Menu + 4725) and Method 2 (VOL- + INFO x3). However, some OLED models require accessing a specific diagnostic sub-menu within the service menu to adjust OLED panel-specific settings like panel brightness limit and pixel refresh cycles.
On OLED models, avoid changing:
- Panel luminance ceiling values without knowing your specific panel spec
- Pixel orbit or pixel shift settings unless directed by Panasonic service documentation
For MZ and Z series OLEDs (2023–2025), Method 2 (VOL- + INFO x3) is the most commonly confirmed working method as of 2026.
Panasonic Plasma TV (Viera TH-Series)
Panasonic Plasma Viera sets (TH-42, TH-50, TH-65 series) typically follow this sequence:
- Turn the TV on.
- Hold VOL- on the TV front panel.
- Press RECALL on the remote 3 times.
- Service menu appears.
Some Plasma models use a different entry: press MENU on the remote, then navigate to setup, and enter 0000 or 0888 when a PIN prompt appears. This varies by region and firmware version.
Panasonic Projector — Method 1
- Turn the projector on.
- Press the POWER button.
- When the Power Off confirmation screen appears, press LEFT, UP, DOWN, UP, DOWN, ENTER in sequence.
- Service menu opens.
- Turn the projector off to exit.
Panasonic Projector — Method 2
- Turn the projector on.
- Press the POWER button.
- When the Power Off confirmation appears, press RIGHT, UP, DOWN, UP, DOWN, ENTER.
- Service menu opens.
Panasonic Projector — Method 3
- Press the MENU button.
- Go to Options → OSD.
- Press and hold ENTER until the service menu appears.
- Press MENU to exit.
Euro Chassis CRT Models — Legacy Access Codes
Panasonic CRT televisions used chassis-based architectures. The service menu entry method is tied to the chassis, not the model number. These sets require the TV’s audio to be at a specific state before entry.
For all Euro chassis CRT models, start here:
- Set the bass to maximum
- Set the treble to minimum
Then use the chassis-specific method below.
Euro 1 Chassis
Models: TX-29A3, TX-25A3, TX-28W3, TX-25W3
- Set bass to max, treble to min.
- Press VOL- on the TV while pressing RESET on the remote.
- Use RED/GREEN buttons to scroll through functions.
- Use YELLOW/BLUE buttons to change values.
- Press STORE after each adjustment.
- Switch the TV off to exit.
Euro 2M Chassis
Models: TX-21AD2/M, TX-29AD2/M, TX-29A2DP, TX-25AD2DP, TX-25MD1/M
- Set bass to max, treble to min.
- Press the F button on the TV, then press VOL- on the TV while pressing REVEAL on the remote simultaneously.
- Use RED/GREEN to scroll functions.
- Use YELLOW/BLUE to change values.
- Press STORE after each change.
- Press NORMAL on the remote to exit.
Euro 3 Chassis
Models: TX-W32D2DP, TX-W28D2DP, TX-W28R3, TX-29AD70DP
- Set bass to max, treble to min.
- Press VOL- on the TV while pressing REVEAL on the remote.
- Navigate with RED/GREEN, adjust with YELLOW/BLUE.
- Press STORE after each change.
- Press NORMAL to exit.
Euro 5 Chassis
Models: TX-W32D40P, TX-33AK10, TX-36PF10, TX-32PF10
- Set bass to max, treble to min.
- Press VOL- on the TV while pressing INDEX on the remote.
- Navigate with RED/GREEN, adjust with YELLOW/BLUE.
- Press STORE after each change.
- Press N button to exit.
Universal Euro Chassis Method (Unknown Chassis)
If you don’t know which Euro chassis your set uses, try these in order until one works:
- VOL- (TV) + RESET (remote)
- VOL- (TV) + REVEAL (remote)
- F (TV) → VOL- (TV) + REVEAL (remote)
- F (TV) → VOL- (TV) + INDEX (remote)
Exit with: NORMAL, N, or by switching the TV off.
How to Navigate the Service Menu
Once inside the service menu, the controls are consistent across most Panasonic models.
On CRT/Euro chassis models:
- RED / GREEN buttons → scroll between menu functions
- YELLOW / BLUE buttons → change the selected value
- STORE → saves the current value (press after every single change)
- NORMAL or N → exit
On LCD/LED/OLED models:
- 1 / 2 on remote → move through main menu sections
- 3 / 4 on remote → move through sub-menu items
- VOL+ / VOL- on remote → change value
- Power off → exits and saves
On cable TV-style models (with CHK mode):
Some older Panasonic cable-ready models enter a CHK mode. Here’s how that works:
- Select CABLE tuner mode in SETUP
- Set SLEEP timer to 30 minutes
- Exit menus, tune to Channel 124
- Set volume to zero
- Press VOL- on the TV front panel — a red “CHK” appears in the upper left corner
Once in CHK mode, press POWER on the remote to cycle through service sub-menus. The lower right of the screen shows the menu letter, item number, and current value.
- CH up/down → select item within a menu
- VOL up/down → adjust value
- ACTION + POWER simultaneously (hold 2 seconds) → exit CHK mode
Service Menu Parameters Explained
This section covers what each sub-menu section controls. These parameter groups are found in older Panasonic CRT and cable-ready models, but the categories translate to modern sets.
B Menu — Sub Picture Adjustments
The B menu controls picture quality for secondary inputs and sub-settings.
| Code | Description | Default |
|---|---|---|
| B0 | Sub color | 31 |
| B1 | Sub tint | 31 |
| B2 | Sub brightness | 31 |
| B3 | Sub contrast | 16 |
| B8 | Sub sharpness (TV/video) | 10 |
Adjusting B0 and B1 affects color saturation and hue on composite/S-Video inputs. B3 controls contrast ceiling for those inputs.
C Menu — White Balance (Cutoff & Drive)
This is the most sensitive menu section. It controls white balance at the hardware level.
| Code | Description | Default |
|---|---|---|
| C0 | Cutoff R (red) | 128 |
| C1 | Cutoff G (green) | 128 |
| C2 | Cutoff B (blue) | 128 |
| C3 | User brightness | 31 |
| C4 | G drive | 64 |
| C5 | B drive | 64 |
| C6 | Drive color temperature | 8 |
| C7 | Contrast color temperature | 5 |
Cutoff values set the black point for each color channel. Drive values set the gain. A shift in C0/C1/C2 by more than 10–15 points will produce a visible color cast. Change these slowly, in 1-unit increments.
D Menu — Geometry
The D menu controls the physical shape and position of the picture on CRT screens.
| Code | Description | Default |
|---|---|---|
| D0 | Horizontal position | 16 |
| D1 | Vertical size | 31 |
| D2 | Vertical S-correction | 4 |
| D3 | Vertical linearity | 14 |
| D4 | E/W trapezium | 8 |
| D6 | Vertical position | 1 |
| D7 | Vertical centering | 63 |
These settings are CRT-specific. LCD and OLED sets handle geometry digitally through different parameters.
M Menu — MTS Audio
| Code | Description | Default |
|---|---|---|
| M0 | Input level | 33 |
| M1 | Low-level separation | 6 |
| M2 | High-level separation | 25 |
Adjust M0 if the TV’s audio is consistently too low or too loud relative to other devices. Don’t touch M1/M2 unless troubleshooting stereo separation problems.
S Menu — Options & ABL
| Code | Description | Default |
|---|---|---|
| S0 | ABL gain | 3 |
| S1 | ABL point | 3 |
| S2 | RGB brightness | 8 |
| S3 | RGB gamma | 1 |
| S7 | Clock adjust | 128 |
| S8 | Loudness compensation | 31 |
ABL (Automatic Brightness Limiter) prevents the CRT from drawing too much power at peak white. S0 and S1 together control when ABL kicks in and how aggressively it limits brightness.
X Menu — Comb Filter
The X menu controls luma/chroma separation for composite video signals. 24 parameters total. Unless you’re troubleshooting dot crawl, cross-color, or poor composite picture quality, leave these alone. The default values are set from the factory for the specific comb filter chip in each chassis.
Common Fixes Using the Service Menu
Fix Color / Tint Problems
If the picture has a persistent color cast (too red, too green, too blue) that the user menu can’t fully correct:
- Enter the C menu
- Check C0, C1, C2 (cutoff values for R, G, B)
- Default for all three is 128
- If one is significantly above or below 128, bring it back toward center in 2-unit steps
If you’re seeing a black screen with no picture rather than a color cast, the issue may be outside the service menu — check backlight and panel power first.
Fix Geometry / Screen Position Issues (CRT)
If the picture is shifted left, right, or the top/bottom are cut off:
- Enter the D menu
- D0 adjusts horizontal position (default 16)
- D6 adjusts vertical position (default 1)
- D1 adjusts vertical size (default 31)
- Make small changes — 1 unit at a time
Reset White Balance
To restore factory white balance on a CRT:
- Set C0, C1, C2 all to 128
- Set C4, C5 (G drive, B drive) both to 64
- Power cycle the set
Fix Volume / Audio Level Issues
If the TV’s maximum volume is too low or the audio is distorted at moderate levels:
- Check M0 (input level, default 33)
- Increase M0 by 2–3 units and test
- Check S8 (loudness compensation, default 31)
- Reducing S8 below 20 can help with distortion on some models
Audio problems that persist after service menu adjustments may point to a hardware fault rather than a calibration issue. This is true across brands — LG TV sound issues, for example, often follow the same diagnostic path.
How to Exit the Service Menu Safely
Exiting correctly matters. On some models, abruptly cutting power without using the proper exit sequence can reset all user settings — clock, favorites, input labels.
LCD/LED/OLED models:
- Press EXIT on the remote, or
- Power off the TV — changes save automatically on most models
CRT / Euro chassis models:
- Press STORE after each individual change
- Then press NORMAL, N, or switch the TV off
CHK mode (cable-ready models):
- Hold ACTION + POWER simultaneously for 2 seconds
- The TV resets and exits — you will need to re-enter all personal settings (clock, favorites, channel labels)
One universal rule: If you enter the service menu and don’t change anything, exit the same way you entered. Don’t pull the power cord.
Frequently Asked Questions
Can I use a universal remote to access the Panasonic service menu?
Usually not. Most Panasonic service menu methods rely on buttons that universal remotes don’t have (REVEAL, RECALL, INDEX, F) or don’t send the exact IR signal the TV’s service mode detection expects. A genuine Panasonic replacement remote is the correct solution. They’re available for under $20 from multiple retailers.
What if the screen goes blank after entering the service menu?
Don’t panic. This usually means a geometry or display parameter was changed to an extreme value. Wait 10 seconds. If the picture doesn’t return, power off the TV, wait 30 seconds, and power back on. In most cases the TV recovers. If the blank screen persists, the set may need a hard reset via the physical reset button (if equipped) or a technician reset. A persistent black screen on a TV after service menu access usually points to a panel or backlight issue that exists independently.
How do I reset all service menu settings to factory defaults?
There is no universal “reset all” button in the service menu. The correct approach is to manually restore every parameter to its documented default value. This is why writing down all values before making changes is essential. On some LCD models, a factory data reset accessible through the main setup menu can restore service parameters — check your model’s service manual. The process is similar to performing a factory data reset on Samsung TVs, where the reset option lives in a specific settings path.
Is it safe to change service menu settings yourself?
Safe adjustments: color balance (C menu), audio levels (M menu), brightness/contrast sub-settings (B menu). Risky adjustments: comb filter parameters (X menu), high-voltage or deflection settings on CRTs, OLED panel-specific limits. If you’re adjusting something you don’t understand, don’t change it.
What does the red “CHK” indicator mean?
CHK stands for Check mode. It’s a service diagnostic mode specific to older Panasonic cable-ready CRT models. It appears in the upper-left corner of the screen when you successfully enter CHK service mode by pressing VOL- on the front panel after the correct setup sequence (Cable mode, 30-minute sleep timer, Channel 124, volume at zero).
Comparing Service Menus Across Brands
Every major TV manufacturer has a version of the service menu. The access method varies, but the purpose is the same — factory-level calibration and diagnostics. If you work on multiple brands, these guides cover the most common ones:
- Samsung TV service menu codes
- LG TV service menu codes
- Sony TV service menu codes
- Philips TV service menu codes
- Hisense TV service menu codes
- Toshiba TV service menu codes
- Vizio TV service menu codes
- JVC TV service menu codes
- Hitachi TV service menu codes
- Haier TV service menu codes
For budget and regional brands, see: Bush TV service menu codes, Sansui TV service menu codes, Vestel TV service menu codes, Skyworth TV service menu codes, and Changhong Ruba TV service menu codes.
Conclusion
The Panasonic TV service menu is a powerful tool when used correctly. The right access code depends entirely on your TV type — LCD, OLED, Plasma, Projector, or CRT chassis. Use the method that matches your set, write down every default value before touching anything, and make changes one unit at a time. For modern Panasonic LCD and OLED sets, Menu + 4725 or VOL- + INFO x3 are the two methods with the broadest compatibility. For legacy Euro chassis CRT models, the bass-max/treble-min setup combined with VOL- and the correct remote button is the standard approach across all chassis variants. Exit cleanly, save correctly, and the service menu is a reliable repair and calibration tool.
For issues that can’t be resolved through the service menu


not working this codes model no lx 750 dx panasonic