Home Blog Page 20

How to Set Up and Use Google TV Streamer: A Complete Guide

0
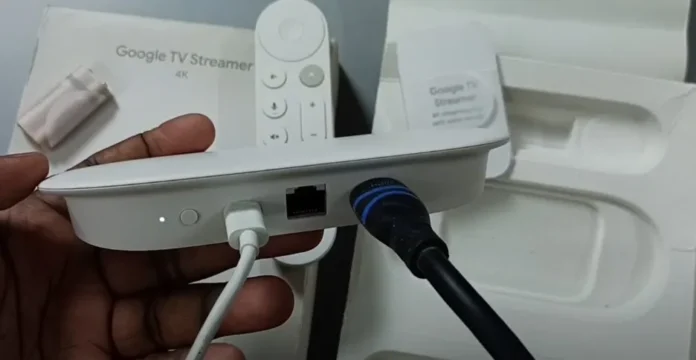
Google TV Streamer connected to TV via HDMI
Connecting Google TV Streamer to TV

The Google TV Streamer is a powerful device that turns your TV into a smart entertainment hub. It supports 4K HDR, Dolby Vision, and over 800 free channels. It also integrates with your smart home devices. This guide provides a step-by-step process to set up and use your Google TV Streamer, based on the latest information as of June 2025. Follow these steps to start streaming your favorite shows in about 10 minutes.

What You Need

Before you begin, ensure you have the following:

  • Google TV Streamer: The main device.
  • HDMI 2.1 Cable: Not included in the box; purchase separately for best performance.
  • Power Adapter and USB Cable: Included with the device.
  • Voice Remote: Comes with AAA batteries.
  • Smartphone: Install the Google Home app (available on Google Play or App Store).
  • Google Account: A Gmail account is recommended for smooth setup.
  • Wi-Fi or Ethernet: A 5 GHz Wi-Fi network or Ethernet cable for stable connectivity. Note: WPA2-Enterprise networks are not supported.

Tip: Use a high-quality HDMI 2.1 cable for optimal audio and video quality, especially if your TV supports Dolby Vision or Dolby Atmos.

Step-by-Step Setup Guide

Step 1: Unbox and Connect the Device

  1. Unbox your Google TV Streamer and check for the device, power adapter, USB cable, remote, and batteries.
  2. Plug one end of the HDMI 2.1 cable into the Google TV Streamer and the other into an available HDMI port on your TV.
  3. Connect the USB cable to the Google TV Streamer and the power adapter.
  4. Plug the power adapter into a nearby electrical outlet.
  5. Turn on your TV and select the HDMI input where the Google TV Streamer is connected.
Google TV Streamer connected to TV via HDMI
Connecting Google TV Streamer to TV

Step 2: Pair the Remote

  1. Insert the AAA batteries into the Voice Remote.
  2. Press and hold the Home and Back buttons on the remote until the light starts pulsing.
  3. Follow the on-screen instructions to pair the remote with the Google TV Streamer.
Google TV Streamer remote pairing process
Pairing the Google TV Streamer remote

Step 3: Select Language

  1. Use the remote’s directional pad (D-pad) to select your preferred language on the TV screen.
  2. Press the OK button to confirm.

Step 4: Set Up with Google Home App

  1. Open the Google Home app on your smartphone. Ensure it’s version 3.19 or higher.
  2. Tap Devices > Add device > Google Nest or partner device.
  3. Scan the QR code displayed on your TV screen.
  4. Follow the app prompts to:
    • Connect to a Wi-Fi network (have your password ready) or use the built-in Ethernet port.
    • Sign into your Google account.
    • Configure additional settings.
Using Google Home app to scan QR code for setup
Scanning QR code with Google Home app (Artificially generated)

Step 5: Configure Settings

  1. Choose whether to enable Google Assistant for voice control.
  2. Link your streaming services, such as Netflix, YouTube, or Disney+.
  3. Set up the ambient screensaver, choosing between Google Photos or an art gallery.

Tip: Linking your Google Photos can display a personalized slideshow on your TV when idle.

Step 6: Pair Remote with TV/Soundbar

  1. In the Google Home app, select Set up remote.
  2. Choose your device type (TV or soundbar) and select the brand.
  3. Follow on-screen instructions to test volume and power controls.

Step 7: Customize Home Screen

  1. Use the remote to navigate to the home screen.
  2. Press and hold the OK button on an app to move or remove it from favorites.
  3. Arrange content rows to prioritize your preferred apps and shows.
Google TV Streamer home screen customization
Customizing the Google TV Streamer home screen

Using Google TV Streamer

Once set up, you can enjoy a range of features:

  • Navigate the Interface: Use the remote’s D-pad to browse apps and content. Google AI curates recommendations based on your preferences.
  • Voice Commands: Press the Assistant button on the remote to search for shows or control smart home devices.
  • Smart Home Integration: Access the Google Home panel by pressing the Home button to control compatible devices like lights or thermostats. Learn more about Google Home compatible devices.
  • Casting Content: Cast videos or music from your smartphone using apps like YouTube or Spotify.

For additional streaming options, check out our guide on How to Watch Dailymotion on Roku TV.

Troubleshooting Common Issues

Here are solutions to common problems:

  • Remote Not Pairing:
    • Ensure batteries are inserted correctly.
    • Restart the Google TV Streamer by unplugging it for 30 seconds.
    • Try pairing again by holding the Home and Back buttons.
  • Wi-Fi Connection Issues:
    • Verify your Wi-Fi password.
    • Ensure your network supports 5 GHz (WPA2-Enterprise is not supported).
    • Consider using the Ethernet port for a stable connection.
  • App Installation Problems:
    • Check your internet connection.
    • Update the Google TV Streamer firmware via Settings > System > About > System Update.
  • Factory Reset:

For more troubleshooting, visit the Google TV Streamer Support Page.

Recent Updates (June 2025)

As of June 2025, recent firmware updates (e.g., build UTTK.250305.003, April 2025 security patch) have fixed bugs related to HDMI-CEC and Dolby Vision/HDR10+. The setup process remains unchanged, but check for updates after setup to ensure optimal performance. A new Home Panel feature allows control of smart home devices on older Google TV devices, enhancing the Google TV Streamer’s capabilities.

Conclusion

Setting up your Google TV Streamer is quick and easy, taking less than 10 minutes. Follow these steps to connect the device, pair the remote, and start streaming. Explore features like voice control and smart home integration to enhance your experience. For further assistance, visit the Google TV Streamer Support Page or check out our related guides on How to Install and Watch IPTV on Roku.

Explore similar content:

How to Update Kodi on Amazon Firestick

0
Amazon Firestick and Kodi logo with "Update Kodi" text.
Thumbnail for updating Kodi on Amazon Firestick.

Kodi is a free, open-source media player that lets you stream and organize movies, music, and TV shows. Many people use Kodi on their Amazon Firestick because it’s affordable and easy to use. To get the best experience, you need to keep Kodi updated. Updates fix bugs, add features, and improve security. This guide shows you how to update Kodi on your Firestick to the latest version, which is likely Kodi 21.2 Omega as of June 2025. We’ll walk you through each step in simple English, making it easy for beginners and experienced users alike.

Why Update Kodi?

Keeping Kodi updated is important for several reasons:

  • Fixes Bugs: New versions solve problems that might cause crashes or errors.
  • Adds Features: Updates may include new tools or options to enhance streaming.
  • Improves Security: Updates protect your device from potential vulnerabilities.
  • Ensures Compatibility: Some addons or services work only with the latest version.

Regular updates keep your streaming smooth and safe. Let’s get started.

Step 1: Check Your Current Kodi Version

Before updating, check which version of Kodi you have. This helps you confirm if an update is needed.

Steps to Check Kodi Version:

  1. Open Kodi on your Firestick.
  2. From the main menu, click the Settings icon (looks like a gear).
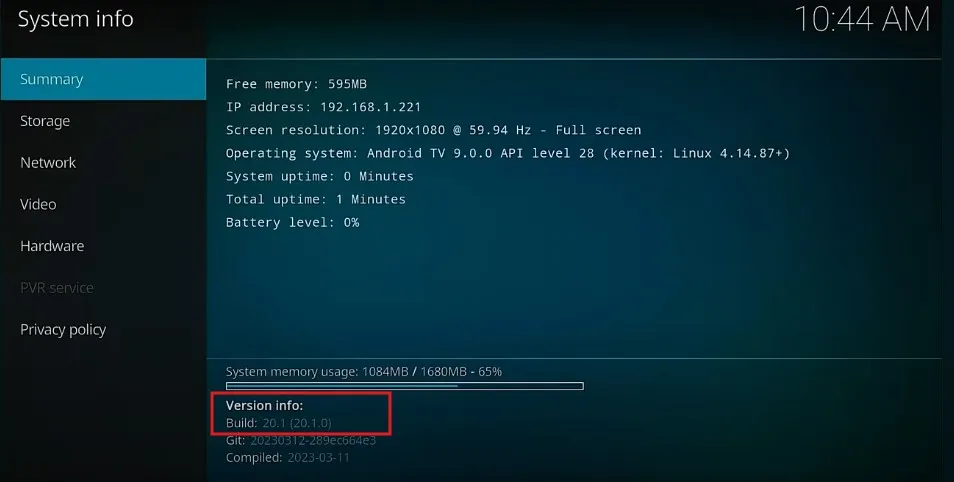
  3. Select System Information.
  4. Look at the Version field. It might say something like “Kodi 21.2 Omega.”

If your version is older than 21.2 Omega, you need to update. As of June 2025, Kodi 21.2 Omega, released around January 2025, is likely the latest version.

Kodi System Information screen showing version number.
Checking the Kodi version on Firestick.

Step 2: Prepare Your Firestick for the Update

Kodi isn’t available in the Amazon App Store, so you need to sideload it using a tool like the Downloader app. Sideloading means installing apps from outside the official store. First, ensure your Firestick is ready.

Install the Downloader App

If you don’t have the Downloader app, follow these steps:

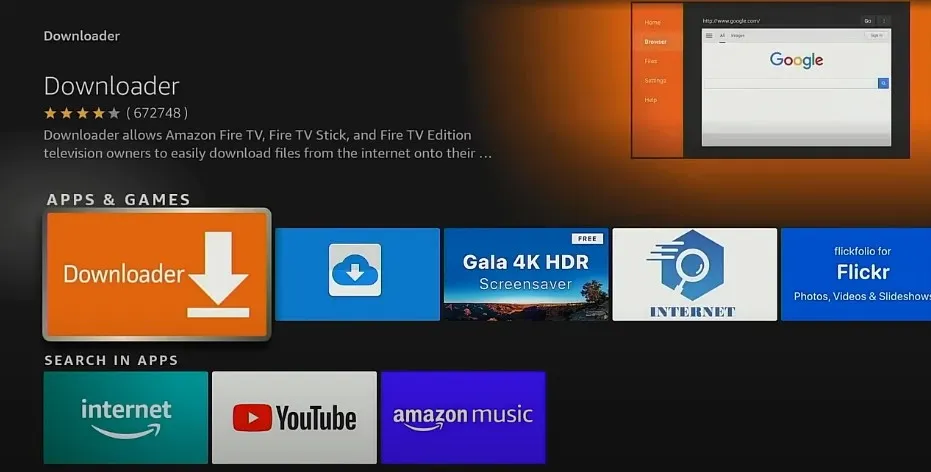
  1. From the Firestick home screen, go to Find > Search.
  2. Type “Downloader” and select it.
  3. Click Download or Get to install the app.
Firestick search screen for Downloader app.
Installing the Downloader app on Firestick.

Enable Apps from Unknown Sources

To sideload Kodi, you must allow apps from unknown sources:

  1. Go to Settings on the Firestick home screen.
  2. Select My Fire TV or Device.
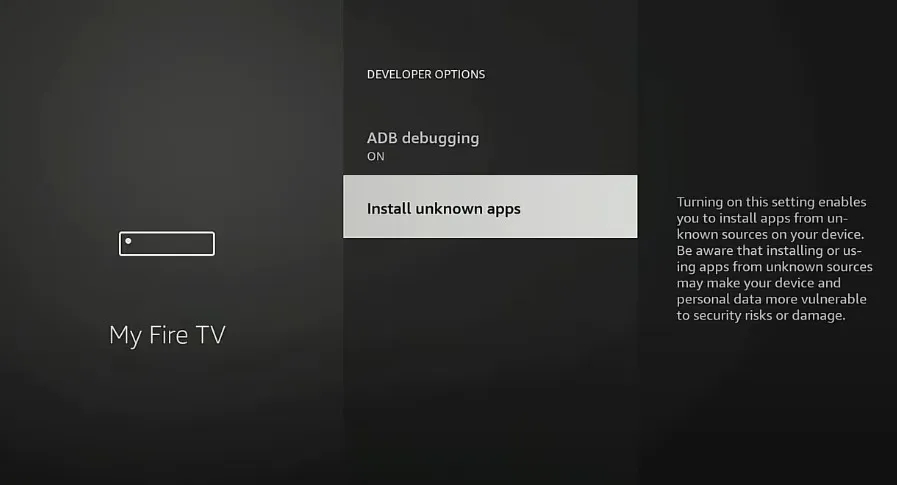
  3. Choose Developer Options.
  4. Turn on Apps from Unknown Sources.
    • If you don’t see Developer Options, go to About, click Fire TV Stick seven times, then check again.
Firestick Developer Options screen.
Enabling Apps from Unknown Sources on Firestick.

Step 3: Download and Install the Latest Kodi Version

Now, use the Downloader app to get the latest Kodi APK (application package file).

Steps to Update Kodi:

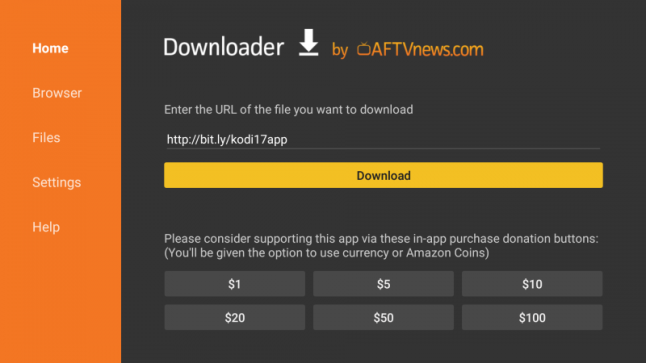
  1. Open the Downloader app.
  2. In the URL field, enter https://kodi.tv/download.
  3. Click Go to visit the Kodi download page.
  4. Scroll to the Android section.
  5. Select the ARMV7A (32-bit) version, suitable for most Firestick devices.
  6. Wait for the APK to download.
  7. When prompted, click Install.
  8. After installation, click Done or Open to launch Kodi.

This method usually preserves your existing addons and settings, but it’s wise to back up your Kodi data before updating.

Downloader app downloading Kodi APK.
Downloading the Kodi APK using Downloader.

Alternative Method: Using ES File Explorer

You can also update Kodi using ES File Explorer, but the official version may require a subscription for sideloading. An unofficial version is available, but Downloader is simpler and free.

Steps for ES File Explorer:

  1. Install ES File Explorer from the Amazon App Store or sideload it.
  2. Open ES File Explorer and go to Tools > Download Manager.
  3. Click New and enter https://kodi.tv/download/android.
  4. Download the APK and click Install.
  5. After installation, click Open.

Note: ES File Explorer may not be the best choice due to costs or complexity. Stick with Downloader unless you prefer this method.

Step 4: Verify the Update

After updating, confirm that Kodi is running the latest version.

Steps to Verify:

  1. Open Kodi.
  2. Go to Settings > System Information.
  3. Check the Version field to ensure it says “Kodi 21.2 Omega” or the latest version.

Troubleshooting Common Issues

If the update doesn’t work, try these solutions:

  • Installation Fails: Ensure “Apps from Unknown Sources” is enabled. Check if your Firestick has enough storage (at least 100 MB free).
  • Kodi Crashes: Clear the cache via Settings > Applications > Manage Installed Applications > Kodi > Clear Cache. If issues persist, uninstall and reinstall Kodi, but note this may remove addons.
  • Addons Not Working: Some addons may not support the new version. Update them or find compatible alternatives.

Updating Kodi Addons and Repositories

To keep your streaming smooth, update your Kodi addons and repositories.

Update Addons:

  1. Open Kodi and go to Add-ons.
  2. Select My Add-ons.
  3. Choose All or a specific category.
  4. If an addon has an update, select it and click Update.

Update Repositories:

  1. Go to Add-ons > Install from repository.
  2. Select a repository, check for updates, and install them.

Using a VPN with Kodi

Using a VPN is recommended when streaming with Kodi, especially with third-party addons. A VPN hides your online activity and can prevent internet providers from slowing your connection.

Popular VPNs for Firestick:

  • ExpressVPN: Fast and reliable, with a Firestick app.
  • NordVPN: Offers strong security and a Firestick app.
  • Surfshark: Affordable with unlimited device connections.

Install a VPN from the Amazon App Store and connect before using Kodi. This ensures a safer streaming experience.

FAQs

How often should I update Kodi?

Check for updates every few months or when a new version is announced.

Will updating Kodi delete my settings and addons?

Updating usually keeps your settings and addons, but back up your data to be safe.

What if I can’t find Developer Options?

Go to Settings > My Fire TV > About, click Fire TV Stick seven times, then check again.

Is it legal to use Kodi on Firestick?

Kodi is legal, but some third-party addons may access copyrighted content, which could be illegal. Use Kodi responsibly.

Can I update Kodi automatically on Firestick?

No, you must update manually since Kodi isn’t in the Amazon App Store.

Conclusion

Updating Kodi on your Amazon Firestick is simple with the right steps. By following this guide, you can enjoy the latest features and improvements of Kodi 21.2 Omega. Regularly check for updates to keep your streaming experience smooth and secure. For more tips on Firestick and TV troubleshooting, explore Soft4led’s guides.

Related Posts:

How to Fix Samsung TV Volume Stuck or Not Working

0
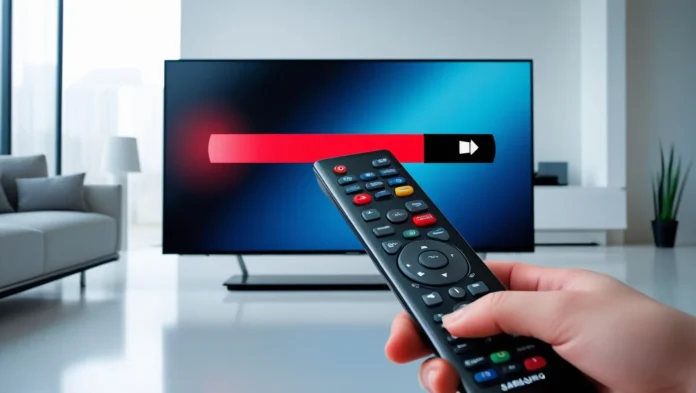
Samsung TV with stuck volume bar and remote
Troubleshooting Samsung TV volume issues

Is your Samsung TV volume stuck or not responding? It’s frustrating when you can’t adjust the sound. Whether the volume is locked at a high or low level or the remote isn’t working, this guide provides clear, step-by-step solutions to fix the problem. Follow these methods to get your TV’s audio back to normal.

Check the Remote Control

The issue might be with your remote. Here’s how to troubleshoot it.

Inspect the Volume Buttons

  • Press the volume up and down buttons.
  • Check if they feel stuck or unresponsive.
  • Clean any debris around the buttons with a soft cloth.

Replace the Batteries

  • Remove the back cover of the remote.
  • Take out the old batteries (usually two AAA).
  • Insert fresh batteries, ensuring correct polarity.
  • Test the volume buttons again.

Try Another Control Method

  • Use the physical buttons on your TV, usually located on the side or bottom.
  • Download the SmartThings app on your smartphone to control the TV.
  • If another method works, your remote may need replacement.
Close-up of Samsung TV remote with volume buttons highlighted
Checking the Samsung TV remote for stuck buttons

Restart the TV

A simple restart can fix many software glitches.

  • Unplug the TV: Disconnect the power cord from the wall outlet.
  • Wait 30 Seconds: Let the TV rest to clear temporary issues.
  • Plug It Back In: Reconnect the power and turn on the TV.
  • Test the Volume: Use the remote or TV buttons to adjust the volume.

Alternatively, hold the power button on the remote or TV for 10-20 seconds until the TV restarts.

Person unplugging a Samsung TV power cord
Unplugging the Samsung TV for a soft reset

Check for External Audio Output

The TV might be sending audio to an external device.

  • Check Connections: Look for headphones, Bluetooth speakers, or soundbars connected to the TV.
  • Disconnect Devices: Unplug any wired audio devices or go to Settings > Sound > Sound Output > Bluetooth Speaker List to disconnect wireless devices.
  • Test the TV Speakers: Set the sound output to TV Speaker in the settings menu.

Disconnect HDMI Devices

HDMI devices can sometimes interfere with volume controls.

  • Unplug HDMI Cables: Remove all HDMI-connected devices, like gaming consoles or streaming sticks.
  • Test the Volume: Try adjusting the volume after disconnecting.
  • Reconnect One at a Time: Plug devices back in individually to identify any conflicts.

Ensure the TV Is in Home Mode

Store Demo mode can lock certain settings, including volume.

  • Go to Settings > General > System Manager > Usage Mode.
  • Select Home Mode if the TV is set to Store Demo.
  • Test the volume after switching modes.

Run a Sound Test

Samsung TVs have a built-in diagnostic tool to check the audio.

  • Press the Home button on your remote.
  • Navigate to Settings > Support > Self Diagnosis > Sound Test.
  • Follow the on-screen instructions to run the test.
  • Note any error messages and address them as prompted.

Reset Sound Settings

Resetting sound settings can resolve audio glitches.

  • Go to Settings > Sound > Expert Settings > Reset Sound.
  • Select Reset to confirm.
  • Test the volume after the reset.
Screenshot of Samsung TV sound settings menu
Resetting sound settings on a Samsung TV

Update the TV Software

Outdated software can cause volume issues.

  • Go to Settings > Support > Software Update > Update Now.
  • Wait for the TV to check for updates and install them.
  • Restart the TV after updating.
  • Test the volume to see if the issue is resolved.

Also:

Delete Unnecessary Apps

Too many apps can slow down the TV and cause glitches.

  • Press the Home button to open the Home screen.
  • Navigate to Apps > Settings (gear icon).
  • Select an unused app and choose Delete. Confirm the deletion.
  • Repeat for other unnecessary apps.
  • Restart the TV and test the volume.

Reset the Smart Hub

Resetting the Smart Hub can fix software-related volume issues.

  • Press the Home button.
  • Go to Settings > Support > Self Diagnosis > Reset Smart Hub.
  • Enter the PIN (default is 0000).
  • Wait for the reset to complete (about 30 seconds).
  • Test the volume afterward.
Screenshot of Samsung TV Smart Hub reset menu
Resetting the Smart Hub on a Samsung TV

Factory Reset the TV

A factory reset is a last resort, as it erases all settings.

  • Press the Home button.
  • Go to Settings > General > Reset.
  • Enter the PIN (default is 0000).
  • Select Yes to confirm.
  • Wait for the TV to reset and restart.
  • Set up the TV again and test the volume.

Also: How to Perform Factory Data Reset in Samsung TV – All Series & Models

Note: This will delete all apps and custom settings. If you’re experiencing other issues, like your TV turning on and off, check our guide on Fix Samsung TV Turning On and Off.

Contact Samsung Support

If none of the above works, contact Samsung for help.

  • Call 1-800-SAMSUNG (1-800-726-7864).
  • Visit the Samsung Support page for online assistance.
  • Provide your TV model number and describe the issue.

Frequently Asked Questions

Why is my Samsung TV volume not changing?

The volume might not change due to a stuck remote button, external audio output, or software glitch. Try checking the remote, disconnecting external devices, or resetting sound settings.

How do I reset my Samsung TV remote?

Remove the batteries, press and hold the power button for 10 seconds, then reinsert fresh batteries. Test the remote again.

What if my TV is stuck in Store Demo mode?

Go to Settings > General > System Manager > Usage Mode and select Home Mode to unlock all settings.

Will a factory reset fix all volume issues?

A factory reset can fix software-related issues but erases all settings. Try other solutions first.

Can an HDMI device cause volume problems?

Yes, HDMI devices can interfere with volume controls. Disconnect all HDMI devices and test the volume.

Conclusion

Fixing a stuck or unresponsive volume on your Samsung TV is usually straightforward. Start with simple checks like the remote or a restart. If those don’t work, try resetting sound settings or the Smart Hub. For persistent issues, a factory reset or contacting Samsung support may be necessary. Follow these steps to restore your TV’s audio quickly.

TP.VST59T.PB706 Firmware Download (All Resolutions)

0
TP.VST59T.PB706 Firmware Software Download

Welcome to Soft4led.com! Are you searching for firmware for the TP.VST59T.PB706 universal TV motherboard? This post has everything you need. We’ll cover what this board is, its specifications, free firmware downloads, installation steps, and troubleshooting tips. It’s perfect for technicians and DIY users who want to fix or upgrade their TVs.

What is the TP.VST59T.PB706?

The TP.VST59T.PB706 is a universal LCD/LED board that supports full HD resolution up to 1920×1080. It’s a combo board, meaning it combines the main power supply, ATV board, and LED backlight driver into one single PCB. This makes it a handy choice for replacing broken TV boards without needing multiple parts.

Specifications

Here are the key details about the TP.VST59T.PB706:

  • Brand: China Universal
  • Model: TP.VST59T.PB706
  • Main Chip: TSUMV59
  • TV System: PAL, SECAM, NTSC Playback
  • Product: LED TV
  • Input Voltage: 220V AC
  • Max Backlight Watt: 45W
  • Resolution: Up to 1920×1080
  • Service Menu Code: Menu 1147

These specs make it a solid option for many TV repair projects.

Free Firmware Downloads

We’ve gathered the latest firmware files for the TP.VST59T.PB706 to help technicians and users. Below are the files you can download:

FilenameDownload
TP.VST59.PB706-ACONATIC AN-LT3221-Backup-DumpDownload
TP.VST59T.PB706-COOCAA 32E20W-Backup-DumpDownload
TP.VST59T.PB706-ERGO LE32CT1000AU-Backup-DumpDownload
TP.VST59T.PB706-INTEX LED-3213-Backup-DumpDownload
TP.VST59T.PB706-ONIDA LEO32HBX1-Backup-DumpDownload
TP.VST59T.PB706-RECONNECT RELEG3206-Backup-DumpDownload

Note: Before downloading, check that the firmware matches your TV model and display panel. Using the wrong file can harm your board. All files are up-to-date as of [insert current date, e.g., October 2023], and safe to use.

Additional Resolution Files

The TP.VST59T.PB706 supports various resolutions. Inside the RAR files, you’ll find options like:

  • 1024×768
  • 1366×768
  • 1440×900
  • 1600×900
  • 1680×1050
  • 1920×1080
  • 1920×1200
  • All-Panel-Files

These files work with a 4MB flash memory and support the M90 general remote control. After downloading, open the RAR file to pick the right firmware for your TV board and panel.

How to Install TP.VST59T.PB706 Firmware

Installing firmware can be tricky, so follow these steps carefully. If you’re not sure, ask a professional for help.

  1. Backup Your Current Firmware: Save your existing firmware first. This keeps your settings safe if something goes wrong.
  2. Download the File: Pick the correct firmware from the links above.
  3. Prepare a USB Drive: Format a USB drive to FAT32. Copy the firmware file onto it.
  4. Plug in the USB: Insert the USB drive into the TV board’s USB port.
  5. Access Service Mode: Turn on the TV. Press “Menu 1147” on your remote to enter the service menu.
  6. Start the Update: Find the firmware update option. Select the file from your USB drive.
  7. Wait: The update takes a few minutes. Don’t turn off the TV while it’s running.
  8. Restart: After it’s done, restart the TV to finish the process.

Warning: Mistakes during installation can damage your TV. Be careful and double-check everything.

Troubleshooting Common Issues

If you run into problems, here are some fixes:

  • TV Won’t Start: Check the power supply and all connections.
  • No Picture: Make sure the firmware matches your panel. You might need to reload the old firmware.
  • Remote Stops Working: Replace the batteries or reset the remote.
  • Bad Picture Quality: Use the service menu to adjust settings.

These tips should solve most issues after a firmware update.

Why Use the TP.VST59T.PB706?

This board is a great pick for TV repairs. It works with many TV models because it’s universal. The combo design means fewer parts to handle, and it supports full HD for clear images. It’s a practical solution for anyone fixing TVs.

Compatibility Tips

The TP.VST59T.PB706 fits many panels and models, but you must confirm it works with your TV. Look at your TV’s manual or talk to a technician if you’re not sure. The included resolution files help match different screens.

Conclusion

This guide gives you all the tools to use the TP.VST59T.PB706 firmware. Download the files, follow the steps, and fix your TV with confidence. Always back up your settings and check compatibility first. Have questions? Leave a comment below—we’re here to help!

Download More:

TSUMV59-T4C1 Firmware Free Download (All Resolutions)

0
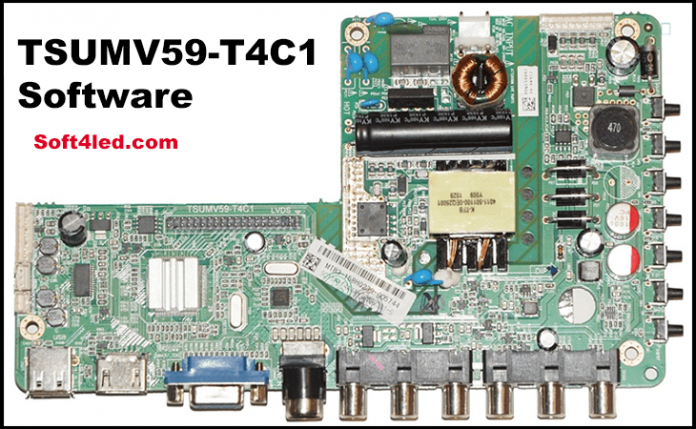
TSUMV59-T4C1 Software Download

Looking for firmware for your LED TV? The TSUMV59-T4C1 universal TV motherboard is a trusted solution for technicians and TV owners. It powers LED TVs across Asia Pacific and Middle East markets. This board supports panels from 24 to 42 inches with resolutions up to 1920×1080. In this post, you’ll get free firmware downloads, technical details, and a clear installation guide. Let’s walk through everything you need to know about the TSUMV59-T4C1 firmware.

What is TSUMV59-T4C1?

The TSUMV59-T4C1 is a universal control board for analog LCD and LED TVs. It’s built for markets in Asia Pacific and the Middle East. This motherboard works with LED panels from 24 to 42 inches and supports resolutions up to Full HD (1920×1080). Technicians love it for its flexibility and reliability. Whether you’re fixing a TV or upgrading it, this board is a solid choice. It handles both non-HD and FHD screens, making it a go-to for many TV models.

Technical Specifications

Here are the key details of the TSUMV59-T4C1 motherboard:

  • Board Make: China
  • Board Model: TSUMV59-T4C1
  • Main Chipset: TSUMV59
  • TV System: PAL, SECAM, NTSC
  • Panel Interface: Single or Dual-channel LVDS
  • Key Buttons: CH-, CH+, MENU, VOL-, VOL+, Source, Power
  • Multi-Language: Yes
  • Ports: HDMI, VGA, AV, USB, RF TV, Earphone Out
  • Audio Output: 2 x 8 Watt (8 ohms)
  • Panel Voltage: +5V or +12V DC (Default 12V)
  • USB Port: Yes (For firmware updates and multimedia playback)
  • IR Control: Yes (Works with remote)
  • Input Voltage: AC 220V
  • Maximum Current: 5000mA (without panel)
  • Standby Power: Less than 0.5W
  • USB Current: 500mA max
  • Flash IC: 4MB
  • Firmware Type: Backup Dump

These specs show why the TSUMV59-T4C1 is so versatile for LED TVs.

Features and Benefits

The TSUMV59-T4C1 offers useful features for TV users. Here’s what it brings:

  • Multimedia Playback: Play videos, music, or photos via USB.
  • Firmware Updates: Update your TV’s software easily with a USB drive.
  • HDMI Support: Multiple HDMI 1.4 ports with HDCP 1.1 for secure playback.
  • Panel Compatibility: Works with non-HD and Full HD panels.
  • Widescreen Ready: Supports modern widescreen TVs.
  • Multi-Language: Menu available in several languages.
  • Dual AV Option: Extra AV inputs for more devices.

These features make your TV more functional and future-proof.

Firmware Download Section

We’re providing free TSUMV59-T4C1 firmware files. These work with various resolutions and panel types. All files are M90 (general remote supported) and fit 4MB flash memory.

Available Firmware Files:

  • T.VST56.03-1024×768
  • T.VST56.03-1366×768
  • T.VST56.03-1440×900
  • T.VST56.03-1600×900
  • T.VST56.03-1680×1050
  • T.VST56.03-1920×1080
  • T.VST56.03-1920×1200
  • T-VST56-03-All-Panel-Files

How to Pick the Right Firmware:

  1. Check Your Resolution: Look at your TV’s manual or panel for its resolution (e.g., 1920×1080).
  2. Match the File: Pick the firmware that fits your resolution.
  3. Confirm Compatibility: Ensure it’s for the TSUMV59-T4C1 board.
  4. Download: Use the links below.

Download Links:

FilenameDownload
TSUMV59-T4C1-Intex 3110-Backup-DumpDownload
TSUMV59-T4C1-Telefunken LED32S34-Backup-DumpDownload

After downloading, open the RAR file. It contains multiple files. Choose the one that matches your TV’s board and panel.

Installation Guide

Updating firmware is simple if you follow these steps. Here’s how to install the TSUMV59-T4C1 firmware:

Steps:

  1. Set Up USB:
    • Format a USB drive to FAT32.
    • Copy the firmware file to it.
  2. Plug In:
    • Turn off the TV.
    • Insert the USB into the TV’s USB port.
  3. Access Service Mode:
    • Turn on the TV.
    • Press “Menu” on the remote, then type “1147.”
  4. Update:
    • Select “USB Update” in the service menu.
    • Pick the firmware file.
    • Start the update and wait.
  5. Restart:
    • Turn the TV off and on again.
    • Check if it works.

Safety Tips:

  • Use the right firmware to avoid damage.
  • Keep power steady during the update.
  • Back up settings if possible.
  • Ask a technician if you’re unsure.

Troubleshooting

Facing issues? Here are common problems and fixes:

  • TV Won’t Start:
    • Check power connections.
    • Unplug for 10 minutes, then retry.
  • Update Fails:
    • Confirm USB is FAT32.
    • Double-check the firmware file.
  • No Picture:
    • Verify input source.
    • Ensure panel matches firmware.
  • Remote Issues:
    • Swap batteries.
    • Check IR settings.

If these don’t help, reach out to a professional.

Conclusion

The TSUMV59-T4C1 firmware keeps your LED TV running smoothly. It’s packed with features and supports many panel types. With this guide, you can download and install it with confidence. Pick the right file, follow the steps, and troubleshoot if needed. Share this post with others who might need it.

Download More:

How to Get Vizio TV Out of Setup Demo Mode

0
Vizio TV with remote exiting demo mode in 5 steps.
Thumbnail for exiting Vizio TV demo mode.

Demo mode, also known as store mode, is a feature on Vizio TVs designed for retail displays. It highlights the TV’s picture quality and features to attract buyers. However, if your Vizio TV is stuck in demo mode at home, it can prevent normal use, such as watching shows or accessing apps. This issue often occurs during the initial setup or after a factory reset.

In this guide, we’ll walk you through multiple methods to exit demo mode and complete your TV setup. These steps are designed for most Vizio models, including D-Series and others, and cater to users with or without a remote.

Why Is My Vizio TV in Demo Mode?

Your Vizio TV might enter demo mode for several reasons:

  • Initial Setup: New TVs or those reset to factory settings may default to demo mode.
  • Accidental Activation: Pressing certain buttons during setup can trigger demo mode.
  • Firmware Issues: Outdated software may cause the TV to get stuck in setup or demo mode.
  • Hardware Problems: In rare cases, a faulty main board could be the culprit.

Understanding the cause can help you choose the right method to fix it. Below, we outline five reliable methods to get your TV back to normal.

Methods to Exit Demo Mode on Vizio TV

Method 1: Using the Remote Control

If you have the Vizio remote, this is the easiest way to exit demo mode.

  1. Turn on the TV using the power button on the remote.
  2. Press the “Exit” or “Back” button when the demo screen appears. Look for a message like “Store Demo is launching.”
  3. If the demo persists, press the “Menu” button on the remote.
  4. Navigate to System > Reset & Admin > Store Demo.
  5. Select “Disabled” or “Off” and confirm.
  6. Restart the TV to ensure demo mode is off.

Note: If your remote isn’t working, check the batteries or try the next method.

Vizio remote highlighting Exit and Menu buttons.
Vizio remote with key buttons to exit demo mode.

Method 2: Without the Remote Control

If you don’t have a remote, use the physical buttons on the TV.

  1. Locate the buttons on the back or side of your Vizio TV (usually on the lower right).
  2. Find the “Input” button. Some models may only have a power button.
  3. Press and hold the “Input” button for 10 seconds or until the demo mode exits.
  4. Alternatively, turn on the TV and watch for a message like “Store Demo is launching. To cancel, press and hold the input button.”
  5. Hold the “Input” button during startup until the setup menu appears.
  6. Follow the on-screen instructions to complete the setup.

Note: For TVs with only a power button, try Method 3 or 4.

Vizio TV back panel with Input button highlighted.
Location of the Input button on a Vizio TV.

Method 3: Using the Vizio Mobile App

The Vizio Mobile app can act as a remote if you’ve lost yours.

  1. Download the Vizio Mobile app from the Google Play Store or Apple App Store.
  2. Connect your smartphone and TV to the same Wi-Fi network.
  3. Open the app and select your TV to pair it. Follow the on-screen code if prompted.
  4. Use the app’s remote feature to press the “Menu” button.
  5. Navigate to System > Reset & Admin > Store Demo > Disabled.
  6. Restart the TV to confirm demo mode is off.

Note: Ensure your phone has an IR blaster if your TV model requires it.

Screenshot of Vizio Mobile app showing remote control buttons.
Vizio Mobile app remote control interface.

Method 4: Power Cycle the TV

A power cycle can reset software glitches causing the demo mode.

  1. Unplug the TV from the power outlet.
  2. Press and hold the power button on the TV for 30 seconds to drain residual power.
  3. Release the button and plug the TV back in.
  4. Turn on the TV and check if demo mode is disabled.
  5. If prompted, complete the setup process.

Note: Wait at least 30 minutes before plugging the TV back in for best results.

Method 5: Update the Firmware

Outdated firmware can cause the TV to get stuck in demo mode.

  1. Visit the Vizio Support firmware page and enter your TV’s serial number.
  2. Download the firmware to a USB drive formatted in FAT32.
  3. Insert the USB drive into the TV’s USB port.
  4. Follow the on-screen instructions to update the firmware.
  5. After updating, check if demo mode is disabled and complete the setup.

Note: Ensure the USB drive has no other files and the firmware is in the main directory.

Troubleshooting Common Issues

If the above methods don’t work, consider these steps:

  • Check Remote Functionality: Replace batteries or test the remote’s IR signal using a phone camera.
  • Verify Internet Connection: A stable Wi-Fi or Ethernet connection is needed for setup completion.
  • Factory Reset: As a last resort, reset your TV to factory settings. Be aware this may trigger demo mode again, so follow the setup carefully. Learn more in our guide on how to factory reset a Vizio TV.
  • Contact Vizio Support: If issues persist, reach out to Vizio Support or call a technician.
IssuePossible CauseSolution
TV stuck in demo modeAccidental activationUse remote or Input button to exit
Remote not workingDead batteries or IR issueReplace batteries or use Vizio Mobile app
Setup screen persistsFirmware glitchUpdate firmware via USB
No Input buttonModel-specific designUse power cycle or app
Persistent demo modeHardware failureContact Vizio Support

Preventing Demo Mode in the Future

To avoid demo mode recurring:

  1. After exiting demo mode, go to Menu > System > Reset & Admin > Store Demo.
  2. Set it to “Disabled” or “Off”.
  3. During initial setup, select “Home” instead of “Retail” when prompted.
TV screen showing menu options to turn off Store Demo mode.
Vizio TV menu to disable Store Demo.

Conclusion

Getting your Vizio TV out of setup demo mode is usually simple with the right steps. Start with the remote or physical Input button, then try the Vizio Mobile app or power cycling if needed. Updating the firmware can resolve software issues, but if problems persist, contact Vizio Support for expert help. For other Vizio TV issues, check out our guides on fixing Wi-Fi connection problems or resolving cable channel issues.

T.MS608.61 Firmware Free Download (All Resolutions)

0
T.MS608.61 Firmware Free Download
T.MS608.61 Firmware

Looking to improve your TV? The T.MS608.61 universal motherboard could be the answer. This smart, WiFi-enabled board works with many LCD and LED TVs. In this post, we’ll cover its features, technical details, and how to install firmware. You’ll also find free firmware files to download. This guide is perfect for TV repair pros or anyone wanting to upgrade their set.

What is the T.MS608.61 Motherboard?

The T.MS608.61 is a universal motherboard for LCD and LED TVs. It fits different brands and models, making it great for repairs or upgrades. It supports Full HD resolution up to 1920×1080, delivering sharp, clear pictures. Since it’s not a combo board, you’ll need an external backlight inverter and power module.

Key Features of T.MS608.61

  • Smart TV Functions: Runs Android 4.4 for apps and streaming.
  • Internet Options: Connect with WiFi or a wired LAN (RJ45).
  • Input Ports: Offers Audio Video, HDMI, VGA, USB, and a headphone jack.
  • Great Sound: Uses the YD1517 amplifier for clear audio.
  • Screen Size Support: Works with 15-inch to 32-inch panels.

Technical Specifications

  • CPU: Dual Core
  • RAM: 512MB DDR
  • ROM: 2GB eMMC
  • OS: Android 4.4
  • Resolution: Up to 1920×1080
  • Tuner: R620
  • Sound Chip: 1517P
  • Power: 12V DC
  • Service Code: Source 2580
  • Chipset: Mstar

How to Install Firmware on T.MS608.61

Updating firmware can solve problems and boost performance. Follow these steps:

FilenameDownload
T.MS608.61-1024×768-GeneralDownload
T.MS608.61-1280×1024-GeneralDownload
T.MS608.61-1366×768-GeneralDownload
T.MS608.61-1920×1080-GeneralDownload
  1. Download Firmware: Pick the file matching your TV’s resolution.
  2. Set Up USB: Format a USB drive to FAT32 and add the firmware file.
  3. Plug In: Insert the USB into the TV’s USB port.
  4. Enter Service Menu: Use “Source 2580” to access the menu.
  5. Start Update: Choose the update option and follow the prompts.
  6. Restart: Turn the TV off and on to finish.

Download T.MS608.61 Firmware

We’ve got free firmware files for different resolutions. Select the right one for your TV panel:

  • Download T.MS608.61-1920×1080-General
  • Download T.VST56.03-1024×768
  • Download T.VST56.03-1366×768
  • Download T.VST56.03-1440×900
  • Download T.VST56.03-1600×900
  • Download T.VST56.03-1680×1050
  • Download T.VST56.03-1920×1080
  • Download T.VST56.03-1920×1200
  • Download T-VST56-03-All-Panel-Files

Note: These files are M90 (works with general remote controls) and fit 4MB flash memory. Check the RAR file after downloading for more details and pick the best file for your TV.

Common Issues and Fixes

  • TV Won’t Turn On: Check the power supply and cables.
  • No Picture: Make sure the input source is set right.
  • Firmware Won’t Update: Confirm the USB is FAT32 and the file matches your TV.
  • WiFi Problems: Look at network settings or signal strength.

Where to Buy T.MS608.61 Motherboard

You can find the T.MS608.61 motherboard online. Buy from trusted sellers to get a real product.

Conclusion

The T.MS608.61 is a solid choice for TV repairs or upgrades. It offers smart features, good sound, and sharp visuals. Use this guide to download firmware and fix issues. Get your TV working better today!

Download More:

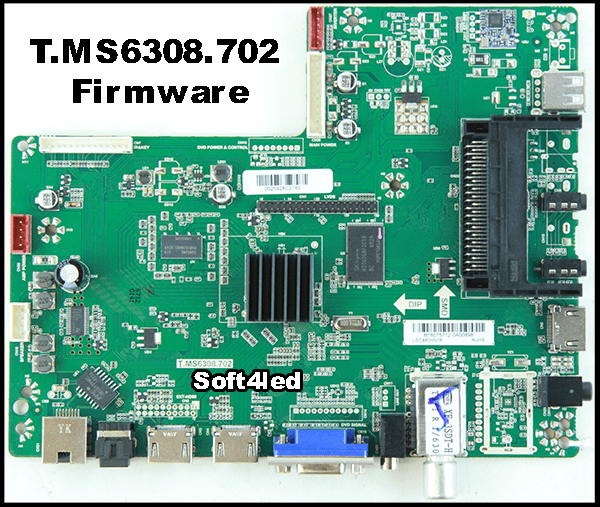
T.MS6308.702 Firmware Free Download (All Resolutions)

1
T.MS6308.702 Firmware Free Download

Need firmware for your T.MS6308.702 TV motherboard? You’re in the right place! At soft4led.com, we offer free, reliable firmware files for this universal TV driver board. This post covers everything you need to know about the T.MS6308.702, from its features and specs to how to download and install the firmware. Let’s get started!

What is the T.MS6308.702 Motherboard?

The T.MS6308.702 is a full HD LED TV driver board that supports a 1920x1080p resolution. It’s a non-combo board, meaning it doesn’t have a built-in power supply. This makes it a flexible option for many TV models. Brands like DGTECH, Bauhn, and Sharp use this motherboard because of its solid performance and useful features.

Key Features of T.MS6308.702

Here’s what makes the T.MS6308.702 special:

  • Full HD Resolution: Displays clear, sharp images at 1920x1080p.
  • Multiple Ports: Comes with three HDMI ports, one USB port (for multimedia and updates), a VGA port for PCs, and a Scart adapter.
  • Dual Tuner Input: Includes DVB-T/T2/C/S/S2 + MPEG4 and a Freeview HD tuner for better channel options.
  • Satellite Support: Has a satellite input for users with satellite setups.
  • Audio Output: Provides 2x10W (8 ohm) sound power.

Technical Specifications

Here are the detailed specs of the T.MS6308.702:

  • Board Model: T.MS6308.702
  • Resolution: 1920x1080p (Full HD)
  • Audio Power: 2x10W (8 ohm)
  • Backlight: Supported
  • USB Ports: 1 (multimedia and firmware updates)
  • HDMI Ports: 3
  • Scart: 1
  • RJ45: Yes
  • Analog Tuner: PAL, SECAM
  • Digital Tuner: DVB-T/T2/C/S/S2 + MPEG4
  • Wi-Fi: No
  • Mira-Cast: Not supported
  • Satellite Input: Yes
  • Memory: NAND Flash
  • Power Rating: 220V~240V 50Hz
  • Power Consumption: 110W max
  • Firmware: allupgrade_6308rtbm.bin (USB updateable)
  • Product Compatibility: DGTECH, Bauhn, Sharp

Why Firmware Matters

Firmware is the software that runs your TV’s hardware. It controls how your TV works, like showing the right picture quality or playing files from a USB. Updating firmware can fix problems, improve how your TV runs, or add new features. For the T.MS6308.702, firmware updates are simple because it uses a USB drive.

Available Firmware Files

We’re sharing free T.MS6308.702 firmware files for download. This includes a specific file for the Technika 50F22B-FHD model. The files support many resolutions like 1024×768, 1366×768, 1440×900, 1600×900, 1680×1050, 1920×1080, and 1920×1200. They work with 4MB flash memory and support the M90 general remote control. After downloading, you’ll see multiple files in the RAR archive. Pick the one that matches your TV’s resolution and panel.

Note: Always check your TV model and resolution before installing firmware to avoid mistakes.

How to Download and Install the Firmware

Follow these steps to update your T.MS6308.702 firmware:

FilenameDownload
T.MS6308.702-1366×768-DGTECDownload
T.MS6308.702-1920×1080-BAUHNDownload
T.MS6308.702-Technika 50F22B-FHDDownload
  1. Download the Firmware: Click the link below to get the files.
    • Download T.MS6308.702 Firmware
    • Download T.MS6308.702-Technika 50F22B-FHD
  2. Extract the Files: Open the RAR file to see the firmware options.
  3. Choose the Correct File: Look at the file names to find the one for your TV’s resolution (e.g., 1920×1080).
  4. Update via USB: Copy the file to a USB drive, plug it into your TV, and follow the TV’s instructions to install it.

Need more help? Check our guide on updating TV firmware.

Common Questions About T.MS6308.702 Firmware

Here are answers to questions readers often ask:

  • What’s a non-combo board?
    A non-combo board, like the T.MS6308.702, needs a separate power supply. Combo boards have one built in.
  • Will this firmware work on any TV?
    No, it’s made for the T.MS6308.702. Check your TV’s motherboard model first.
  • How do I pick the right firmware file?
    Match the file to your TV’s resolution and panel type. File names show the resolution.
  • Is it safe to update firmware?
    Yes, if you use the right file and follow the steps. Save your TV settings first, if you can.

Why Trust soft4led?

At soft4led, we test every firmware file to make sure it’s safe and works with your TV. Our goal is to help you keep your TV running well with free downloads and clear guides.

Final Thoughts

The T.MS6308.702 is a great TV motherboard, and updating its firmware keeps it performing at its best. Whether you need to fix an issue or just want the latest software, our free files are here for you. Share this post with others who might need it, and let us know in the comments if you have questions!

Download More:

Airy TV Free Live TV Channels: The Complete Guide

0
Thumbnail for Airy TV free live TV channels 2025 guide
Airy TV Free Live TV Channels Thumbnail

Airy TV is a free streaming service that brings live TV channels and on-demand content to viewers without subscription fees. Supported by ads, it offers a wide range of entertainment, including movies, sports, news, music, kids’ shows, and lifestyle programs. This guide provides a comprehensive look at Airy TV, including how to access it, a complete list of channels as of mid-2025, and unique features.

Whether you’re a cord-cutter or just looking for free entertainment, this article has all the details you need.

Airy TV Logo
Airy TV Logo

What is Airy TV?

Airy TV is a free, ad-supported streaming platform delivering over 100 live TV channels and a large library of on-demand movies and TV shows. Its motto, “Free TV, Forever,” reflects its mission to provide accessible entertainment. Available on smartphones, tablets, smart TVs, and desktops, Airy TV caters to a broad audience. It also features a rewards program where viewers can earn gift cards while watching, setting it apart from other services.

How to Access Airy TV

Getting started with Airy TV is simple. Download the app from the Apple App Store, Google Play Store, or Amazon Appstore. You can also stream directly on your browser via Airy TV’s website. The service works on devices like Fire TV, Roku (beta version), and other smart TVs. No sign-up is required for most content, but some features may need an account. A channel guide makes navigation easy.

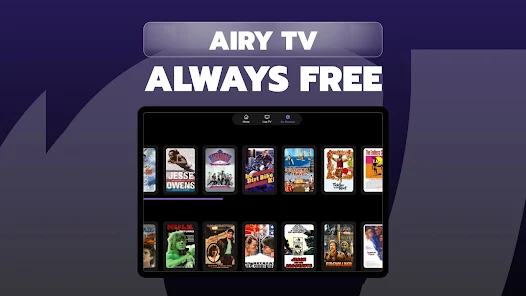
Screenshot of Airy TV channel guide
Airy TV Channel Guide

Complete List of Airy TV Channels

Airy TV offers over 100 live TV channels as of mid-2025, covering movies, sports, news, music, kids, lifestyle, and more. Channel lineups may vary by region or change over time, so check the app or website for the latest updates. Below is a comprehensive list of channels, compiled from top-ranking sources and cross-referenced for completeness.

Channel Categories and List

CategoryChannels
MoviesBig Cinema, Film Star, Legend Films, One World Flix, Streamster, The Western Channel, Movie Max 1, Classic Movies, iSciFi
SportsFishing Offshore, Hard Knocks, WD Golf, World Poker Tour, Poker Night in America, Esports
News30A TV, ABC Australia News, Al Jazeera English, America vs. Addiction, Troptions TV, Channel 12 Pensacola WBQP
MusicMusic Legends, My Jam Music TV, Nashville Country TV, Top of the Pops!
KidsGumball, Kids Net, Bluey, G.I. Joe, Re Vu Kids, Classic Kids, Cartoon and Kartoon Classic
LifestyleiSpirit TV, The Chef’s Kitchen, Holr Lifestyle, PassTime TV, The Boomer Channel
Travel and FoodAXS TV Now, Nat Geo Wild, Sidewalks TV, Thailand TV, The Beach Show, Wild America
TV ShowsAll Battle Rap Network, Best of Times, Down the Rabbit Hole, Peak, TV Nuts, WBQP Florida, Crime Wave, Armed Forces, Re Vu Soul, Play Me, The Sherard Show, Historical
Sci-FiSci Fi – Airy
ComedyComedy, The 3 Stooges, Dennis the Menace

Note: This list is based on data from Airy TV’s official site, app store listings, and third-party sources, cross-referenced for accuracy as of mid-2025. Availability may vary by device or region.

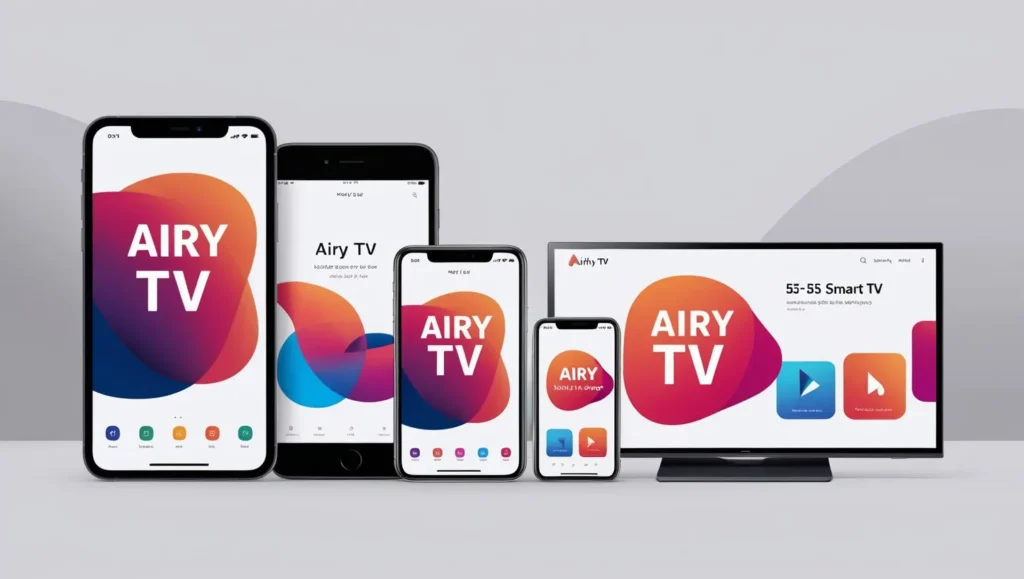
Airy TV app on smartphone, tablet, and TV
Airy TV on Multiple Devices

On-Demand Content

Beyond live TV, Airy TV provides a vast library of on-demand movies and TV shows. Genres include action, comedy, drama, sci-fi, and classics. Popular titles feature classic shows like Gomer Pyle, Hogan’s Heroes, and The Addams Family, as well as movies with stars like Tom Hanks and Clint Eastwood. This section lets you watch at your own pace, perfect for flexible viewing.

Features and Benefits

Airy TV stands out with these key features:

  • Free Access: No fees, just ads to keep content free.
  • Multi-Device Support: Works on smartphones, tablets, smart TVs, and browsers.
  • Channel Guide: Easy-to-use interface for quick navigation.
  • Rewards Program: Earn gift cards while watching.
  • Content Requests: Suggest shows or movies you’d like to see.

These benefits make Airy TV a strong choice for budget-conscious viewers.

Comparison with Other Services

Airy TV competes with free streaming services like Tubi TV and Freebie TV. Its rewards program and user-requested content are unique. For a broader look, see our articles on Tubi TV Channels and Freebie TV Channels List. Airy TV’s mix of live channels and on-demand options holds its own against similar platforms.

Addressing Common Questions

Here are answers to popular questions from Google’s “People Also Ask” and related searches:

Is Airy TV free?

Yes, it’s 100% free, supported by ads.

What channels does Airy TV offer?

Over 100 channels, including Nat Geo Wild, Al Jazeera English, Bluey, and more.

How do I download Airy TV?

Get the app from the Apple App Store, Google Play Store, or Amazon Appstore, or stream at airy.tv.

Are local channels available?

Yes, channels like 30A TV and WBQP Florida are included, but availability varies by region.

Is Airy TV legal?

Yes, it’s a legitimate service, available on major app stores with ad support.

Conclusion

Airy TV delivers a robust, free streaming experience with over 100 live TV channels and on-demand content. From movies and sports to news and kids’ shows, it covers all bases. Its user-friendly design, multi-device support, and rewards program make it a top pick for cord-cutters. Check the latest channel lineup on Airy TV’s website or download the app to start watching today.

For more streaming options, visit our guides below:

T.MS6308.801 Firmware Free Download (All Resolutions)

0
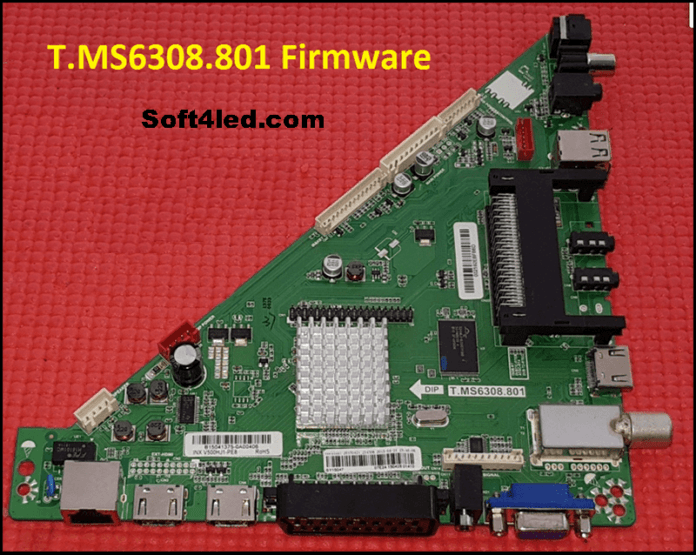
T.MS6308.801 Firmware Free Download

Welcome to soft4led.com! This post is about the T.MS6308.801 motherboard for LCD and LED TVs. It’s a popular choice because it supports Full HD and has many useful features. We’re providing free firmware files for you to download. Keep reading to learn about this motherboard, its specifications, and how to use the firmware.

What is T.MS6308.801?

The T.MS6308.801 is a universal ATV Driver Motherboard made for LCD and LED TVs. It works with Full HD screens, giving you clear and sharp pictures. This is not a complete setup—you’ll need a separate power input module and LED backlight inverter circuit. The motherboard includes a built-in ATV card and fits TVs from 32 to 42 inches.

Key Features

The T.MS6308.801 comes with these features:

  • HDMI input for connecting devices like Blu-ray players.
  • Dual USB ports for playing media files and updating firmware.
  • PC input to hook up a computer.
  • Component input for older equipment.
  • TV and optional Scart connections.
  • Earphone output for personal listening.

The dual USB ports stand out. You can play videos or music from one while using the other to update the software.

Technical Specifications

Here are the details you need to know:

  • Model: T.MS6308.801
  • Resolution: 1920×1080 (Full HD)
  • Panel: v500hj1-pe8
  • Flash: Nand Flash
  • Firmware Type: USB Upgrade
  • Firmware Name: AllUpgrade_6308RTEC.bin
  • Product: Bush, Polaroid
  • Service Code: [Insert Service Code Here]

These specs help you confirm if this motherboard matches your TV.

How to Choose the Right Firmware

Picking the correct firmware is important. Match it to your TV’s resolution (1920×1080) and panel type (like v500hj1-pe8). Using the wrong file can cause problems. If you’re not sure, ask a technician for advice.

Download T.MS6308.801 Firmware

Get the firmware files here: Download T.MS6308.801-1920×1080. These are for technicians who understand TV repairs. If you’re new to this, visit a professional instead of trying it yourself.

FilenameDownload
T.MS6308.801-1920×1080Download

How to Install T.MS6308.801 Firmware

Installing the firmware is simple if you follow these steps:

  1. Download the firmware file from the link above.
  2. Copy it onto a USB drive.
  3. Plug the USB drive into your TV’s USB port.
  4. Follow the TV’s on-screen instructions to update.

Not confident? Take your TV to a technician to avoid mistakes.

Common Issues and Fixes

Here are some problems you might face and how to solve them:

  • Problem: TV won’t turn on after the update.
    • Fix: Check if the firmware matches your TV model. Download the correct file if needed.
  • Problem: No sound comes out.
    • Fix: Make sure nothing is plugged into the earphone output. Check the volume.
  • Problem: TV doesn’t see the USB drive.
    • Fix: Try another USB drive or format it to FAT32.

For other issues, a technician can help.

Caution for Users

All pictures and details in this post are for reference only. If you don’t have repair experience, don’t load the firmware yourself. Some TV faults need a different fix than a software update. Always check with a technician first.

Disclaimer

This post and firmware are for informational use. soft4led.com isn’t responsible for damage from incorrect use. Consult a professional if you’re unsure.

Conclusion

The T.MS6308.801 is a solid motherboard for LCD and LED TVs. It supports Full HD and offers plenty of connection options. Download the firmware from our link and follow the steps to install it. If you need help, reach out to a technician. Thanks for visiting soft4led.com!

Download More: