Home Blog Page 5

Best Picture Settings to Optimize Your Toshiba TV for Gaming

0
Thumbnail of Toshiba TV with gaming scene and controller for blog post
Toshiba TV Optimized for Gaming

Gaming on a Toshiba TV can be a fantastic experience with the right picture settings. These adjustments help reduce delays, enhance colors, and improve clarity, making your games more immersive. Whether you’re playing action-packed shooters or open-world adventures, this guide provides the best settings for your Toshiba TV. Follow these steps to achieve smooth gameplay and vibrant visuals. Note that settings may vary slightly depending on your TV model and personal preferences.

Why Use Game Mode?

Game Mode is essential for gaming. It reduces input lag, the delay between your controller input and the action on the screen. Lower input lag means faster response times, which is critical for games requiring quick reflexes, like first-person shooters or racing games. Game Mode turns off extra image processing that can slow down your TV’s response.

How to Enable Game Mode on Your Toshiba TV

To turn on Game Mode:

  1. Press the Menu button on your Toshiba TV remote.
  2. Go to Picture Settings.
  3. Select Picture Mode.
  4. Choose Game Mode.

This setting ensures your TV prioritizes speed over extra visual effects.
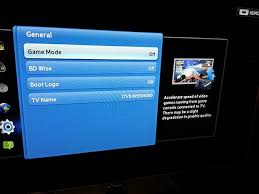
Toshiba TV menu showing Picture Mode options with Game Mode selected
Enabling Game Mode on Toshiba TV

Enabling HDR for Vibrant Visuals

High Dynamic Range (HDR) makes games look more realistic by enhancing colors and contrast. If your game and console support HDR, enabling it on your TV can improve the visual experience. Bright scenes pop, and dark areas show more detail.

How to Enable HDR

  1. Go to Picture Settings in the TV menu.
  2. Find HDR Mode or Smart HDR.
  3. Turn it on.

Ensure your gaming console (like a PS5 or Xbox Series X) is set to output HDR. Check your game settings to confirm HDR compatibility. For HDR gaming, you may also need to set the HDMI Input Mode to 2.0, which we’ll cover later.

Optimizing Brightness and Contrast

Brightness and contrast settings affect how clear and vivid your games appear. Proper adjustments ensure you can see details in both dark and bright scenes without washing out colors.

  • Brightness: Set to 50-55%. This level prevents dark areas from looking too shadowy while keeping the image clear.
  • Contrast: Set to around 80%. You can also enable Contrast Enhance or Dynamic Contrast if your TV has these options for sharper visuals.

Test these settings in a game with varied lighting, like a scene with both shadows and bright areas, to ensure details are visible.

Adjusting Backlight Levels

The backlight controls the overall brightness of your TV screen. For gaming, a balanced backlight prevents eye strain and ensures good visibility in different lighting conditions.

  • Set Backlight to 50-60%. This provides a good balance for most rooms.
  • If available, enable Dynamic Backlight to automatically adjust brightness based on the scene.

Adjust the backlight based on your room’s lighting. In a bright room, you might increase it slightly; in a dark room, lower it to avoid glare.

Disabling Motion Smoothing

Motion smoothing (also called motion interpolation, Smooth Motion, or Clean Frame) can add lag and visual artifacts, which are problematic for gaming. These features make motion look smoother but can delay your inputs, affecting gameplay.

How to Disable Motion Smoothing

  1. Go to Picture Settings.
  2. Look for options like Smooth Motion, Clean Frame, or Motion Interpolation.
  3. Turn them off.

Disabling motion smoothing ensures your TV processes game visuals quickly, keeping gameplay responsive.

Fine-Tuning Color and Sharpness

Color and sharpness settings affect how vibrant and detailed your games look. Overdoing these can lead to unnatural colors or visual noise, so balance is key.

  • Color: Set to 50-60%. This range provides vibrant yet natural colors without oversaturation.
  • Sharpness: Set to 10-15%. This enhances details without adding grainy artifacts.

Test these settings with a colorful game to ensure characters and environments look realistic.

Additional Tips for Optimal Gaming

Here are extra settings to enhance your gaming experience:

  • HDMI Input Mode: For HDR games, set the HDMI Input Mode to Mode 2.0. Go to Settings > HDMI Input Mode and select the port your console is connected to. This ensures compatibility with HDR content from modern consoles like the PS5 or Xbox Series X.
  • Noise Reduction: Turn off MPEG Noise Reduction for modern games to preserve sharp details. Only enable it for older, low-resolution games if you notice graininess.
  • Local Dimming: If your Toshiba TV has local dimming, set it to High. This improves contrast by adjusting backlight zones, making dark scenes deeper and bright areas more vivid. Test with games featuring space or night scenes for the best effect.

If you encounter issues with your TV, such as it not turning on, check our guide on Fixing Toshiba TV Won’t Turn On. If you need to start fresh, learn how to Reset Your Toshiba TV.

Testing and Tweaking Settings

After applying these settings, test them with your favorite games. Different games and room lighting conditions may require slight adjustments. For example, a dark room might need a lower backlight, while a bright room may benefit from higher brightness. If you’re playing older games, you might enable noise reduction to smooth out visuals. Always check your TV’s manual for model-specific options, as menu layouts can differ.

Conclusion

Optimizing your Toshiba TV for gaming is simple with these picture settings. By enabling Game Mode, turning on HDR, and adjusting brightness, contrast, backlight, color, and sharpness, you can enjoy smoother gameplay and better visuals. Turn off motion smoothing to keep inputs responsive, and use additional settings like HDMI Mode 2.0 for HDR games. These adjustments should work for most Toshiba TVs, but feel free to tweak them to match your preferences and gaming setup. Happy gaming!

How to Use Your Smartphone as an Insignia TV Remote

0
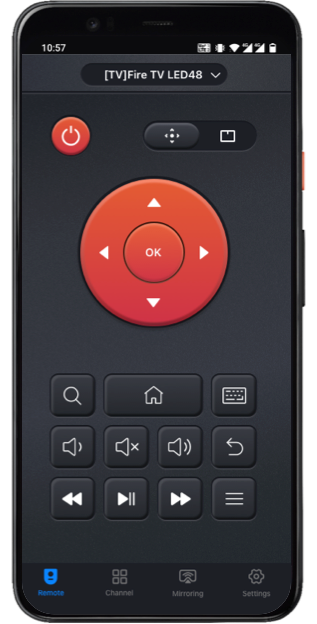
Smartphone with Insignia TV remote app on screen.
Smartphone displaying Insignia TV remote app interface.

Lost your Insignia TV remote? No problem. You can use your smartphone as a remote for your Insignia Smart TV. This guide explains how to set up and use your phone to control Insignia TVs running Google TV, Fire TV, or Roku OS. It’s simple, free, and works over Wi-Fi. Follow these steps to get started

Why Use Your Smartphone as an Insignia TV Remote?

Using your smartphone as a remote is convenient. It’s always with you, unlike a physical remote that can get lost. Smartphone apps offer extra features like keyboard input and voice control. They work over Wi-Fi, so you don’t need a direct line of sight. Plus, apps are free and easy to set up.

  • No need to buy a new remote: Save money if your remote is lost or broken.
  • Easy text input: Use your phone’s keyboard for searches or logins.
  • Advanced controls: Access settings, apps, and streaming services quickly.
  • Multi-device support: Control Google TV, Fire TV, or Roku-based Insignia TVs.
Smartphone with Insignia TV remote app on screen.
Smartphone displaying Insignia TV remote app interface.

Requirements for Using Your Smartphone as a Remote

Before starting, ensure you have these:

  • Insignia Smart TV: Must run Google TV, Fire TV, or Roku OS.
  • Smartphone or Tablet: Android (4.4 or later) or iOS (iOS 10 or later).
  • Wi-Fi Connection: Both TV and phone must be on the same Wi-Fi network.
  • Remote App: Download the correct app for your TV’s platform (Google TV, Fire TV, or Roku).

If your Insignia TV won’t connect to Wi-Fi, check our guide on fixing Insignia TV Wi-Fi issues.

How to Set Up Your Smartphone as an Insignia TV Remote

The setup depends on your Insignia TV’s platform. Below are step-by-step instructions for Google TV, Fire TV, and Roku OS.

For Insignia Google TV

  1. Connect to Wi-Fi: Ensure your TV and phone are on the same Wi-Fi network.
  2. Download the App: Install the Google TV app from the Google Play Store or Apple App Store.
  3. Open the App: Launch the Google TV app on your phone.
  4. Tap the Remote Icon: Find the remote icon at the bottom right and tap it.
  5. Select Your TV: The app will scan for devices. Choose your Insignia TV from the list.
  6. Pair the Devices: Follow on-screen instructions on your TV to pair. Enter any code if prompted.
  7. Control Your TV: Use the app’s on-screen buttons to navigate, adjust volume, or change inputs.

Troubleshooting Tip: If the app doesn’t find your TV, restart both devices and ensure they’re on the same Wi-Fi network.

For Insignia Fire TV

  1. Connect to Wi-Fi: Confirm your phone and TV are on the same Wi-Fi.
  2. Download the App: Get the Amazon Fire TV app from the Google Play Store or Apple App Store.
  3. Sign In: Open the app and log in with your Amazon account (same as your Fire TV).
  4. Select Your TV: Choose your Insignia Fire TV from the device list.
  5. Enter the Code: A code will appear on your TV. Enter it in the app to pair.
  6. Start Controlling: Use the app to manage volume, channels, or apps.

Troubleshooting Tip: If pairing fails, go to your TV’s settings (using physical buttons if needed) and check “Controllers & Bluetooth Devices” to ensure remote pairing is enabled.

Learn how to reset your Insignia Fire TV remote if you’re troubleshooting connectivity.

For Insignia Roku TV

  1. Connect to Wi-Fi: Ensure both devices are on the same Wi-Fi network.
  2. Download the App: Install the Roku app from the Google Play Store or Apple App Store.
  3. Open the App: Launch the Roku app and tap “Devices” at the bottom.
  4. Find Your TV: Wait for the app to detect your Insignia Roku TV. Select it.
  5. Connect and Control: Tap “Remote” to use the virtual remote for navigation.

Troubleshooting Tip: If the TV doesn’t appear, power cycle your TV and phone, then retry. Check our guide on fixing Roku app not finding device.

Using the Insignia TV Remote App (Non-Fire/Roku Models)

Some Insignia TVs don’t run Fire or Roku OS. For these, use the Insignia TV Remote app.

  1. Download the App: Get it from the Google Play Store or Apple App Store.
  2. Connect to Wi-Fi: Ensure both devices are on the same network.
  3. Pair the App: Open the app, select your TV, and follow pairing instructions.
  4. Control Your TV: Use buttons for power, volume, input, and more.

Note: Some user reviews mention ads or connectivity issues with this app. If it doesn’t work, try a universal remote app like Universal TV Remote Ricci

If you’re facing issues with your Insignia TV, see our guide on fixing Insignia TV won’t turn on.

Advanced Features of Smartphone Remote Apps

These apps offer more than basic controls:

  • Keyboard Input: Type search queries or login details easily.
  • Voice Control: Use voice commands on Fire TV or Google TV apps (e.g., “Play Netflix”).
  • App Shortcuts: Launch apps like YouTube or Netflix directly.
  • Screen Mirroring: Mirror your phone’s screen to the TV (supported on Fire TV and some Google TV models).

Learn how to connect Bluetooth devices to your Insignia TV for enhanced audio.

Troubleshooting Common Issues

  • TV Not Found: Ensure both devices are on the same Wi-Fi. Restart your router, TV, and phone.
  • Pairing Fails: Check TV settings for remote pairing options. Power cycle the TV.
  • App Crashes: Update the app to the latest version. Clear app cache via phone settings.
  • No IR Blaster: Most apps use Wi-Fi, but some (like Universal TV Remote) require an IR blaster. Check your phone’s specs.

For screen mirroring issues, see our guide on mirroring YouTube Music to your TV.

Alternatives to Smartphone Apps

If apps don’t work, try these:

  • Physical Buttons: Use buttons on the TV for basic controls (power, volume, input).
  • Universal Remote: Buy a universal remote ($8-20) and program it with Insignia codes.
  • Voice Assistants: Connect your TV to Alexa or Google Assistant for voice control.

Check how to connect your Insignia TV to Alexa.

People Also Ask

Can I use my phone as a remote without Wi-Fi?

Most apps require Wi-Fi. Some phones with IR blasters can use apps like Universal TV Remote without Wi-Fi.

What if my Insignia TV has no buttons?

Use a smartphone app or buy a universal remote. Some newer models lack physical buttons.

How do I fix a remote app not connecting?

Ensure same Wi-Fi network, restart devices, and update the app. Check TV’s network settings.

Can I screen mirror with these apps?

Yes, Fire TV and some Google TV apps support mirroring. Roku apps may not.

Conclusion

Using your smartphone as an Insignia TV remote is easy and free. Download the right app for your TV’s platform (Google TV, Fire TV, or Roku). Connect both devices to the same Wi-Fi and follow the pairing steps. These apps offer advanced features like voice control and screen mirroring. If you face issues, troubleshoot Wi-Fi or try alternatives like universal remotes. Share your tips or questions in the comments below!

How to Use Your Insignia Fire TV as an Extended Monitor

0
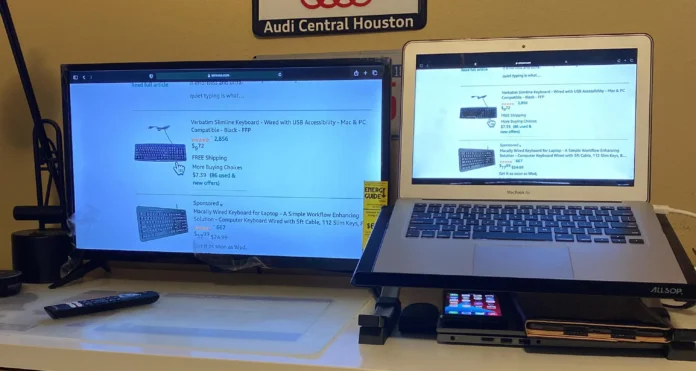
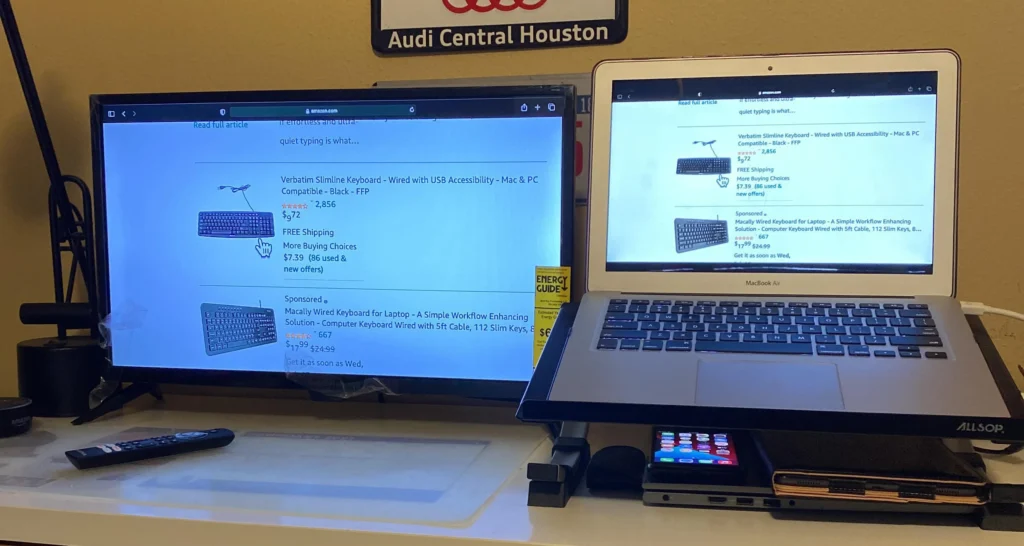
Insignia Fire TV as extended monitor with laptop

Using your Insignia Fire TV as an extended monitor can enhance your productivity by providing a larger screen for work, gaming, or presentations. This guide offers step-by-step instructions to connect your computer to your Insignia Fire TV using both wired and wireless methods. We’ll also cover how to optimize settings and troubleshoot common issues. Written in simple English, this post aims to help you set up your TV as a second monitor easily.

Why Use Your Insignia Fire TV as a Monitor?

An Insignia Fire TV can serve as a cost-effective alternative to a dedicated monitor. Its large screen size, often ranging from 24 to 65 inches, makes it ideal for multitasking, watching content, or gaming. Benefits include:

  • Larger Display: View more content at once, reducing the need to switch between windows.
  • Cost-Effective: TVs are often cheaper than monitors of similar size.
  • Versatility: Use it for work, entertainment, or creative tasks like graphic design.

However, there are some considerations. TVs may have higher input lag than monitors, which can affect responsiveness. Color accuracy might not match professional monitors, and ergonomic positioning is important to avoid strain.

Insignia Fire TV as extended monitor with laptop

Wired Connection via HDMI

The most reliable way to use your Insignia Fire TV as an extended monitor is through an HDMI cable. This method ensures minimal latency and works with both Windows and Mac computers.

For Windows PC

Follow these steps to connect your Windows PC to your Insignia Fire TV:

  1. Connect the HDMI Cable:
    • Plug one end of an HDMI cable into your computer’s HDMI port.
    • Plug the other end into an available HDMI port on your Insignia Fire TV. Note the port number (e.g., HDMI 1 or HDMI 2).
    • Use a high-quality HDMI cable, such as HDMI 2.0 for 4K at 60Hz, for best results.
  2. Select the HDMI Input on TV:
    • Turn on your Insignia Fire TV.
    • Press the Input button on your TV remote.
    • Choose the HDMI port you connected to (e.g., HDMI 1).
  3. Configure Display Settings:
    • On your Windows PC, right-click the Start menu and select Settings.
    • Go to System > Display.
    • Under Multiple displays, select Extend these displays to use the TV as an extended monitor.
    • Adjust the resolution to match your TV’s native resolution (e.g., 1920×1080 for 1080p or 3840×2160 for 4K).
  4. Fine-Tune Settings:
    • Set the refresh rate (usually 60Hz; some models support 120Hz).
    • Adjust scaling to make text and icons readable.
    • Arrange displays by dragging the monitor icons in the settings to match their physical positions.

For Mac

Here’s how to connect your Mac to your Insignia Fire TV:

  1. Connect the HDMI Cable:
    • Use an HDMI cable or an adapter (e.g., USB-C to HDMI for newer Macs).
    • Connect one end to your Mac and the other to an HDMI port on the TV.
  2. Select the HDMI Input on TV:
    • Turn on the TV and use the remote to select the correct HDMI input.
  3. Configure Display Settings:
    • Your Mac should automatically detect the TV and mirror the display.
    • Go to System Preferences > Displays > Arrangement tab.
    • Uncheck Mirror Displays to use the TV as an extended monitor.
    • Drag the display icons to arrange them according to their physical setup.
  4. Adjust Settings:
    • Set the resolution to match the TV’s native resolution.
    • Adjust color profiles or brightness for better visuals.

If you’re having trouble with your Insignia Fire TV’s remote, check out our guide on how to reset Insignia Fire TV remote.

Wireless Connection

Some Insignia Fire TVs support wireless display options like Miracast for Windows or AirPlay for Mac. These methods are convenient but may have slight delays, making them better for presentations than gaming.

For Windows PC (Miracast)

  1. Enable Display Mirroring on TV:
    • On your Insignia Fire TV, go to Settings > Display & Sounds > Enable Display Mirroring.
  2. Cast from PC:
    • On your Windows PC, press Win + K to open the Cast menu.
    • Select your Insignia Fire TV from the list.
    • The display may start in duplicate mode. To extend, click Change projection mode and select Extend.
  3. Ensure Connectivity:
    • Both devices must be on the same Wi-Fi network.
    • Some desktop PCs may require a Miracast-compatible dongle.

Note: Not all Insignia Fire TVs support Miracast, especially older models. Check your TV’s settings or manual to confirm.

For Mac (AirPlay)

  1. Enable AirPlay on TV:
    • Go to Settings > Display & Sounds > Apple AirPlay and HomeKit.
    • Turn on AirPlay. Not all models support AirPlay; verify compatibility on the Insignia support page.
  2. Screen Mirroring from Mac:
    • Open Control Center on your Mac and click Screen Mirroring.
    • Select your Insignia Fire TV.
    • To use as an extended display, go to System Preferences > Displays and select Extended display.
  3. Disconnecting:
    • Click Screen Mirroring in Control Center and select Stop Mirroring.

Optimizing Your Display Settings

To get the best performance from your Insignia Fire TV as a monitor, adjust these settings:

  • Resolution: Match your computer’s output to the TV’s native resolution (e.g., 1920×1080 for 1080p or 3840×2160 for 4K). This ensures sharp visuals.
  • Refresh Rate: Most TVs use 60Hz. Some newer models support 120Hz for smoother motion. Check your TV’s specs.
  • Game Mode: Enable Game Mode in the TV’s picture settings to reduce input lag, which is the delay between your actions and the screen’s response. This is crucial for gaming or fast-paced tasks.
  • Color and Brightness: Adjust brightness and contrast for clarity. For graphic design, calibrate colors using your computer’s display settings or an external colorimeter for accuracy.
  • Ergonomics: Position the TV at eye level to avoid neck strain. Consider a TV mount for flexibility.

For more on adjusting your TV’s display, see our guide on how to change resolution on Vizio TV.

For detailed display settings on Windows, visit Microsoft’s display settings guide.

Troubleshooting Common Issues

If you encounter problems, try these solutions:

  • No Signal on TV:
    • Ensure the HDMI cable is securely connected.
    • Try a different HDMI port or cable.
    • Restart both the TV and the computer.
  • Display Not Extending:
    • Check your computer’s display settings and select “Extend these displays.”
    • Update your graphics drivers.
  • Wireless Connection Fails:
    • Confirm both devices are on the same Wi-Fi network.
    • Verify your TV supports Miracast or AirPlay.
    • Restart your router and devices.
  • Lag or Poor Performance:
    • Switch to a wired HDMI connection for better reliability.
    • Enable Game Mode to reduce input lag.

If your Insignia Fire TV won’t turn on, check our guide on fixing Insignia TV won’t turn on.

Specific Use Cases

  • Home Office: Use the large screen for multitasking or presentations. Position the TV ergonomically and adjust scaling for readable text.
  • Gaming: Enable Game Mode and check for Variable Refresh Rate (VRR) support like FreeSync for smoother gameplay. Use HDMI for minimal lag.
  • Graphic Design: Calibrate colors for accuracy. A dedicated monitor may offer better color precision, but a TV can work with proper settings.

FAQs

Can I use my Insignia Fire TV as a second monitor?

Yes, connect via HDMI or wirelessly and set your computer to extend the display.

What’s the best connection for gaming?

An HDMI connection with Game Mode enabled provides the lowest input lag.

Can I control my computer with the TV remote?

No, the TV remote only controls TV functions. Use a wireless keyboard and mouse for convenience.

Does wireless connection work as well as HDMI?

Wireless options like Miracast or AirPlay are convenient but may have slight delays. HDMI is more reliable.

What resolution should I use?

Match your TV’s native resolution (e.g., 1080p or 4K) for the best image quality.

Table: Connection Methods Comparison

MethodProsConsBest For
HDMI (Wired)Reliable, minimal latency, high qualityRequires cable, less flexibleGaming, graphic design, work
Miracast (Wireless)Cable-free, easy setupPossible lag, Wi-Fi dependentPresentations, casual use
AirPlay (Wireless)Convenient for Mac usersLimited to AirPlay-compatible TVsMac users, casual use

How to Fix Home Button Not Working on Samsung TVs

0
Samsung TV and remote with home button fix text.
Samsung TV home button repair guide.

Is your Samsung TV’s home button not working? This can be frustrating. You might not be able to access apps or settings. The home button is key to using your smart TV’s features. But don’t worry. This guide provides clear, step-by-step solutions to fix the issue. We’ve researched top sources to ensure these tips are up-to-date and effective for 2025.

Understanding the Problem

The home button on your Samsung TV remote opens the smart hub. This is where you find apps like YouTube or Netflix and adjust settings. If the button doesn’t work, you’re stuck. The issue could be with the remote or the TV itself. Knowing the cause helps you fix it faster.

Common Causes

Several things might stop the home button from working:

  • Low or dead batteries: Weak batteries can affect remote functions.
  • Dirty or faulty remote: Dirt or damage might block the button.
  • Software glitches: TV software bugs can disrupt remote commands.
  • Wrong settings: Some TV settings may interfere with the button.
  • Signal interference: Objects or devices might block the remote’s signal.
  • IR or Bluetooth issues: Basic remotes use infrared (IR); smart remotes use Bluetooth, which can fail.
  • Hardware issues: Rarely, the TV or remote might have a physical problem.

Troubleshooting Steps

Follow these steps to fix the home button. Start with simple solutions. Move to advanced ones if needed.

Check the Remote Batteries

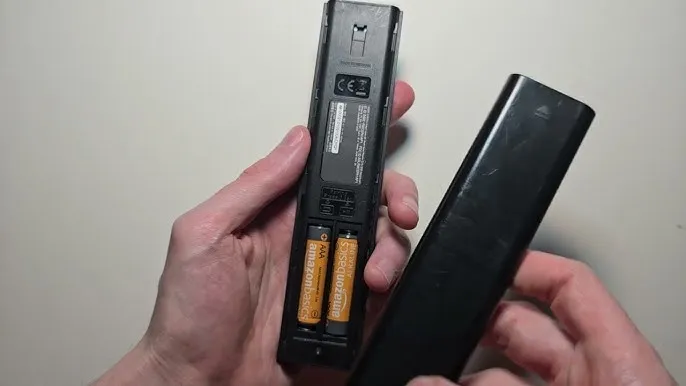
Weak batteries can cause issues. Replace them with fresh ones. Ensure they’re inserted correctly, matching the positive and negative signs.

Samsung TV remote with battery compartment open.
Inserting new batteries in a Samsung TV remote.

Clean the Remote

Dirt or grease can block buttons. Wipe the remote with a dry, soft cloth. Focus on the home button. Avoid liquids to prevent damage.

Test the IR Emitter (for Basic Remotes)

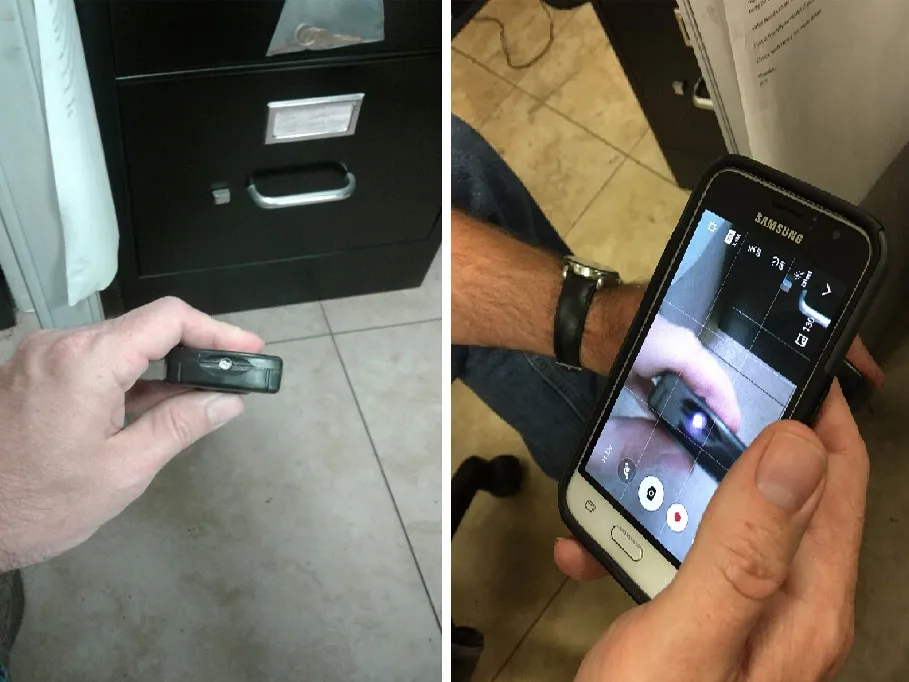
If your remote uses infrared (IR), check if it’s sending a signal. Use a smartphone camera:

  1. Open your phone’s camera app.
  2. Point the remote at the camera.
  3. Press the home button.
  4. Look for a flashing light on the camera screen.

If you see no light, the remote might be faulty. Try new batteries first.

Checking Samsung TV remote IR signal with phone camera.
Testing a Samsung remote’s IR signal with a smartphone.

Reset the Remote

Resetting can fix remote issues. The method depends on your remote type:

  • Basic Remote:
    1. Remove the batteries.
    2. Press any button for 20 seconds to discharge power.
    3. Reinsert the batteries.
    4. Test the home button.
  • Smart Remote:
    1. Press and hold the Return and Enter buttons for 10 seconds.
    2. Follow your TV’s pairing instructions (usually press Back and Play/Pause together).
    3. Test the home button.

Power Cycle the TV

A power cycle can clear software glitches. Follow these steps:

  1. Unplug the TV from the power outlet.
  2. Wait 1-2 minutes.
  3. Plug it back in and turn on the TV.
  4. Test the home button.

Tip: Press and hold the TV’s power button for 10 seconds while unplugged to discharge residual power. If your TV has other issues, like turning on and off by itself, see our guide on Fix Samsung TV Turning On and Off.

Update the TV Software

Outdated software can cause issues. Update your TV’s firmware:

  1. Go to Settings > Support > Software Update > Update Now.
  2. If you can’t access settings, use the TV’s physical buttons or a smartphone app.
  3. Follow the prompts to install updates.

Check Samsung’s official site for the latest firmware or visit Update Samsung TV Firmware: Guide for All Models.

Factory Reset the TV

A factory reset fixes persistent software issues but erases all settings and apps. Back up any important data first.

  1. Go to Settings > General > Reset.
  2. Enter the PIN (default is 0000).
  3. Follow the prompts to reset.
  4. Set up the TV again and test the home button.

Disconnect External Devices

Connected devices like streaming boxes or gaming consoles might interfere. Unplug all external devices. Test the home button. Reconnect devices one by one to identify any issues.

Use the Ambient Mode Trick

Some users found this trick works on certain Samsung TVs:

  1. Press the Ambient Mode button on the remote.
  2. Cancel the mode to see if the home screen appears.
  3. Test the home button.

This may not work on all models.

Check for Obstructions

Ensure nothing blocks the remote’s signal:

  • For basic remotes, clear the path to the TV’s IR sensor (usually near the Samsung logo).
  • For smart remotes, avoid devices that might interfere with Bluetooth, like wireless routers.

Pair the Smart Remote Again

If you have a smart remote, re-pair it:

  1. Point the remote at the TV.
  2. Press and hold Back and Play/Pause buttons together until a pairing message appears.
  3. Follow the on-screen instructions.
  4. Test the home button.

Alternative Methods

If the home button still doesn’t work, try these options:

Using a Smartphone App

Use a smartphone app to control your TV:

  1. Download the SmartThings app.
  2. Sign in with your Samsung account.
  3. Connect to your TV (must be on the same Wi-Fi network).
  4. Use the app’s virtual remote to access the home screen.

Using the TV’s Physical Buttons

Most Samsung TVs have physical buttons or a control stick:

  1. Find the buttons (usually on the back or bottom of the TV).
  2. Use them to navigate to the home screen or settings.
  3. Check your TV’s manual for exact button locations.

When to Seek Professional Help

If none of these steps work, the issue might be a hardware problem with the remote or TV. Contact Samsung support or a professional technician. Check your TV’s warranty for possible free repairs.

Conclusion

Fixing a Samsung TV home button is often simple. Start with checking batteries and cleaning the remote. Then try resetting, power cycling, or updating the TV. If those fail, use a smartphone app or physical buttons. For persistent issues, professional help may be needed. Try these steps and get back to enjoying your TV.

FAQ

Why is only the home button not working on my Samsung TV remote?

It might be a specific button issue or a software glitch. Reset the remote or power cycle the TV to fix it.

How can I access settings without the home button?

Use the TV’s physical buttons or the SmartThings app to navigate to settings.

How do I reset my Samsung TV remote?

For basic remotes, remove batteries and press a button for 20 seconds. For smart remotes, press Return and Enter for 10 seconds.

What if my remote isn’t sending an IR signal?

Check the batteries. If they’re fine, the remote may need replacement.

Can I use a universal remote instead?

Yes, but ensure it’s programmed correctly for Samsung TVs. Some features may not work.

How to Connect Earbuds to Your TV: Easy Steps

0
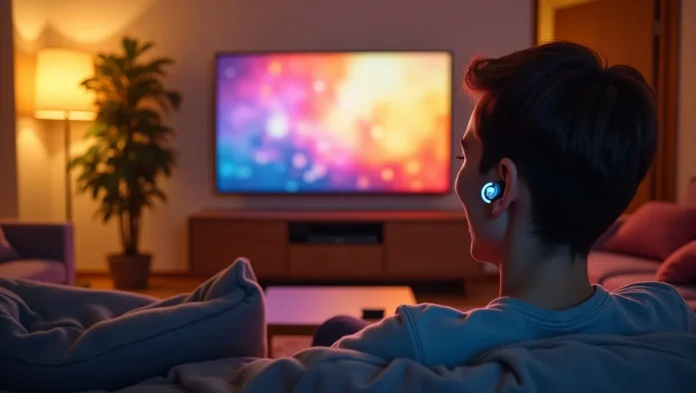
Person watching TV with wireless earbuds.
Enjoy TV audio with wireless earbuds.

Watching TV with earbuds can make your experience more personal and immersive. You can enjoy movies, shows, or games without disturbing others. Earbuds are great for late-night viewing, small spaces, or if you’re hard of hearing. This guide explains how to connect both wireless and wired earbuds to your TV. We’ll cover multiple methods, troubleshooting tips, and special cases to ensure you get the best audio experience.

Why Connect Earbuds to Your TV?

Using earbuds with your TV has many benefits:

  • Privacy: Watch TV without disturbing others in the room.
  • Better Sound: Earbuds can offer clearer audio than some TV speakers.
  • Custom Volume: Adjust the volume to your liking, especially helpful for hearing difficulties.
  • Flexibility: Use earbuds in small spaces where external speakers are impractical.

Before you start, check your TV’s audio output options. Most modern TVs have Bluetooth, while older models may have a 3.5mm headphone jack, RCA, or optical ports. Knowing your TV’s capabilities will help you choose the right method.

Connecting Wireless Earbuds

Most modern earbuds are wireless and use Bluetooth. Here are the main ways to connect them to your TV.

Via Bluetooth (If Your TV Supports It)

Many smart TVs have built-in Bluetooth, making it easy to connect wireless earbuds. To check if your TV has Bluetooth, look in the settings under “Sound” or “Connections” or check the user manual.

Steps to Connect:

  1. Put your earbuds in pairing mode. Press and hold the pairing button until a light flashes. Check your earbuds’ manual for specific instructions.
  2. Enable Bluetooth on your TV. Go to the TV’s settings menu, find “Bluetooth” or “Wireless Connections,” and turn it on.
  3. Search for devices. Select “Pair new device” or a similar option.
  4. Select your earbuds. When your earbuds appear in the list, choose them to pair.
  5. Set audio output. Some TVs require you to select “Headphones” or “Bluetooth” as the audio output in the sound settings.
  6. Adjust volume. Use the TV remote or earbuds’ controls to set the volume.

Tips:

  • Ensure your earbuds are charged and within 30 feet of the TV.
  • Avoid interference from other devices like Wi-Fi routers or cordless phones.
  • Some TVs support advanced Bluetooth codecs like aptX for better sound quality and lower latency.

Using a Bluetooth Transmitter (If TV Lacks Bluetooth)

If your TV doesn’t have Bluetooth, a Bluetooth transmitter can send audio to your wireless earbuds. These devices plug into your TV’s audio output and are affordable, typically costing $20-$50.

Steps to Connect:

  1. Check your TV’s audio ports. Look for 3.5mm, RCA, or optical (TOSLINK) outputs on the back of your TV.
  2. Choose a compatible transmitter. Select one that matches your TV’s ports. Optical connections offer the best audio quality.
  3. Connect the transmitter. Plug it into the TV’s audio output port. If it needs power, connect it to a USB port or power adapter.
  4. Put the transmitter in pairing mode. Follow the transmitter’s instructions, usually indicated by a flashing light.
  5. Pair your earbuds. Put your earbuds in pairing mode and connect them to the transmitter.
  6. Set TV audio output. In the TV’s sound settings, select the port you’re using (e.g., “Headphones” or “External Audio”).

Tips:

  • Choose a transmitter with low-latency support (e.g., aptX Low Latency) to reduce audio delay, especially for movies or gaming.
  • Ensure the transmitter is close to the TV to avoid signal issues.

Using Media Streamers

If you use a media streamer like Apple TV, Chromecast, or Amazon Fire TV Stick, you can connect your earbuds to the streamer instead of the TV. Most streamers support Bluetooth.

Steps for Apple TV:

  1. Go to Settings > Remotes and Devices > Bluetooth.
  2. Put your earbuds in pairing mode.
  3. Select your earbuds from the list to pair.

Steps for Amazon Fire TV:

  1. Go to Settings > Controllers & Bluetooth Devices > Other Devices > Add New Device.
  2. Pair your earbuds when they appear.

Steps for Chromecast with Google TV:

  1. Go to Settings > Remote & Accessories > Add Accessory.
  2. Pair your earbuds as prompted.

For other streamers, check the user manual for Bluetooth pairing instructions. For more on using streaming devices, see our guide on How to Use Amazon Fire TV Without Remote.

Connecting Wired Earbuds

Wired earbuds are simple to connect if your TV has a 3.5mm headphone jack. If not, you may need an adapter.

Steps for 3.5mm Jack:

  1. Find the headphone jack. It’s usually on the side or back of the TV, labeled “Headphones.”
  2. Plug in your earbuds. Insert the 3.5mm plug into the jack.
  3. Set audio output. In the TV’s sound settings, select “Headphones” if needed.
  4. Adjust volume. Use the TV remote to control the volume.

Steps for RCA Outputs:

  1. Check for RCA ports. These are red and white audio outputs on the TV.
  2. Use an RCA-to-3.5mm adapter. Connect the adapter to the RCA ports.
  3. Plug in your earbuds. Insert the earbuds’ plug into the adapter’s 3.5mm jack.
  4. Set audio output. Ensure the TV is set to output audio to the RCA ports.

Tips:

  • Use earbuds with a long cable for comfort, as you’ll be tethered to the TV.
  • Be cautious of tripping hazards with long cables.

Special Cases

Some situations require extra steps or specific TV features.

Connecting Multiple Pairs of Earbuds

Certain TVs, like some Samsung models, support connecting multiple Bluetooth devices at once. Check your TV’s manual or settings for “Multi Connect” or “Dual Audio” options.

Steps:

  1. Go to the TV’s Bluetooth settings.
  2. Pair the first pair of earbuds.
  3. Look for an option to add another device and pair the second pair.

Some Bluetooth transmitters also support multiple connections. Check the transmitter’s specifications before purchasing.

For brand-specific guidance, see our guide on Connecting Bluetooth Devices to Insignia TV.

Using Earbuds and TV Speakers Simultaneously

Some TVs allow audio output to both earbuds and speakers, which is useful if others in the room want to hear the TV. This feature varies by model.

Steps:

  1. Go to the TV’s audio settings.
  2. Look for “Audio Output” or “Sound Mode.”
  3. Check for an option to enable both speakers and headphones.

If your TV doesn’t support this, some dedicated TV headphones with a base station may allow simultaneous audio output. Check your TV’s manual for details.

Brand-Specific Instructions

Different TV brands have unique settings for connecting earbuds:

  • Samsung TVs: Go to Menu > Sound > Sound Output > Bluetooth Speaker List.
  • LG TVs: Navigate to Settings > Sound > Sound Out > Use Wireless Speaker.
  • Sony TVs: Press Home, then go to Settings > Bluetooth Settings.

For other brands, consult the user manual or manufacturer’s website. For Vizio TV troubleshooting, see our guide on How to Reset Vizio TV.

Troubleshooting Common Issues

If your earbuds don’t connect or produce sound, try these fixes:

  • Check earbud battery. Ensure wireless earbuds are charged.
  • Verify pairing mode. Confirm both earbuds and TV/transmitter are in pairing mode.
  • Reduce interference. Move closer to the TV and avoid obstacles like walls or other devices.
  • Update TV firmware. Check for software updates in the TV’s settings.
  • Set correct audio output. Ensure the TV is set to output audio to Bluetooth or the correct port.
  • Restart devices. Turn off and on both the TV and earbuds, then try pairing again.
  • Check cable connections. For wired earbuds, ensure plugs are secure.

For additional TV audio troubleshooting, see our guide on Fixing TV No Picture.

FAQ

Can I connect Bluetooth earbuds to my TV?

Yes, if your TV has Bluetooth. Check the settings or manual to confirm.

What if my TV doesn’t have Bluetooth?

Use a Bluetooth transmitter plugged into the TV’s audio output.

Can I connect wired earbuds to my TV?

Yes, if your TV has a 3.5mm jack or RCA ports with an adapter.

How do I connect multiple pairs of earbuds?

Some TVs or transmitters support multiple Bluetooth connections. Check for “Multi Connect” options.

Can I use earbuds and TV speakers at the same time?

Some TVs support dual audio output. Check your TV’s audio settings.

Here are answers to common questions about connecting earbuds to your TV:

Conclusion

    Connecting earbuds to your TV is a simple way to enjoy a personalized audio experience. Whether you use Bluetooth, a transmitter, or a wired connection, this guide provides all the steps you need. Try these methods and enjoy your favorite content without disturbing others. If you run into issues, our troubleshooting tips and related guides can help. Have questions? Leave a comment below!

    Related Posts:

    How to Change Resolution on Vizio TV: A Simple Guide

    0
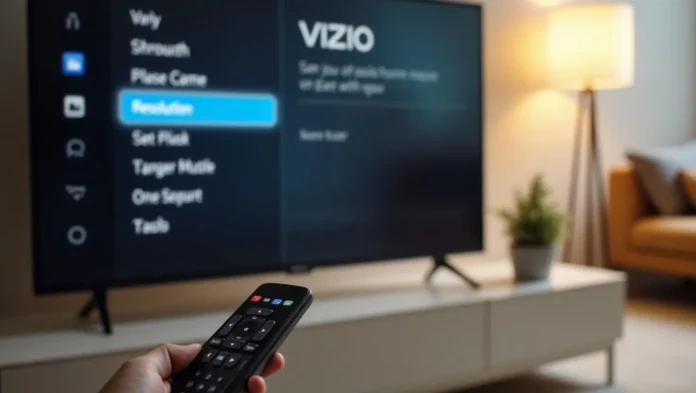
    Vizio TV with resolution menu and remote
    Vizio TV displaying resolution settings

    Want to improve your Vizio TV’s picture quality? Changing the resolution can help. Resolution is the number of pixels that make up the image on your screen. More pixels mean a sharper picture. This TW guide will show you how to adjust the resolution on your Vizio TV, step by step. You’ll also find tips to fix common issues and get the best display for movies, games, or shows.

    What Is Resolution and Why Change It?

    Resolution is how many pixels your TV uses to create an image. Common options include 720p (1280×720 pixels), 1080p (1920×1080 pixels), and 4K (3840×2160 pixels). Higher numbers give clearer images. You might want to change it to match your content or fix a blurry screen.

    Aspect ratio is different. It’s the shape of the image, like 16:9 (widescreen) or 4:3 (square). Resolution affects detail, while aspect ratio affects how the image fits. Both can be adjusted on a Vizio TV.

    How to Check Your Current Resolution

    Before changing anything, see what resolution your TV uses now. Here’s how:

    1. Pick up your Vizio remote.
    2. Press the Info button.
    3. Look for a box on the screen showing the resolution, like “1080p” or “720p.”

    If it’s not what you want, keep reading to adjust it.

    Vizio TV remote showing Info button
    Vizio remote with Info button highlighted

    Steps to Change Resolution on Your Vizio TV

    Most Vizio TVs let you adjust resolution through the settings menu. Follow these steps:

    1. Press the Menu button on your remote.
    2. Use the arrow keys to find Picture or Display.
    3. Select TV Resolution or Resolution.
    4. Pick a resolution, like 720p, 1080p, or 4K (if your TV supports it).
    5. Press OK to save the change.

    Note: Menu names can differ by model. If you don’t see “Resolution,” check your TV’s manual or the Vizio support page.

    Not all Vizio TVs let you change resolution manually. Some adjust it based on the input signal, like from a cable box or streaming device. If options are locked, try the troubleshooting section below.

    Changing Resolution for Different Devices

    Using a gaming console or streaming device? The resolution might depend on the device, not just the TV. Here’s what to do:

    • Gaming Consoles: Set the console’s output to match your TV. For example, on a PlayStation, go to Settings > Display. Then check the TV settings too.
    • Streaming Devices (Roku, Fire Stick): Adjust the device’s display settings. On Roku, go to Settings > Display Type.

    To switch inputs on your Vizio TV:

    1. Press the Input button on your remote.
    2. Choose the input, like HDMI 1 or HDMI 2.
    3. Adjust the resolution for that input if needed.

    Fixing Common Resolution Problems

    Sometimes, changing the resolution doesn’t go smoothly. Here are fixes for common issues:

    • Options Are Grayed Out: The TV might be auto-adjusting to the input. Go to Settings > System > Aspect Ratio and pick a manual mode like “Normal.”
    • Picture Looks Stretched: This is an aspect ratio issue. Go to Settings > Picture > Aspect Ratio and try “Wide” or “Normal.”
    • “Resolution Not Supported” Message: The input resolution doesn’t match your TV. Lower the resolution on your device or TV.

    If nothing works, reset your TV:

    1. Press Menu.
    2. Go to System > Reset & Admin > Reset TV to Factory Defaults.
    3. Follow the prompts.

    This clears all settings, so you’ll need to set it up again.

    Tips for Better Picture Quality

    Resolution isn’t the only setting that matters. Try these adjustments:

    • Picture Modes: Choose from Standard, Vivid, or Game Mode. Game Mode helps with gaming by cutting lag.
    • Brightness: Increase it for bright rooms, lower it for dark ones.
    • Sharpness: Raise it for clearer edges, but not too much, or it looks fake.

    Find these in Settings > Picture. Test different settings to see what looks best.

    Answers to Common Questions

    Here are quick answers to questions people ask:

    Why Can’t I Change My Vizio TV Resolution?

    The TV might be locked to the input signal. Check your device’s settings or switch to a manual mode in the TV menu.

    What’s the Best Resolution for My Vizio TV?

    It depends on your TV and content. Use 1080p for most shows or 4K if your TV supports it. Check your model’s specs.

    How Do I Fix a Blurry Vizio TV Screen?

    Set the resolution to match your content. Also, tweak sharpness in Settings > Picture.

    Can I Change Resolution Without a Remote?

    Yes, use the Vizio SmartCast app on your phone. It may let you adjust settings, depending on your model.

    For more Vizio tips, see “How to Fix Vizio TV Not Connecting to WiFi” with anchor text “fix Vizio TV WiFi issues.”

    Final Thoughts

    Adjusting the resolution on your Vizio TV is simple once you know the steps. It can make your picture sharper and better suited to what you’re watching. Use this guide to change settings, fix problems, and get the most out of your TV. Try different options to find what works for you.

    For more help with your Vizio TV, check out our posts on How to Update Vizio TV Firmware and How to Get Vizio TV Out of Setup Demo Mode.

    How the Amazon Fire TV Stick Works: A Simple Guide

    0
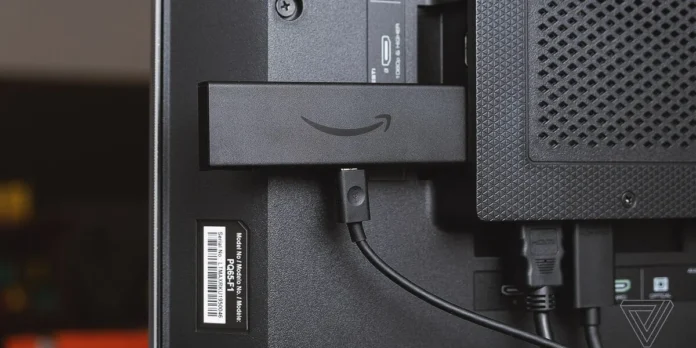
    Amazon Fire TV Stick connected to TV
    Setting up your Fire TV Stick

    The Amazon Fire TV Stick turns any TV with an HDMI port into a smart TV. It’s a small device that streams movies, shows, music, and more using your Wi-Fi connection. This guide explains how it works, how to set it up, and what you can do with it. Whether you’re new to streaming or upgrading your setup, we’ll cover everything you need to know in clear, simple steps.

    What Is the Amazon Fire TV Stick?

    The Amazon Fire TV Stick is a compact streaming device. It plugs into your TV’s HDMI port and connects to the internet to deliver content. You can watch movies, TV shows, live TV, and music from apps like Netflix, Prime Video, and Disney+. It also supports games and smart home control through Alexa.

    Key Features of the Fire TV Stick

    • Streaming Apps: Access over 1.5 million movies and shows from platforms like Netflix, Hulu, and YouTube.
    • Alexa Voice Control: Use the included remote to search for content or control smart home devices with voice commands.
    • Portable Design: Small enough to fit in your pocket, it works on any TV with an HDMI port.
    • Affordable Models: Options range from the Fire TV Stick Lite ($29.99) to the Fire TV Stick 4K Max ($59.99).
    Amazon Fire TV Stick connected to TV
    Setting up your Fire TV Stick

    How Does the Amazon Fire TV Stick Work?

    The Fire TV Stick uses your Wi-Fi to stream content from the internet to your TV. It runs on Fire OS, a version of Android, which supports thousands of apps. You control it with a remote, voice commands, or a smartphone app. Here’s how it delivers entertainment:

    1. Connects to Your TV: Plugs into an HDMI port and draws power from a USB cable or power adapter.
    2. Streams Content: Downloads and plays videos, music, or games from apps over Wi-Fi.
    3. Alexa Integration: The remote’s microphone lets you search for shows or control devices like lights or cameras.
    4. User Profiles: Create up to six profiles for personalized recommendations and watchlists.

    Learn how to fix common Fire TV Stick issues like a black screen if you run into problems.

    Setting Up Your Amazon Fire TV Stick

    Setting up the Fire TV Stick is quick and straightforward. Follow these steps to get started:

    1. Plug It In: Insert the Fire TV Stick into your TV’s HDMI port. Use the included HDMI extender if the port is hard to reach. Connect the power adapter to a wall outlet or USB port.
    2. Connect to Wi-Fi: Select your Wi-Fi network on the TV screen and enter the password.
    3. Sign In: Log in to your Amazon account or create one. If bought from Amazon, it’s pre-registered.
    4. Pair the Remote: Insert batteries and press the home button to pair it with the TV.
    5. Download Apps: Choose apps like Netflix or Prime Video from the home screen. Sign in to each app with your credentials.

    If you lose your remote, check out how to use your Fire TV Stick without a remote.

    What Can You Do with the Fire TV Stick?

    The Fire TV Stick offers more than just streaming. Here are its main uses:

    • Watch Movies and Shows: Stream from paid apps like Netflix or free apps like Pluto TV and Freevee.
    • Listen to Music: Use apps like Spotify, Amazon Music, or Pandora for music and playlists.
    • Play Games: Download games like Minecraft or use cloud gaming with Amazon Luna or Xbox Game Pass.
    • Control Smart Devices: Use Alexa to manage lights, thermostats, or security cameras.
    • Browse the Web: Use browsers like Silk or Firefox to surf the internet.
    • Live TV: Access live channels like BBC or ITV through the TV guide.

    For a full list of apps, visit Amazon’s Fire TV Appstore.

    Which Fire TV Stick Model Should You Choose?

    Amazon offers several Fire TV Stick models. Each suits different needs and budgets:

    • Fire TV Stick Lite ($29.99): Streams in 1080p. Basic remote without TV controls. Best for budget users.
    • Fire TV Stick HD ($39.99): 1080p streaming with Dolby Atmos and a remote with TV controls.
    • Fire TV Stick 4K ($49.99): Supports 4K, HDR10+, and Dolby Vision. Ideal for 4K TVs.
    • Fire TV Stick 4K Max ($59.99): Adds Wi-Fi 6 and 16GB storage. Best for high-performance streaming.

    Tips for Getting the Most Out of Your Fire TV Stick

    Maximize your experience with these practical tips:

    • Connect Bluetooth Devices: Pair headphones or speakers for private listening. Go to Settings > Controllers and Bluetooth Devices > Other Devices > Add Bluetooth Device.
    • Set Parental Controls: Restrict content with a PIN. Navigate to Settings > Preferences > Parental Controls.
    • Monitor Data Usage: Set data limits in Settings to avoid overusing your internet plan.
    • Use a Mobile Hotspot: Connect to your phone’s hotspot for streaming on the go.
    • Update Firmware: Keep your device updated for better performance. Check for updates in Settings > My Fire TV > About.

    Want to connect Bluetooth headphones? See how to connect Bluetooth devices to your Insignia TV for similar steps.

    Common Questions About the Amazon Fire TV Stick

    Do You Need an Amazon Account to Use It?

    Yes, an Amazon account is required to set up and use the Fire TV Stick. It links to your apps and Prime Video content.

    Can You Use It Without Internet?

    Limited features like local media playback work offline, but streaming requires Wi-Fi. Learn more in how to use your Fire TV Stick without internet.

    Is There a Monthly Fee?

    No monthly fee for the device, but streaming services like Netflix may require subscriptions.

    Can It Replace Cable TV?

    Yes, with apps like Hulu and YouTube TV, it can replace cable for many users.

    Why Choose the Amazon Fire TV Stick?

    The Fire TV Stick is affordable, easy to use, and packed with features. It’s perfect for upgrading older TVs or simplifying your streaming setup. With Alexa, thousands of apps, and support for 4K streaming, it’s a versatile choice for any home.

    How to Reset Your Insignia Fire TV: A Step-by-Step Guide

    0
    Insignia Fire TV reset guide thumbnail
    Resetting Insignia Fire TV

    If your Insignia Fire TV is acting up—freezing, crashing apps, or refusing to connect to Wi-Fi—a reset might be the fix you need. This guide walks you through the steps to perform a soft reset or factory reset, with or without a remote. We’ve gathered the latest information from trusted sources to ensure you can troubleshoot effectively. Whether you’re preparing to sell your TV or fixing a glitch, these steps should help.

    Why You Might Need to Reset Your Insignia Fire TV

    Resetting your Insignia Fire TV can resolve many common issues. You may need to reset if:

    • The TV freezes or becomes unresponsive.
    • Apps crash or fail to load.
    • Wi-Fi or network connectivity issues persist.
    • The TV is stuck on a setup screen, like language selection.
    • You’re selling or giving away the TV and want to erase personal data.

    Before resetting, try basic troubleshooting like checking your internet connection or updating the firmware. For more tips, see our guide on Fixing Insignia TV Won’t Turn On.

    Understanding Soft Reset vs. Factory Reset

    There are two types of resets for your Insignia Fire TV:

    • Soft Reset: A simple restart that doesn’t delete data or settings. It’s like rebooting a computer and is ideal for minor issues like temporary freezes.
    • Factory Reset: Restores the TV to its original settings, erasing all apps, accounts, and personal data. Use this for persistent problems or when preparing the TV for a new owner.
    Reset TypeData LossBest ForTime Required
    Soft ResetNoneMinor glitches, freezing1-2 minutes
    Factory ResetAll data, apps, settingsMajor issues, selling TV5-10 minutes

    Note: A factory reset will remove all installed apps and account information, so note any important settings before proceeding.

    How to Perform a Soft Reset on Insignia Fire TV

    A soft reset is the first step to fix minor issues. Here are two methods:

    Method 1: Using the Remote

    1. Press and hold the Power button on your Insignia Fire TV remote until the TV restarts (about 10 seconds).
    2. Wait for the TV to turn back on.

    Method 2: Unplugging the TV

    1. Turn off the TV using the remote or the TV’s power button.
    2. Unplug the TV from the power outlet.
    3. Wait at least 60 seconds to clear the system cache.
    4. Plug the TV back in and turn it on.

    This method clears temporary glitches without affecting your settings. If the issue persists, try a factory reset.

    Insignia Fire TV remote control
    Insignia Fire TV Remote

    How to Perform a Factory Reset with a Remote

    For more serious issues, a factory reset using the remote is straightforward:

    1. Press the Home button to access the main screen.
    2. Navigate to Settings (gear icon) using the remote.
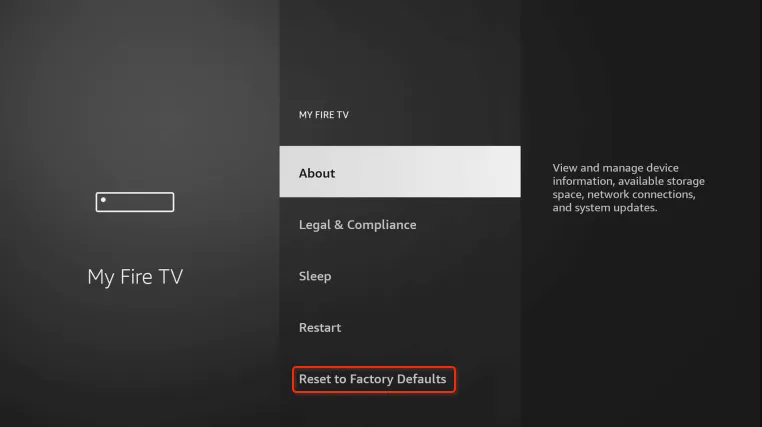
    3. Select My Fire TV from the menu.
    4. Scroll to Reset to Factory Defaults.
    5. Confirm the reset by selecting Reset.
    6. Wait for the TV to complete the process and restart.

    After the reset, the TV will display setup instructions, including pairing the remote and connecting to Wi-Fi. You’ll need to sign into your Amazon account and reinstall apps.

    Fire TV settings menu for factory reset
    Fire TV settings menu for factory reset

    How to Perform a Factory Reset without a Remote

    If you’ve lost your remote or it’s not working, you can still reset your TV using its physical buttons:

    1. Unplug the TV from the power outlet.
    2. Locate the Power button on the TV (usually on the side or bottom; check your user manual if unsure).
    3. Press and hold the Power button.
    4. While holding, plug the TV back into the power outlet.
    5. Release the Power button when the Insignia logo or recovery menu appears.
    6. Use the TV’s navigation buttons to select Wipe Data/Factory Reset.
    7. Press the Power button to confirm.
    8. Select Yes to proceed with the reset.
    9. Hold the Power button until the confirmation message appears.
    10. Choose Reboot System to restart the TV.

    Note: Button locations vary by model. If you can’t find the power button, refer to your TV’s manual, available on the Insignia Support Page.

    Troubleshooting Common Reset Issues

    Sometimes, resetting doesn’t go as planned. Here are solutions for common problems:

    • TV Stuck on Language Selection Screen: If the TV is stuck after a reset, try a soft reset by unplugging it for 60 seconds. Alternatively, press the Home button on the remote to proceed. See more tips in our Fix Insignia TV Won’t Turn On guide.
    • Remote Not Pairing After Reset: Follow on-screen instructions to pair the remote. If it fails, reset the remote by holding the Left, Menu, and Back buttons for 15 seconds, then reinsert batteries and press Home. Learn more at Amazon Fire TV Support.
    • TV Keeps Restarting: This could indicate a hardware issue. Perform a factory reset, and if the problem persists, contact Insignia Support.

    If issues continue, consider using the Insignia TV Remote App to control your TV.

    Frequently Asked Questions

    Will a factory reset delete all my apps and settings?

    Yes, a factory reset removes all apps, settings, and personal data, restoring the TV to its original state.

    Can I reset my Insignia Fire TV without a remote?

    Yes, use the TV’s physical buttons as described in the “Factory Reset without a Remote” section.

    What if my TV is stuck after a reset?

    Try a soft reset by unplugging the TV for 60 seconds. If the issue persists, contact Insignia Support.

    How do I pair my remote after a factory reset?

    Follow the on-screen instructions after the reset. If pairing fails, reset the remote using the steps in the troubleshooting section.

    What’s the difference between a soft reset and a factory reset?

    A soft reset restarts the TV without data loss, while a factory reset erases everything and restores default settings.

    Conclusion

    Resetting your Insignia Fire TV can resolve many issues, from minor glitches to major connectivity problems. A soft reset is quick and safe, while a factory reset is a last resort for persistent issues or when preparing the TV for a new owner. Always try a soft reset first, and back up important settings before a factory reset. For further help, visit the Insignia Support Page or explore related guides on Soft4led, such as Connecting Bluetooth Devices to Insignia TV.

    How to Turn On Your Toshiba TV Without a Remote

    0
    Thumbnail showing a Toshiba TV and smartphone with control app.
    Turning on a Toshiba TV without a remote.

    Losing your TV remote or having it stop working can be a hassle. Fortunately, there are several ways to turn on your Toshiba TV without the original remote. This guide provides step-by-step instructions to help you get your TV back on using methods like the physical power button, a smartphone app, a universal remote, or even voice control for some models. We’ve also included troubleshooting tips and answers to common questions to ensure you have all the information you need.

    Why You Might Need to Turn On Your Toshiba TV Without a Remote

    Remotes get lost, batteries die, or the remote might break. In these cases, you need alternative ways to power on your Toshiba TV. Whether you have a smart TV or an older model, this article covers reliable methods to get your TV working again. Each method is explained in simple steps, and we’ve included images to guide you.

    Method 1: Using the Physical Power Button

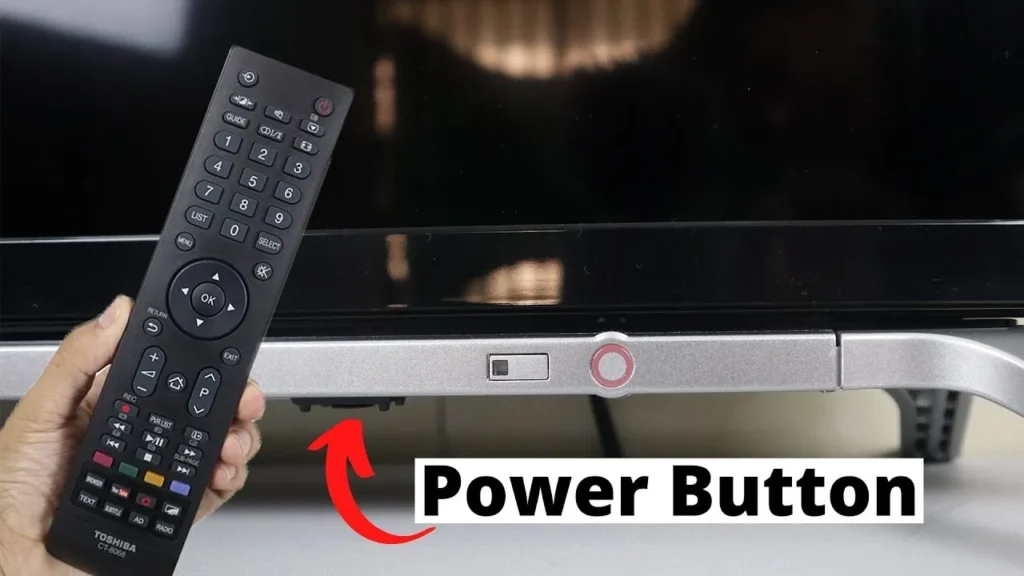
    Most Toshiba TVs have a physical power button located on the TV itself. The button’s position depends on the model, but it’s typically found on the side, bottom, or front edge of the TV.

    Steps to Use the Physical Power Button

    1. Locate the Power Button: Check the right or left side, bottom edge near the speakers, or front bezel of your TV. Some newer models have touch-sensitive buttons that blend into the design.
    2. Press the Button: Press and hold the power button for a few seconds to turn on the TV. On some models, a single press is enough.
    3. Check the Manual: If you can’t find the button, refer to your TV’s user manual.

    Tips:

    • Look for a small, slightly raised button or a touch-sensitive area.
    • If the button is labeled “Power/Input,” it may also switch inputs when pressed briefly.
    • For older models, buttons might be on the front right below the screen.
    Hand pressing the power button located on the bottom of a Toshiba TV.
    Pressing the power button on a Toshiba TV.

    Method 2: Using the Toshiba Smart Centre App (For Smart TVs)

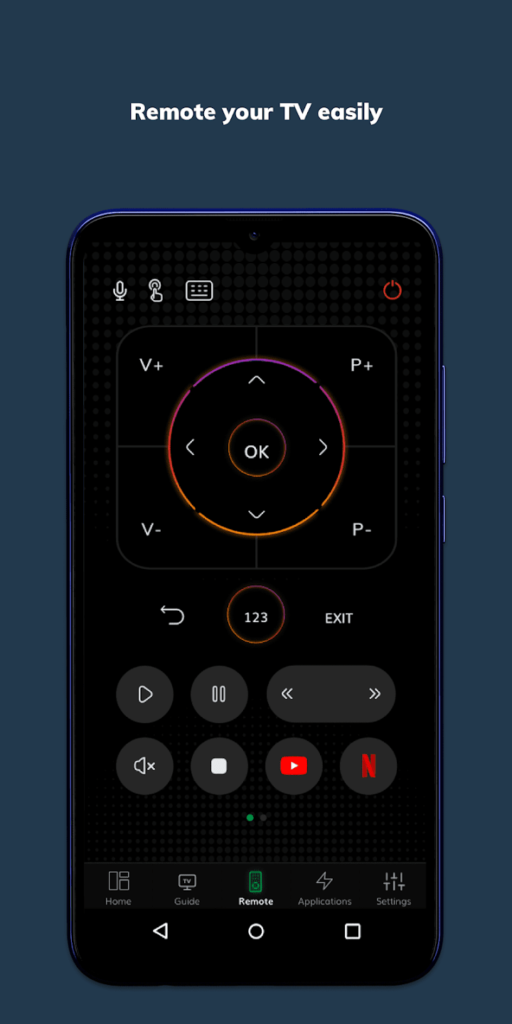
    If you have a Toshiba smart TV, you can use the Toshiba Smart Centre app to control your TV from your smartphone. This app works over Wi-Fi and can turn on your TV if it’s in standby mode and connected to the internet.

    Steps to Use the Toshiba Smart Centre App

    1. Ensure Wi-Fi Connection: Connect your Toshiba smart TV and smartphone to the same Wi-Fi network.
    2. Enable Virtual Remote: On your TV, go to Settings and turn on the “Virtual Remote” option. You may need to do this initially with the remote or physical buttons.
    3. Download the App: Get the Toshiba Smart Centre app from the Google Play Store or App Store.
    4. Connect to Your TV: Open the app, follow the prompts to add your TV, and enter any required PIN displayed on the TV screen.
    5. Turn On the TV: Use the app’s power button to turn on your TV.

    Tips:

    • The TV must be in standby mode (not fully powered off) for the app to work.
    • If the app doesn’t connect, ensure “Virtual Remote” is enabled and both devices are on the same network.
    • The app also lets you control volume, channels, and other settings.
    Screenshot of the Toshiba Smart Centre app showing the virtual remote control.
    Toshiba Smart Centre app interface.

    Method 3: Using a Universal Remote

    A universal remote can control your Toshiba TV if programmed correctly. These remotes work by using specific codes for your TV model.

    Steps to Use a Universal Remote

    1. Get a Universal Remote: Purchase a universal remote from retailers like Amazon or electronics stores.
    2. Find the Code: Look up the code for your Toshiba TV model in the remote’s manual or check Toshiba TV remote codes and programming guide.
    3. Program the Remote: Follow the remote’s instructions to enter the code. This usually involves pressing a setup button and entering the code.
    4. Test the Remote: Press the power button to turn on your TV.

    Tips:

    • If the first code doesn’t work, try other codes listed for Toshiba TVs.
    • Some remotes have an auto-search feature to find the correct code.
    • Keep the remote’s manual for future reference.
    Universal remote control that can be programmed to work with Toshiba TVs.
    A universal remote control

    Method 4: Using a Smartphone with an IR Blaster

    Some smartphones, like certain Samsung or Xiaomi models, have an infrared (IR) blaster that can control your TV. You’ll need a compatible app to send IR signals.

    Steps to Use a Smartphone with IR Blaster

    1. Check for IR Blaster: Confirm your phone has an IR blaster. Most iPhones and newer Androids don’t have this feature.
    2. Download an App: Install an app like Universal Remote from the Google Play Store.
    3. Select Toshiba TV: Open the app, choose Toshiba as the device, and select your TV model if prompted.
    4. Test the Power Button: Use the app to send the power signal to your TV.

    Tips:

    • IR blaster apps require line-of-sight to the TV’s IR receiver.
    • If the app doesn’t work, try different model options or another app.
    • This method only works for TVs with IR receivers, typically non-smart or older models.

    Method 5: Voice Control (For Supported Models)

    Some newer Toshiba smart TVs support voice control, allowing you to turn on the TV with voice commands. This feature is model-specific and may require initial setup.

    Steps to Use Voice Control

    1. Check for Voice Support: Confirm your TV model supports voice control, such,安 as through Alexa or Google Assistant. Check the Toshiba support page for details.
    2. Set Up Voice Control: Enable voice control in your TV’s settings, possibly using the Toshiba Smart Centre app or a compatible voice assistant.
    3. Use Voice Commands: Say commands like “Turn on TV” if paired with Alexa or Google Assistant.

    Tips:

    • The TV must be in standby mode to respond to voice commands.
    • This feature is typically available on high-end smart TV models.
    • See our guide on connecting Alexa to LG TV for similar setup steps.

    Troubleshooting Tips

    If none of the methods work, try these steps:

    • Check Power Supply: Ensure the TV is plugged into a working outlet. Test the outlet with another device.
    • Reset the TV: Unplug the TV for 1-2 minutes, then plug it back in and try again. Learn more in our guide on how to reset Toshiba TV.
    • Inspect for Hidden Buttons: Some Toshiba TVs have touch-sensitive or hidden buttons. Check all edges carefully.
    • Contact Support: If the TV still won’t turn on, visit the Toshiba support page or call their support line at 1-888-407-0396.
    • Refer to Related Issues: For persistent problems, see our article on Toshiba TV won’t turn on fixes.

    Frequently Asked Questions

    Where is the power button on my Toshiba TV?

    The power button is usually on the side, bottom, or front edge of the TV. Check your user manual or the Toshiba support page for your model’s exact location.

    Can I use my phone to turn on my Toshiba TV?

    Yes, for smart TVs, use the Toshiba Smart Centre app. For non-smart TVs, your phone needs an IR blaster and a compatible app.

    What if my Toshiba TV doesn’t have a power button?

    Most Toshiba TVs have a power button, but it may be touch-sensitive or hidden. If you can’t find it, try the Smart Centre app or a universal remote. See troubleshooting tips for more help.

    How do I program a universal remote for my Toshiba TV?

    Find the code for your TV model in the remote’s manual or online, enter it using the remote’s setup process, and test the power button. See detailed guide here Programming Universal Remote Codes for Toshiba TV [2025]

    Can I use voice control to turn on my Toshiba TV?

    Some Toshiba smart TVs support voice control via Alexa or Google Assistant. Check your model’s specifications on the Toshiba support page.

    Conclusion

    Turning on your Toshiba TV without a remote is possible with several methods. Start by checking for a physical power button on the TV’s side, bottom, or front. For smart TVs, the Toshiba Smart Centre app is a convenient option. A universal remote or a smartphone with an IR blaster can also work, and some models support voice control. If you run into issues, our troubleshooting tips and related guides, like how to reset Toshiba TV, can help. Try these methods to get your TV back on and enjoy your viewing experience.

    How to Change the Apple TV Remote Battery

    0
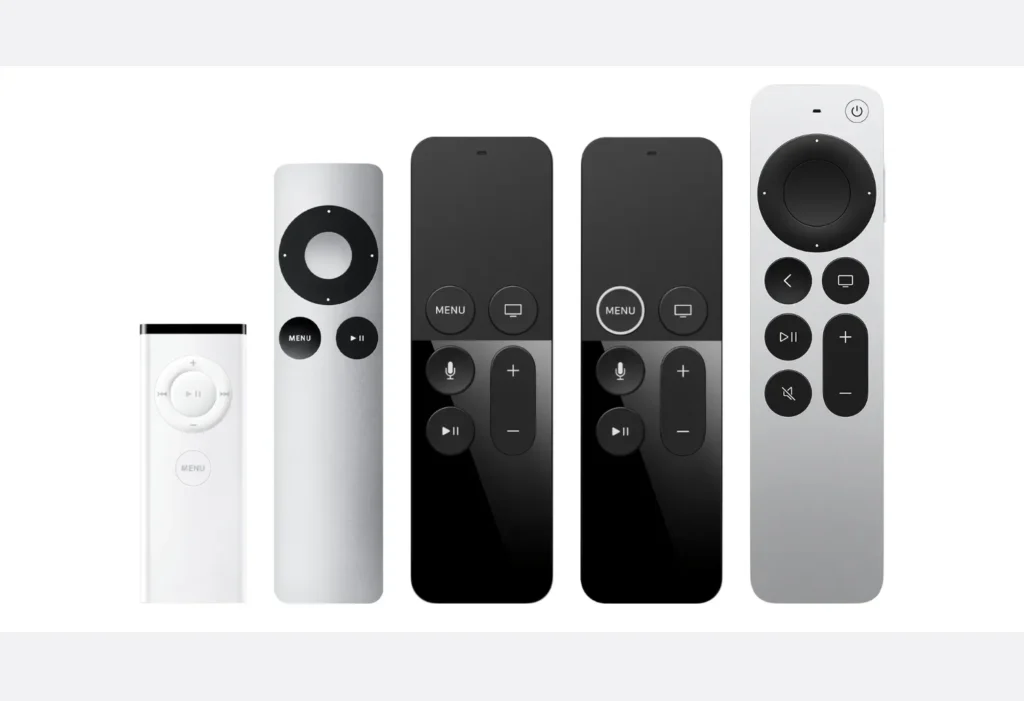
    Apple TV remote models comparison
    Apple TV remote models

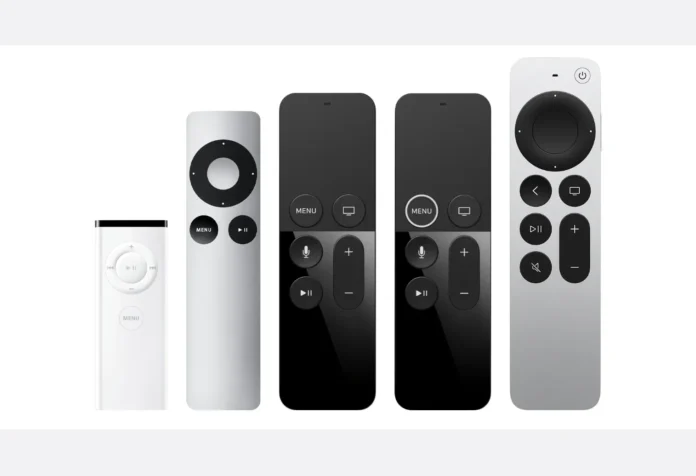
    Apple TV remotes come in different models, each with its own way to manage the battery. Older models use replaceable batteries, while newer ones are rechargeable. This guide will help you identify your remote and provide clear steps to replace or charge its battery. Whether you have an older Apple Remote or a newer Siri Remote, we’ve got you covered with simple instructions.

    Identify Your Apple TV Remote

    To manage your remote’s battery, you first need to know which model you have. Apple has released several remotes over the years, each with distinct features. Here’s how to identify them:

    • Apple Remote (White): This remote shipped with the Apple TV (1st generation). It’s white plastic with a round navigation button, Menu, and Play buttons. It uses a replaceable CR2032 lithium 3V coin battery.
    • Apple Remote (Aluminum): This came with Apple TV (2nd and 3rd generation). It’s silver with a similar round navigation button. It uses a CR2032 or BR2032 lithium 3V coin battery.
    • Siri Remote (1st Generation): Introduced with Apple TV HD and Apple TV 4K (1st generation), this remote is black with a glass touch surface and a Siri button. It has a rechargeable battery charged via a Lightning cable.
    • Siri Remote (2nd Generation): Shipped with Apple TV 4K (2nd generation), it’s silver with a touch-enabled clickpad and a Siri button. It uses a Lightning cable for charging.
    • Siri Remote (3rd Generation): Comes with Apple TV 4K (3rd generation). It’s similar to the 2nd generation but uses a USB-C cable for charging.
    Apple TV remote models comparison
    Apple TV remote models

    To confirm your model, check the color and design. You can also go to Settings > Remotes and Devices > Remote on your Apple TV to find details like the serial number for newer models. For older remotes, the serial number is on the back (white) or inside the battery compartment (aluminum). See Identify your Apple TV remote for more details.

    Replacing the Battery in Older Apple TV Remotes

    Older Apple Remotes (white and aluminum) use replaceable CR2032 lithium 3V coin batteries, available at most electronics stores. If your remote stops working, it’s likely time to replace the battery. Below are the steps for each model.

    Apple Remote (White)

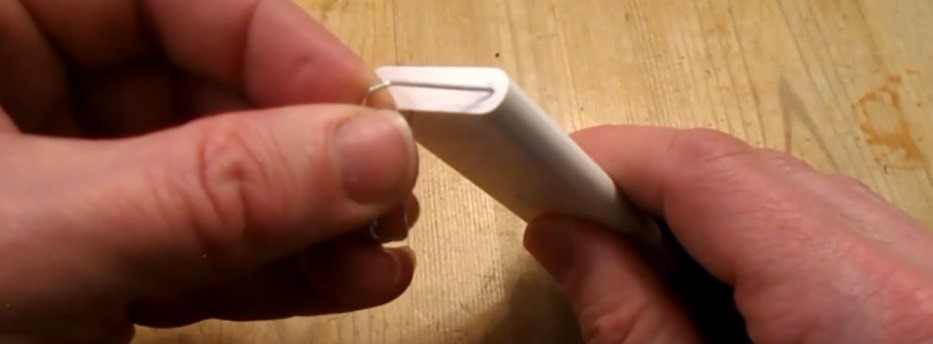
    1. Locate the battery compartment on the bottom of the remote.
    2. Use a paperclip or similar object to press the small circle button. This releases the battery tray.
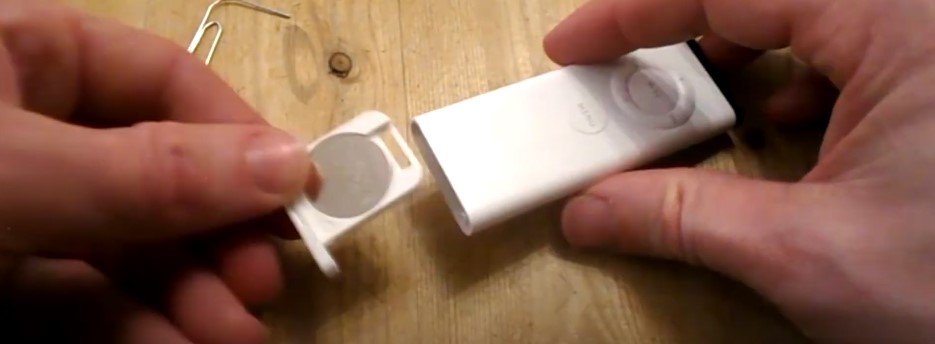
    3. Pull out the tray and remove the old battery.
    4. Insert a new CR2032 battery with the positive (+) side facing up.
    5. Slide the tray back into the remote until it clicks into place.
    Opening the battery tray on the white Apple Remote
    Opening the battery tray on the white Apple Remote
    White Apple Remote battery replacement
    White Apple Remote battery replacement

    Apple Remote (Aluminum)

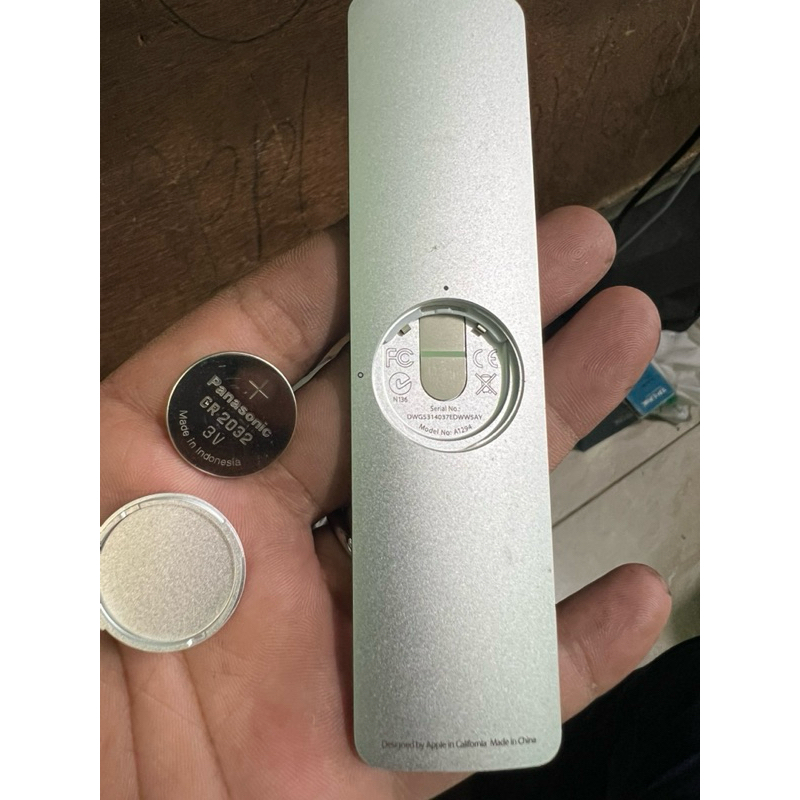
    1. Find the circular battery door on the back of the remote.
    2. Use a coin to turn the door counterclockwise until it opens.
    3. Remove the old battery.
    4. Insert a new CR2032 or BR2032 battery with the positive (+) side facing you.
    5. Close the door by turning it clockwise with the coin.
    Aluminum Apple Remote battery replacement
    Aluminum Apple Remote battery replacement

    Note: Both CR2032 and BR2032 batteries work for the aluminum remote, but CR2032 is more common and widely available. Ensure the battery is inserted correctly to avoid issues.

    Charging the Battery in Newer Apple TV Remotes

    Newer Siri Remotes (1st, 2nd, and 3rd generations) have built-in rechargeable batteries that cannot be replaced by users. Instead, you charge them using a Lightning or USB-C cable, depending on the model. A full charge takes about three hours and can last several months with typical use, according to Apple Support.

    Siri Remote (1st and 2nd Generation)

    These remotes use a Lightning cable for charging.

    1. Plug one end of a Lightning cable into the port on the bottom of the remote.
    2. Connect the other end to a USB port on a computer or a USB power adapter plugged into a wall outlet.
    3. The remote starts charging immediately. It takes about three hours to fully charge.
    4. You can use the remote while it’s charging.

    Siri Remote (3rd Generation)

    This remote uses a USB-C cable for charging.

    1. Plug one end of a USB-C cable into the port on the bottom of the remote.
    2. Connect the other end to a USB-C port on a computer or a USB-C power adapter plugged into a wall outlet.
    3. The remote starts charging. It takes about three hours to fully charge.
    4. You can use the remote while it’s charging.

    Note: Use a standard Lightning or USB-C cable. The cable included with your Apple TV or one from another Apple device (like an iPhone or iPad) should work fine.

    Checking the Battery Level

    For Siri Remotes, you can check the battery level directly on your Apple TV:

    1. Open Settings on your Apple TV.
    2. Go to Remotes and Devices.
    3. Select Remote.
    4. Look for the Battery Level to see the current charge percentage.

    You’ll also see an on-screen alert when the battery drops below 20%. For older Apple Remotes (white or aluminum), there’s no way to check the battery level on the TV. If the remote stops working, try replacing the battery.

    Troubleshooting Common Issues

    If your remote isn’t working or charging, try these steps:

    • For Older Apple Remotes:
      • Ensure the battery is inserted with the positive (+) side facing correctly.
      • Try a new CR2032 battery to rule out a faulty one.
      • Check the battery compartment for dirt or corrosion.
    • For Siri Remotes:
      • Verify you’re using the correct cable (Lightning for 1st/2nd gen, USB-C for 3rd gen).
      • Inspect the charging port for debris or damage. Use a soft brush to clean it.
      • Try a different cable or power source (e.g., another USB port or adapter).
      • If the remote still doesn’t charge, the battery may be faulty. Contact Apple Support for service options. If you have an AppleCare Plan and the battery holds less than 80% of its original capacity, you may be eligible for a free replacement.
    • General Tips:
      • If the remote isn’t responding, try pairing it again. Point it at the Apple TV, press and hold Menu and Volume Up for 2–5 seconds until a message confirms pairing.
      • For persistent issues, see Apple’s troubleshooting guide.

    Battery Life and Maintenance Tips

    • Older Remotes: Battery life varies but typically lasts several months to a year, depending on usage. Replace the battery when the remote becomes unresponsive.
    • Siri Remotes: A full charge lasts about 2–3 months with regular use. Charge a few times a year for normal operation. To prolong battery life:
      • Avoid letting the battery drain completely.
      • Use a high-quality charging cable to prevent slow charging or damage.
      • Store the remote in a cool, dry place when not in use.

    FAQ

    Can I replace the battery in my Siri Remote?

    No, Siri Remotes have built-in rechargeable batteries that aren’t user-replaceable. If the battery fails, contact Apple Support for service.

    How do I know if my Apple TV remote needs charging?

    For Siri Remotes, an alert appears on your TV when the battery is low. You can also check the battery level in Settings > Remotes and Devices > Remote.

    What type of battery does the Apple Remote use?

    The white and aluminum Apple Remotes use a CR2032 lithium 3V coin battery. The aluminum model can also use a BR2032.

    How long does it take to charge a Siri Remote?

    It takes about three hours to fully charge a Siri Remote, regardless of the generation.

    Can I use any USB-C or Lightning cable to charge my remote?

    Yes, standard Lightning (for 1st/2nd gen) or USB-C (for 3rd gen) cables work. Cables from other Apple devices are usually compatible.

    What should I do if my Siri Remote won’t charge?

    Check the cable, port, and power source. Try a different cable or adapter. If it still doesn’t charge, contact Apple Support.