The Haier TV service menu is a hidden settings panel built into the firmware. You access it using a specific remote button sequence. The most universal code is Source → 2 → 5 → 8 → 0. If that doesn’t work on your model, there are three other methods — and one master password — covered in full below.
If you’ve already gone through service menus on other brands, the logic is the same. You can compare approaches in our full LCD and LED TV service menu codes guide for a broader reference.
What Is the Haier Service Menu?
The service menu is a factory-level interface that exists on every Haier TV, separate from the regular on-screen menu you use daily. Haier’s engineering team builds it into every unit for calibration, diagnostics, and repair. It is not accessible through standard menus. You can only reach it through a specific remote key sequence.
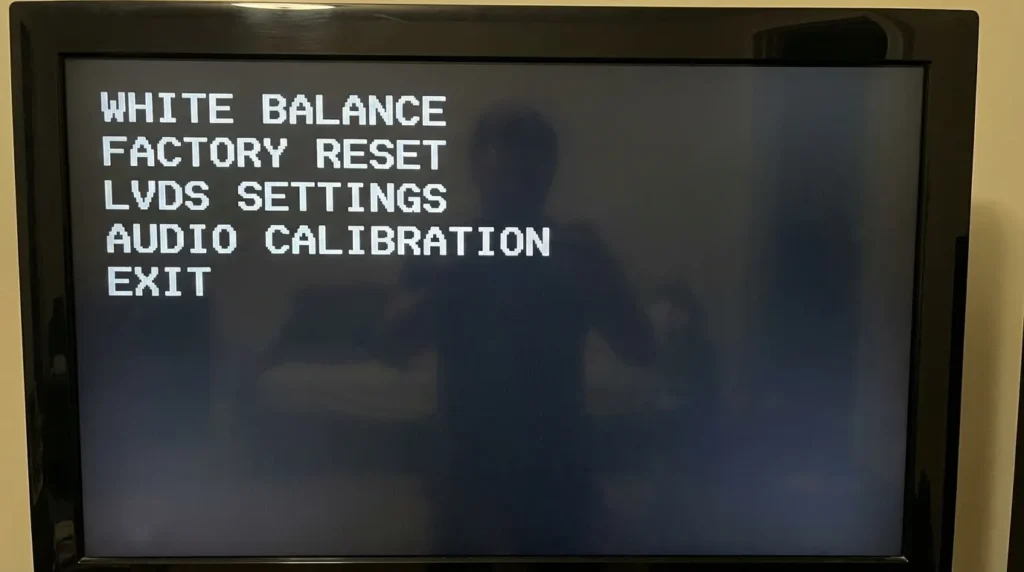
Inside, you’ll find controls for white balance, backlight intensity, panel geometry, audio calibration, LVDS settings, and a factory reset option that clears deeper settings than the standard reset in the user menu.
It is not intended for general use. That said, technicians and experienced DIY users rely on it regularly for picture quality adjustments and repair diagnostics.
Before You Start — Critical Warnings
Read this before pressing anything.
The service menu contains settings that directly control hardware behavior. Changing the wrong value can produce a black screen, distorted picture, or a TV that fails to boot. Some settings write to flash memory immediately — there is no undo button.
- Do not change anything you don’t understand. Explore is fine. Edit only if you know what the setting does.
- Write down current values before changing them. Use your phone to photograph each screen.
- Do not power off mid-session. If you’re mid-edit, exit through the menu first, then power off normally.
- Settings flagged as UART, Init Flash, or Erase Flash are not for casual use. These write directly to firmware.
If a black screen is already your starting problem — before you even attempt the service menu — read our TV no picture fix guide first. The service menu won’t help if the panel itself has failed.
Haier TV Service Menu Codes — All Working Methods
There is no single universal code that works across every Haier model. Haier uses different main boards — VS.TP53, MTK (MediaTek), T.VST59 — and each generation may respond to a different sequence. Start with Method 1 and work down.
Method 1 — Source + 2580 (Most Common)
- Turn the TV on.
- Press Source on the remote.
- Press 2 → 5 → 8 → 0 in sequence.
- The service menu should appear on screen.
- Press Exit to close when done.
This works on most Haier LED and LCD models from 2016 onward, including the LE40D3281, HL42XD2, and many H-series smart TV models.
Method 2 — Menu + Source + 8893
- Turn the TV on.
- Press Menu on the remote.
- Then press Source → 8 → 8 → 9 → 3.
- Press OK to confirm entry.
- Press Exit to close.
This method targets models using the VS.TP53U71 and VS.TP53U61 board variants. The code 8893 also doubles as the master password on some units (covered below).
Method 3 — Menu + 1999
- Turn the TV on.
- Press Menu.
- Press 1 → 9 → 9 → 9.
- The service menu opens directly.
- Press Exit to close.
Found on older Haier models and some non-Android LED TVs. Less common after 2020 but still active on certain panels.
Method 4 — Board-Specific and Alternative Codes
Some Haier boards use different codes. If the first three methods fail, try these in order:
| Code Sequence | Remote Input | Common Boards / Models |
|---|---|---|
| Menu → 1147 | 1 → 1 → 4 → 7 | T.VST59.031 board variants |
| Source → 4578 | 4 → 5 → 7 → 8 | Older 32–43″ LCD panels |
| Menu → 8202 | 8 → 2 → 0 → 2 | Some Haier Android TV units |
| Source → 208 | 2 → 0 → 8 | Haier CRT-era and early LED models |
Master Password: On models that prompt for a password after entering the menu, type 8893.
Other brands use a similar structure with board-specific variation. If you’re working across multiple brands, check the Hisense TV service menu codes, Hitachi TV service menu codes, and Skyworth TV service menu codes — all share similar access logic to Haier.

How to Navigate the Service Menu
Once inside, the service menu uses the remote’s arrow keys and OK button. There is no touch input.
- Up / Down arrows — move between menu items
- Left / Right arrows — adjust values within a selected item
- OK — confirm or enter a submenu
- Menu or Exit — go back or close the service menu
Values change in real time as you press left/right. On some models, changes save automatically. On others, you need to press OK to lock a change in. When unsure, press OK after every adjustment.
What’s Inside the Haier Service Menu — Settings Explained
Picture / White Balance Settings
This section controls the TV’s color calibration at the signal level — not the picture mode shortcuts in the regular menu.
- RGB Gain (R/G/B Gain) — Adjusts intensity for each color channel. Used to correct color tint problems, especially green or yellow cast on aging panels.
- RGB Offset / Cut — Fine bias adjustment per channel. Combined with Gain, these two form the full white balance control.
- Color Temp — Switches the default temperature target (3200K, 6500K, 9300K options on most models). 6500K is the standard for daylight-accurate viewing.
- ADC Auto Adjust — Runs an automatic calibration pass for analog inputs. Press OK and let it run for 3–5 seconds.
- Overscan — Crops the edge of the image. Set to 0 for pixel-perfect display from consoles and PCs.
If you’re chasing a dark or dim picture specifically, the TV dark screen fix guide covers backlight diagnosis before you touch service menu controls.
Sound / Audio Settings
- Max Volume Limit — Sets the ceiling for volume output. Commonly used in hotels and care facilities to prevent loud settings.
- EQ Settings — Frequency-band equalizer. Separate from the regular bass/treble controls.
- SPDIF Mode — Switches digital audio output between PCM (stereo) and Bitstream (for Dolby passthrough).
- Audio Delay (ms) — Corrects lip-sync offset. Adjust in 5ms increments.
Panel Settings (LVDS and Backlight)
Do not edit these unless you are specifically troubleshooting a panel or backlight failure.
- LVDS Map / Bit Mode — Controls the data format sent to the display panel. This is hardware-specific. Changing it incorrectly causes a black screen or scrambled display.
- Backlight Max / Min — Sets the hardware limits for backlight intensity. The slider in your regular menu operates within these limits.
- PWM Frequency — Controls how fast the backlight pulses. Lower values cause visible flicker on camera. Higher values reduce flicker but can affect efficiency.
- SSC (Spread Spectrum Clock) — Reduces electrical noise from the LVDS signal. Leave at its default unless you’re troubleshooting horizontal lines.
Factory Reset Option
The service menu factory reset (labeled Init Factory or Factory Default depending on model) runs a deeper reset than the standard option in your regular settings. It clears calibration data, stored inputs, and some firmware preferences.
Use this when:
- A standard factory reset didn’t resolve your issue
- The picture or sound behaves abnormally after a firmware update
- You’re preparing the TV for resale and want a complete wipe
It does not reflash the firmware. It resets stored values to factory defaults.
For a comparison of how Samsung handles the same process at service level, see our Samsung TV factory reset guide.
How to Exit the Service Menu Safely
Always exit the service menu through the menu itself — not by pulling the power plug.
- Press Exit on the remote.
- Or navigate to Exit Service Mode if that option appears.
- Wait 3–5 seconds for the TV to return to normal operation.
- Power the TV off and on once to confirm settings held.
If the TV displays a black screen after exiting, wait 10 seconds. If it doesn’t recover, power cycle once. In most cases this resolves on its own. If the screen stays black, see the TV black screen fix guide — the diagnosis steps apply across brands.
Code Not Working? Troubleshooting Steps
The service menu didn’t open. Here’s why it usually fails:
- You pressed the buttons too slowly. The sequence must be entered quickly — within 2–3 seconds total. Practice the sequence before attempting it on the TV.
- Wrong remote. Some codes only work with the original Haier remote for that model. Universal remotes and app-based remotes often miss specific key codes the TV firmware listens for.
- Wrong model code. Check your TV’s model number (found on the back label or in Settings → About). Search that exact model alongside “service menu code” to confirm the correct sequence.
- Android TV firmware blocks it. Haier Android TV models (those running Google TV or Android 9+) have restricted service menus. Some options are hidden or require a specific engineer mode app via sideloading.
- The TV is in Hotel Mode / Lock Mode. Some Haier commercial units (installed in hotels or corporate settings) disable the service menu code. You’ll need to disable Hotel Mode first using the Hotel Mode access code (usually Menu → 0 → 6 → 1 → 5).
The same remote dependency issue affects other brands too. Brands like Insignia, Element, and Vizio all require their original remotes for factory-level access.
Who Should Use the Haier TV Service Menu?
The service menu is built for technicians — people who understand what white balance gain, LVDS mapping, and PWM frequency actually mean. That said, a few tasks inside it are safe for any careful user:
- Running ADC Auto Adjust to fix analog picture quality
- Checking the factory reset option when a standard reset didn’t help
- Adjusting overscan to fix cut-off edges when using a PC or console
If you’re doing anything else — especially white balance edits, panel settings, or audio level caps — understand the setting before you change it. The information is in this guide. Take 60 seconds to read the relevant section before touching the controls.
The service menu is a tool. Like most tools, it’s useful in the right hands and damaging in the wrong ones.
If you’re researching service menus across multiple brands, the full comparison is available in the all LCD and LED TV service menu codes reference. For brand-specific guides, the Sony service menu, LG service menu, Samsung service menu, and Panasonic service menu each follow similar access logic with different codes.
Last updated: 2026