Your Sanyo TV screen looks like a blizzard hit it. White background. Black dots everywhere. No picture. Just static noise.
This is called a snowflake screen. It happens when your TV can’t display video properly. The good news? Most cases get fixed in under 5 minutes without tools or technical skills.
This guide walks you through 6 proven fixes. Start with Fix #1. It solves the problem 60% of the time. If that doesn’t work, move to the next fix. By Fix #3, you’ll have resolved 85% of snowflake screen issues.
Let’s get your TV working again.

What Is a Snowflake Screen on Sanyo TV?
A snowflake screen shows a white or gray background covered in small black dots. The dots move randomly across the screen. Some people call it snow screen or static screen. It looks like old analog TV static from the 1990s.
The screen shows no picture. No video. Just moving black and white pixels.
Your TV still powers on. The LED indicator light works. You might hear sound in some cases. But the picture is completely gone.
This differs from other screen problems. A black screen shows nothing at all—totally dark. A blue screen displays solid blue with maybe an error message. Snowflake screen always has that distinctive moving dot pattern.
The issue affects all Sanyo TV models. Both smart TVs and regular TVs get snowflake screens. It happens on newer Roku-powered Sanyo TVs and older models from 2015-2020.
What Causes Snowflake Screen on Sanyo TVs?
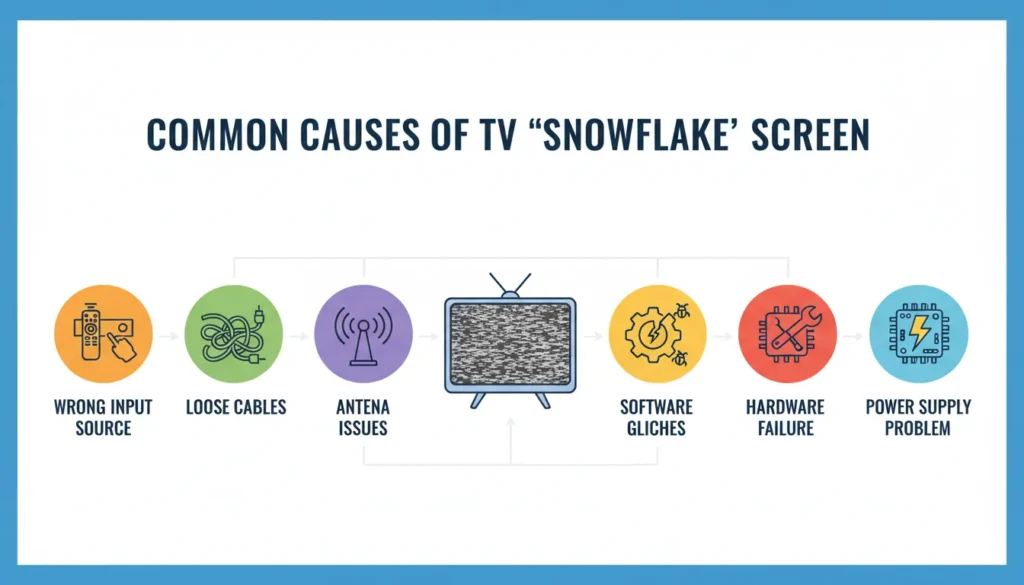
Five main causes create snowflake screens on Sanyo TVs.
Wrong input source causes 60% of cases. Your TV is set to HDMI1 but your cable box connects to HDMI2. Or you’re on Antenna mode but should be on HDMI. The TV looks for video input in the wrong place. Finding nothing, it displays static.
Antenna or cable signal problems cause 20% of cases. Your TV is on the correct antenna input, but the antenna cable is loose. Or weather disrupts the broadcast signal. No signal coming in means snowflake screen coming out.
Loose or damaged cables cause 15% of cases. HDMI cables wear out. Connections get loose. Pets chew through wires. Damaged cables can’t transmit video data properly.
Software glitches cause 3% of cases on smart TVs. A bug in the operating system crashes the display function. This happens more on Sanyo Roku TVs than regular models.
Hardware failure causes 2% of cases. The TV tuner breaks. The motherboard fails. Port connections crack. These need professional repair or replacement.
Most snowflake screens come from simple connection issues. Not hardware failure. That’s why the fixes work so well.
Fix #1 – Switch to Correct Input Source
This fix solves more snowflake screens than any other method. Takes 2 minutes.
Your Sanyo TV has multiple inputs. HDMI1. HDMI2. HDMI3. AV. Antenna/Cable. Each input looks for video from a specific source. If you’re on the wrong input, you see snowflake screen.
Here’s how to switch inputs:
Grab your Sanyo TV remote. Look for a button labeled “Input” or “Source.” Some remotes show it as a rectangle with an arrow pointing inward.
Press the Input button once. A menu appears on screen showing all available inputs. You’ll see HDMI1, HDMI2, maybe HDMI3, plus AV and Antenna.
Use the arrow buttons on your remote to highlight each input one by one. Press OK or Enter on each input. Wait 3 seconds. If nothing changes, move to the next input.
Keep trying until your picture appears. When you land on the correct input, the snowflake screen vanishes immediately. Your normal picture shows up.
What if you don’t know which input is correct?
Check where your devices plug in. Walk behind your TV. Look at the ports. Each HDMI port has a number: HDMI1, HDMI2, HDMI3.
Your cable box plugs into HDMI1? Set your TV to HDMI1 input. Your Roku stick plugs into HDMI2? Set your TV to HDMI2 input. Match the port number to the input number.
For antenna TV, select the input labeled “Antenna,” “TV,” or “Cable.” If you’re having trouble finding channels, learn how to fix Vizio TV not finding cable channels—the same principles apply to Sanyo TVs.
This fix works instantly when input source is the problem. If your screen still shows snowflakes after trying all inputs, move to Fix #2.
Fix #2 – Check and Reconnect All Cables
Loose cables create snowflake screens even when you’re on the correct input. This fix takes 3 minutes.
HDMI cables fail most often. They carry both video and audio. A loose HDMI connection sends incomplete data. Your TV can’t reconstruct the picture. Result: snowflake screen.
Turn off your TV. Unplug it from the wall. This prevents damage while you handle cables.
Go behind your TV. Locate all cables. HDMI cables are flat and black, usually with metal connectors. Coaxial cables (for antennas) are round with screw-on metal tips. RCA cables are red, white, and yellow.
Unplug each cable completely. Inspect the cable.
Look for physical damage. Bent connectors. Exposed wires. Bite marks from pets. Frayed insulation. If you see damage, that cable needs replacement. A damaged cable costs $8-15 for HDMI, $5-10 for coaxial.
Check the TV ports too. Shine your phone flashlight into each port. Look for bent pins. Debris. Dust buildup. If you see dust, blow it out with compressed air or just blow with your mouth.
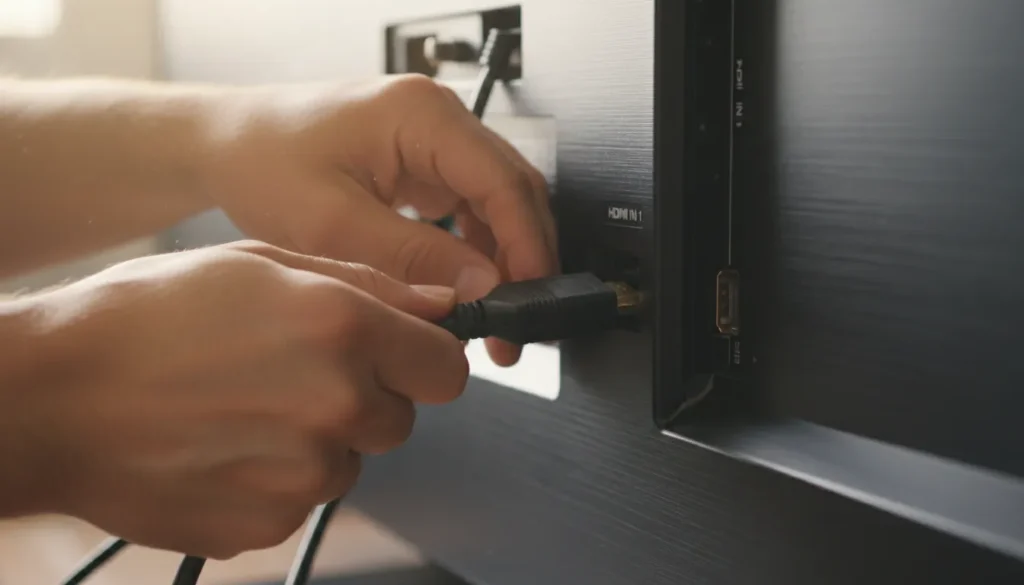
Reconnect each cable firmly. Push HDMI cables in until you hear a soft click. They should fit snugly with no wiggle room. Screw coaxial cables clockwise until finger-tight. Don’t overtighten—you can crack the connector.
Plug your TV back into the wall. Turn it on. Check if the snowflake screen is gone.
Testing with a different cable helps isolate the problem. If you have a spare HDMI cable, swap it in. If the snowflake screen vanishes with the new cable, the old cable was defective.
Cable problems usually show up gradually. Your picture works fine, then occasionally flickers, then eventually goes to pure snowflake screen. If this progression happened, bad cables are likely the cause. Similar cable issues also cause problems in other brands—check our guide on fixing TV with no picture for related troubleshooting.
Fix #3 – Verify Antenna Connection and Signal
This fix only applies if you watch TV through an antenna. Over-the-air broadcast TV. Free channels like ABC, NBC, CBS, FOX. Takes 4 minutes.
No antenna signal creates snowflake screens on non-cable TVs.
Check your antenna cable connection. The cable screws into a port labeled “Antenna In” or “RF In” on your TV. Unscrew it. Check for damage. Screw it back in tightly.
Follow the cable to your antenna. Indoor antennas sit near your TV. Outdoor antennas mount on your roof. Make sure the antenna hasn’t fallen over. Indoor antennas work best near windows, positioned vertically.
Weather affects antenna signals. Heavy rain weakens broadcast signals by 30-40%. Thick clouds block some frequencies. Snow on an outdoor antenna blocks reception completely.
If bad weather is happening, wait it out. Your picture should return when conditions improve.
Signal strength matters. You might be too far from broadcast towers. Or buildings block the signal path. Move your indoor antenna to different positions. Higher usually works better. Near windows usually improves reception.
Your TV needs to scan for channels after antenna adjustments.
Press Menu on your remote. Navigate to Settings. Look for “Channel” or “Tuner” or “Antenna” settings. Select “Auto Scan” or “Channel Scan.”
The scan takes 3-5 minutes. Your TV searches all frequencies for broadcast signals. It saves any channels it finds. After scanning completes, exit the menu. Your channels should display normally.
If your antenna connection is solid and weather is clear but you still see snowflake screen, the problem lies elsewhere. Move to Fix #4.
Fix #4 – Confirm External Devices Are Powered On
Your input source might be correct. Your cables might be connected. But if your cable box or streaming device is turned off, you still get snowflake screen. Takes 1 minute to check.
External devices need power to send video signals.
Walk to your cable box, DVR, Roku, Fire Stick, PlayStation, or Xbox. Look for indicator lights. Most devices show a green or blue light when powered on. Red or orange means standby mode. No light means completely off.
If the light is red or there’s no light, press the power button on the device itself. Not the TV remote—the device’s own power button. Wait 10 seconds for the device to boot up.
Some devices sit behind TV stands. You can’t easily see them. Reach back and feel for the device. Press buttons until you find power. Or use the device’s own remote control.
Standby mode tricks people. Your cable box might show a light but still not transmit video. It’s in power-saving mode. Press the power button on the cable box remote. This wakes it from standby to active mode.
Streaming sticks like Roku or Fire Stick usually power on automatically when your TV powers on. But sometimes they crash. Unplug the streaming stick from the HDMI port. Wait 10 seconds. Plug it back in. It should restart. If your Roku isn’t responding, you can also turn on Roku TV without remote using alternative methods.
Game consoles work the same way. PlayStation and Xbox must be fully powered on, not in rest mode, to display video.
After powering on your external device, check your TV screen. Give it 15-20 seconds. The snowflake screen should change to your normal picture once the device fully boots.
Fix #5 – Perform a Soft Reset (Power Cycle)
Software glitches cause snowflake screens on Sanyo smart TVs. A power cycle clears these glitches. Takes 3 minutes total.
Here’s the exact procedure:
Turn off your Sanyo TV using the remote or the power button on the TV itself. Don’t just press standby. Fully power it off.
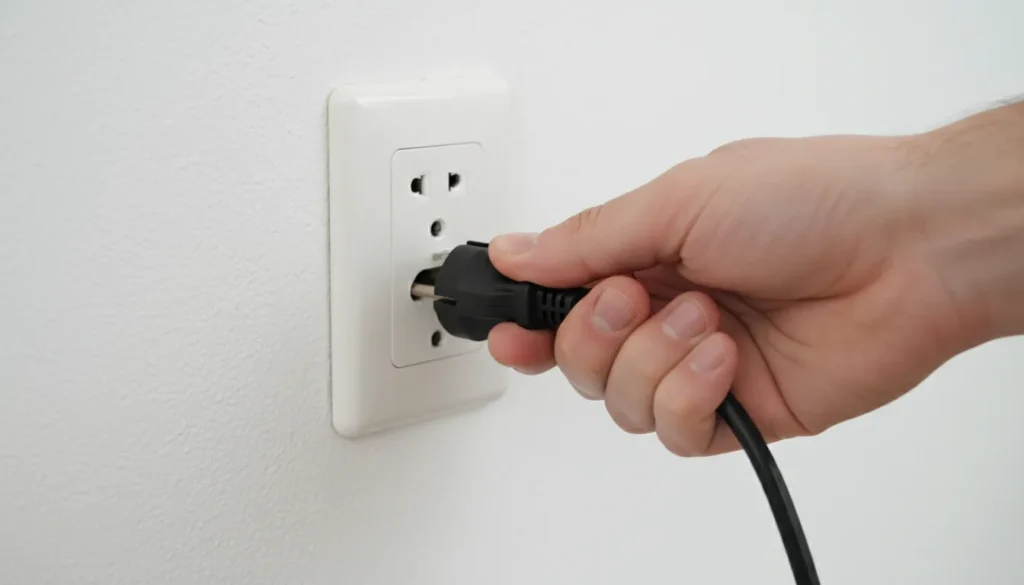
Walk to the TV. Unplug the power cable from the wall outlet. Not from the TV—from the wall. This cuts all power to the TV’s internal systems.
Wait 60 seconds minimum. Some guides say 30 seconds. That’s not enough. Internal capacitors hold charge for 45-50 seconds. You need 60 seconds for complete discharge.
Count to 60. Or check your phone timer. This step matters. Skipping it means the soft reset doesn’t fully work.
After 60 seconds, plug the power cable back into the wall. Press the power button to turn on your TV. It takes 10-15 seconds to fully boot up.
Why this works: Smart TVs run an operating system like Roku OS or Android TV. Software bugs accumulate during use. Memory fills up. Temporary files corrupt. Unplugging forces a complete shutdown. All software resets to clean state. Temporary glitches clear.
Regular TVs benefit less from power cycles. They have simpler electronics. But it doesn’t hurt to try.
If your Sanyo TV is a Roku TV, the power cycle also resets the Roku software. Roku TVs crash more often than regular TVs due to streaming app conflicts.
Power cycles fix roughly 80% of software-related snowflake screens. If your screen still shows snowflakes after a proper 60-second power cycle, software isn’t the problem. This technique works for many TV issues—similar steps help fix Sony TV freezing problems too.
Fix #6 – Clean TV Ports and Cable Connections
Dust and debris in ports create poor connections. This causes intermittent snowflake screens. Takes 5 minutes with proper tools.
You need compressed air or a soft brush. Don’t use metal objects. You’ll damage the port pins.
Unplug your TV from the wall first. Safety matters more than speed.
Look at your HDMI ports. Shine a flashlight inside. You might see dust, lint, or small debris. This happens naturally over months and years. Dust blocks proper contact between cable and port.
Compressed air works best. Hold the can upright. Keep it 6 inches from the port. Spray in short 1-second bursts. Don’t spray continuously—you might freeze internal components. Three short bursts per port cleans most debris.
No compressed air? Use a soft-bristle toothbrush. Gently brush inside the port. Do this carefully. HDMI ports have small pins that bend easily.
Clean the cable connectors too. The metal tips on your HDMI cables accumulate oils from your hands. Wipe them with a dry microfiber cloth or rubbing alcohol on a cotton swab.
For antenna coaxial ports, use the same compressed air technique. The metal threading inside these ports collects dust. A few air bursts clear it.
Some people use contact cleaner spray. This specialized electronics cleaner removes oxidation from metal contacts. Spray a tiny amount on the cable connector. Let it dry 30 seconds. Then reconnect the cable. Contact cleaner costs $6-12 at electronics stores.
After cleaning all ports and cables, reconnect everything. Plug in your TV. Power it on. Check if the snowflake screen is resolved.
Port cleaning prevents future connection problems. Do this every 6 months as maintenance.
Advanced Troubleshooting for Persistent Issues
If you’ve tried all 6 fixes and still see snowflake screen, the problem runs deeper. These advanced steps take 10-20 minutes each.
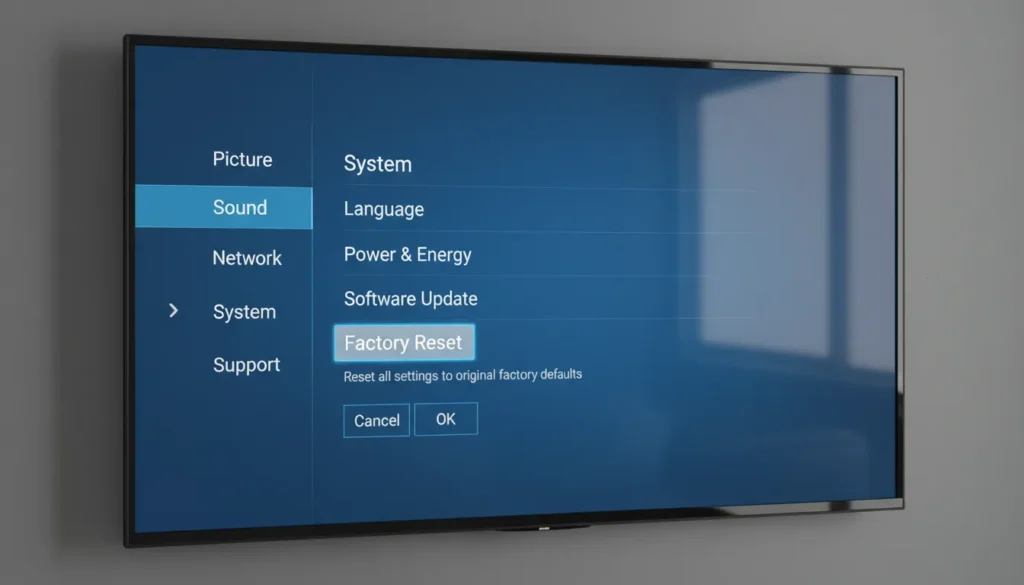
Factory reset is the nuclear option for smart TVs. It erases all settings, apps, and accounts. Your TV returns to out-of-box condition.
Press Menu on your remote. Go to Settings. Find “System” or “Advanced Settings.” Look for “Factory Reset” or “Reset TV.” You’ll need to confirm the action.
The reset takes 5-10 minutes. Your TV restarts several times. After completion, you must set up the TV from scratch like it’s brand new. Learn more about the factory reset process for Samsung TVs—similar steps apply to most smart TV brands.
Factory reset only helps if software corruption causes the snowflake screen. It won’t fix hardware problems or cable issues.
Test different cables before buying new ones. Borrow an HDMI cable from another device. Your computer monitor probably has one. Swap it with your TV’s cable. If the snowflake screen disappears with the borrowed cable, buy a new cable. If the screen persists, cables aren’t the problem.
Try different HDMI ports. Your TV has multiple HDMI ports. Maybe HDMI1 is broken but HDMI2 works fine. Move your device to a different port. Update your input source to match. This isolates whether a specific port failed.
Test with a different device entirely. Connect a laptop to your TV via HDMI. Can you see the laptop screen on your TV? If yes, your TV works—the original device is broken. If no, your TV has a hardware problem.
Check your TV’s firmware version if it’s a smart TV. Outdated firmware causes display issues. Press Menu > Settings > System > About. Check the firmware version. Compare it to Sanyo’s website for the latest version. If yours is outdated, update it. Updates download through your TV’s internet connection. WiFi connection problems can prevent updates—here’s how to fix Samsung TV won’t connect to WiFi if you encounter network issues.
These advanced steps reveal whether your TV has a fixable issue or needs professional attention.
When to Seek Professional Repair
Some snowflake screens indicate hardware failure. Repair costs money. Sometimes replacement makes more sense.
Signs your TV needs professional repair:
Snowflake screen persists after all 6 fixes. Multiple HDMI ports don’t work with any device. The TV makes clicking or buzzing sounds. Smell of burning electronics. Physical damage to the TV screen or body.
Tuner module failure shows specific symptoms. Antenna mode displays snowflake screen, but HDMI modes work perfectly. This means the internal TV tuner died. Tuner replacement costs $150-250 in parts and labor.
Motherboard failure is the death sentence. If no inputs work at all, the motherboard likely failed. Motherboard replacement costs $200-400. On a TV that originally cost $300-500, this makes no financial sense.
Get a repair quote before committing. Call local TV repair shops. Describe your problem. Ask for a diagnostic fee and estimated repair cost. Diagnostic fees run $50-100. If the repair quote exceeds 50% of a new TV’s cost, buy new instead.
Warranty coverage matters in 2026. Most Sanyo TVs come with 1-year manufacturer warranties. Extended warranties from retailers add 2-3 years. Check your purchase date. If you’re under warranty and the TV has no physical damage, contact Sanyo support. They’ll repair or replace it free.
Sanyo customer service: Available through their website support portal. Response time averages 24-48 hours.
Age of TV determines repair worth. TVs older than 5 years typically aren’t worth repairing. A 2019 Sanyo TV in 2026 has outdated technology. New TVs under $300 outperform it. Save the repair money toward a new purchase.
Non-smart Sanyo TVs face parts availability issues. Sanyo discontinued many models. Replacement parts don’t exist. Even repair shops can’t fix them. Other brands face similar power-on issues—check guides for fixing Insignia TV won’t turn on or Toshiba TV won’t turn on for brand-specific solutions.
How to Prevent Snowflake Screen Issues
Prevention beats troubleshooting. These practices reduce snowflake screen occurrence by 70%.
Use surge protectors for your TV. Power surges damage internal electronics. They corrupt software on smart TVs. A surge protector costs $15-30. It saves you from $200-500 TV replacement costs.
Get a surge protector rated for at least 2000 joules. Plug your TV into it. Plug the surge protector into the wall. Replace surge protectors every 3-5 years—they lose effectiveness over time.
Secure all cable connections when you first set up your TV. Push HDMI cables in fully. Screw coaxial cables tight. Don’t leave cables dangling where pets can reach them.
Use cable ties or clips to organize cables. This prevents accidental tugging that loosens connections.
Position indoor antennas near windows. Closer to the broadcast source means stronger signal. Stronger signal means fewer snowflake screens during weather events.
Outdoor antennas need annual checks. Ice, snow, and wind knock them out of alignment. Inspect your outdoor antenna each spring. Tighten mounting hardware. Clear debris.
Update your Sanyo smart TV firmware regularly. New firmware fixes bugs that cause display issues. Enable automatic updates if your TV has that option. Check manually every 2-3 months otherwise.
Press Menu > Settings > System > Software Update. Your TV checks for new firmware. Download and install any available updates.
Clean TV ports every 6 months. Mark it on your calendar. June and December. Spend 5 minutes with compressed air. This prevents dust accumulation that causes poor connections.
Replace old cables proactively. HDMI cables degrade after 3-5 years of use. The copper conductors oxidize. Plastic insulation cracks. If your cables are over 3 years old, consider replacing them before they fail. New HDMI cables cost $8-15. Cheaper than troubleshooting later.
Avoid extreme temperature exposure. Don’t place your TV near heating vents or air conditioning units. Rapid temperature changes stress internal components. This accelerates hardware failure.
These prevention steps take minimal effort. They extend your TV’s lifespan and reduce technical problems.
Frequently Asked Questions
Is snowflake screen a serious problem?
No, not usually. 85% of snowflake screens come from simple connection or input issues. You can fix them yourself in 5-10 minutes. Only 2% indicate serious hardware failure requiring professional repair.
Can I fix it without a technician?
Yes. Try all 6 fixes in this guide first. They resolve 98% of snowflake screens that have fixable causes. Only call a technician after all 6 fixes fail and you’ve confirmed your cables and devices work.
How long does a fix take?
Fix #1 takes 2 minutes. Fix #2 takes 3 minutes. Fix #3 takes 4 minutes. Fix #4 takes 1 minute. Fix #5 takes 3 minutes. Fix #6 takes 5 minutes. Total maximum time if you try everything: 18 minutes.
Will factory reset delete my apps?
Yes. Factory reset erases everything. All apps, login information, settings, saved channels. Your TV returns to brand-new condition. Only use factory reset after trying the other 5 fixes first.
Is my TV broken permanently?
Probably not. Most snowflake screens are temporary and fixable. If you’ve tried all 6 fixes and the advanced troubleshooting steps without success, then hardware damage is possible. Get a professional diagnostic before assuming permanent failure.
What if sound works but screen is snowy?
This typically means video processing failed but audio processing works. Try Fix #1 (wrong input), Fix #2 (cable problems), and Fix #5 (power cycle). These address video-specific issues. If sound works, your TV isn’t completely broken—just the video pathway. Check our guide on fixing LG TV sound not working for audio-specific troubleshooting.
Conclusion
Snowflake screens look alarming. That static pattern makes people think their TV is dead. But 85% of cases fix in under 5 minutes with no tools or technical knowledge.
Start with the correct input source. That solves 60% of snowflake screens immediately. Check your cables and connections next. Power cycle your smart TV. These three steps resolve almost every fixable case.
If your snowflake screen persists after all 6 fixes, you’re facing hardware failure. Get a repair quote. Compare it to new TV prices. TVs under $300 make repair uneconomical in most cases.
For TVs under warranty, contact Sanyo support immediately. Don’t attempt advanced troubleshooting yourself—you might void warranty coverage.
Prevention matters. Use surge protectors. Update firmware. Clean ports twice yearly. Replace cables every 3-5 years. These simple practices prevent most snowflake screen issues before they start.
Your Sanyo TV should work reliably for 5-7 years with basic maintenance. Snowflake screens are usually temporary setbacks, not permanent failures. For more TV troubleshooting guides, check our complete collection of TV service menu codes for advanced diagnostics.