The most common Onida TV service menu code is 2580. Press the Source button on your remote, navigate to the audio settings screen, then type 2580 on the number pad. The factory menu appears immediately. For CRT models, the method is different — press DISPLAY and VSM together on the original remote.
This guide covers every method by TV type, explains what the settings inside actually do, and tells you what to avoid so you don’t cause problems that are hard to undo.
If you work with other TV brands, we also have complete guides for Sony TV service menu codes, Samsung TV service menu codes, and LG TV service menu codes.
What Is the Onida TV Service Menu?
The service menu is a hidden settings layer built into every Onida TV. It sits behind the regular user menu and gives access to low-level controls — picture calibration, panel configuration, factory defaults, and diagnostic options.
Onida engineers and authorized technicians use it to calibrate sets at the factory and during repairs. It is not locked away because of complexity alone. It is hidden because changing the wrong value can break picture output, distort audio, or cause the set to lose its calibration entirely.
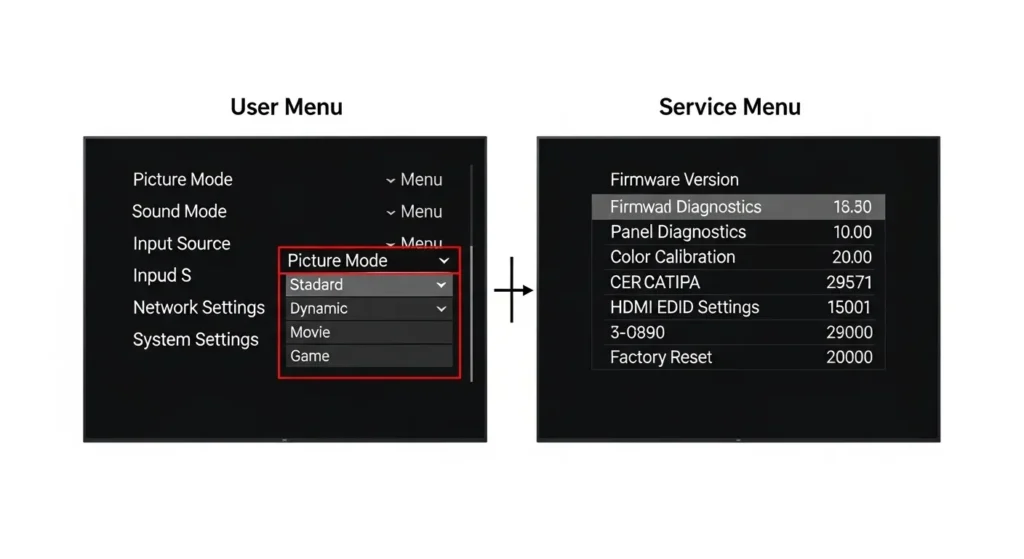
Service Menu vs. Standard User Menu
The user menu controls things like brightness, contrast, volume, and input source. These settings are designed to be adjusted by any viewer.
The service menu controls settings one level deeper — panel type identification, white balance gain, color temperature calibration, vertical geometry, and EEPROM reset options. These are not adjustable in the regular menu because incorrect values can require a trained technician to fix.
Who Should Use It
DIY users comfortable with electronics can safely use it for two tasks: performing a full factory reset and adjusting picture or sound values that the standard menu does not expose.
Everyone else — especially those unfamiliar with the model’s default values — should call Onida’s authorized service center before touching anything inside. The number is on their official site at onida.com.
Onida TV Service Menu Codes — By TV Type
Different Onida TV generations use different access methods. Using the wrong method wastes time. Use the table below to identify your TV type first, then go to the correct section.
| TV Type | Primary Code / Method | Notes |
|---|---|---|
| LED / LCD (non-Android) | Source + 2580 | Works on most post-2010 LED and LCD models |
| CRT (tube) models | DISPLAY + VSM simultaneously | Requires original Onida CRT remote |
| Android / Smart TV | Source + 2580 or front-panel combo | Some models use a different button path |
| Alternative (if 2580 fails) | Source + 0000 | Secondary code for select models |
| Button-combo method | VOL+ and CH+ held at power-on | Use if remote input does not work |
For a wider comparison across all TV brands, the All LCD LED TV Service Menu Codes master list is a useful reference.
Onida LED / LCD TV — Code 2580 (Primary Method)
This works on the majority of Onida LED and LCD televisions manufactured after 2010. You need the original Onida remote that shipped with the TV. Universal remotes usually do not carry the service-mode signal.
Step-by-step:
- Turn the TV on. Let it load to a live picture or input screen.
- Press the Source (or Input) button on your remote.
- The source selection or audio settings screen appears.
- Press 2, 5, 8, 0 in sequence on the number pad.
- The factory menu opens on screen.
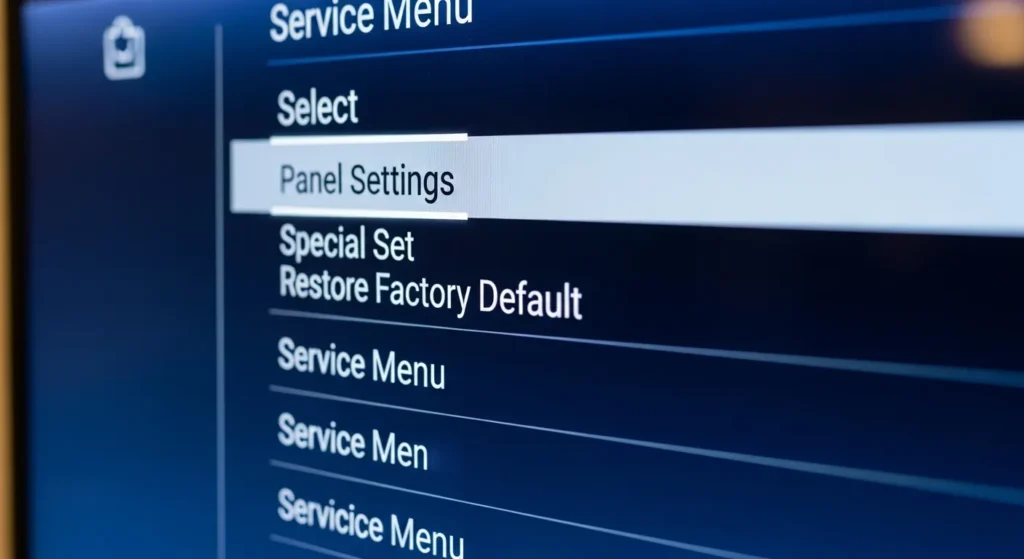
Inside, you will see options including Panel Settings, Special Set, Restore Factory Default, and picture and audio calibration controls.
Onida CRT TV — DISPLAY + VSM Method
Onida CRT sets — including the Oxygen 350, Onida Black, Profile 21, and 21DELITE series — use a completely different method. There is no numeric code involved.
Step-by-step:
- Turn the CRT TV on.
- On the original Onida remote, press and hold the DISPLAY button and the VSM button at the same time.
- The service menu appears. Release both buttons.
- Navigate using the arrow keys on the remote.
If your remote is not the original one supplied with the television, this will not work. The VSM key is a service-specific key present only on factory Onida CRT remotes. A universal remote replacement will not have it.
Some older CRT models also respond to the code 5963 followed by pressing the Menu button. Try this if the DISPLAY + VSM combo produces no response.
Onida Android / Smart TV
Onida’s Android and Google TV models — including HD Ready LED Android sets — store the service menu slightly differently from standard LED models.
Try the standard Source + 2580 method first. On many Android Onida TVs, this still works.
If it does not, try the front-panel button method:
- Press the Menu button on the TV’s physical front panel (not the remote).
- While holding it, press Menu on the remote simultaneously.
- The service menu may appear.
On a small number of Android models, Onida has restricted service menu access to authorized technicians only. If neither method works, the service menu may be locked at the software level. Contact the Onida service center directly.
Alternative Codes to Try If 2580 Fails
If 2580 gives no result, work through this list in order. Stop when one works.
- Source + 0000
- Source + 2585
- Source + 2583
- Menu + 2580 (substitute Menu for Source)
- Menu + 0000
- VOL+ and CH+ held during power-on (button combo, no remote code)
Each variation targets different chipset generations used across Onida’s LED lineup. The board inside the TV determines which code applies, not the model name alone.
Indian-market TV brands like Micromax and Videocon use similar chipset families. If you also work on those, the Micromax TV service menu codes and Videocon TV service menu codes guides cover their respective access methods.
Step-by-Step: How to Enter the Service Menu
What You Need Before You Start
- The original Onida remote supplied with the TV. Not a replacement, not a universal remote.
- The TV fully powered on and displaying a picture or input screen.
- A phone or notepad to photograph or write down current settings before you change anything.
- For CRT models: confirm the remote’s DISPLAY and VSM keys are physically functional.
If your remote has dead or sticky keys, the code entry will fail silently. Test the remote with your phone’s front camera — point the remote at it and press any button. A white flash from the remote’s IR LED confirms it is working.
Navigating Inside the Service Menu
Once inside, the remote arrow keys move between options. The OK or Enter key selects. The Menu or Exit key typically backs out or exits the service menu entirely.
Do not press OK on any option unless you know what it does. Selecting Restore Factory Default or any reset option will wipe all stored calibration values immediately.
Onida Service Menu Settings Explained
The exact options vary by model, but most Onida service menus contain the following categories.
Panel Settings
This section identifies the display panel type installed in the TV. It stores values like panel resolution, backlight type, and regional broadcast standard (PAL-BG, NTSC).
Do not change panel settings unless you have replaced the physical panel. Mismatched panel settings cause picture failure — blank screen, wrong aspect ratio, or color errors that look like hardware damage.
If your Onida TV is showing a dark or black screen after settings changes, see the TV no picture fix guide for diagnostic steps that don’t require service menu access.
Special Set
Special Set is a submenu that contains factory-level configuration options. This is where Restore Factory Default lives. It resets all user and service-level settings back to factory values.
Use this when the TV’s picture has drifted significantly, or when previous service adjustments have caused problems you cannot trace. After a factory reset, the TV behaves as it did the day it left the factory.
Picture Settings (White Balance, Brightness, Contrast)
These controls go deeper than the standard user menu. You can adjust RGB gain and offset values individually — this is how you calibrate white balance if whites appear too warm (yellow) or too cool (blue).
Default white balance values for most Onida LED models sit at 128 on a 0–255 scale for each RGB channel. If you are correcting a color temperature problem, adjust in small steps — no more than 5–10 points at a time — and check a white image between each adjustment.
If the picture problem you’re trying to fix is a dark screen rather than a calibration issue, the dark TV screen fix guide covers the most common causes and solutions.
Sound Settings (Bass, Treble, Balance)
Some service menus expose a deeper equalizer than the user menu shows. You can set default bass and treble levels that persist even after a user resets sound to factory. Balance should normally sit at 0 — any offset here causes one speaker to output more than the other.
Geometry Settings (CRT Models Only)
CRT-specific service menus include horizontal and vertical geometry controls — H-size, V-size, H-position, V-position, and linearity adjustments. These correct the physical shape of the picture tube image.
Geometry drift in CRT sets is normal after years of use. Adjustments here are the standard fix. Make changes in small increments and always check the picture with a full-screen white or grid test pattern.
Factory Reset via Service Menu
Inside Special Set, select Restore Factory Default and press OK. The TV will reset and may restart automatically. All custom picture and sound settings return to factory values. This does not erase channel memory or input configurations on most models.
If you need to reset channel memory separately, look for an Auto Scan or Channel Search option in the regular user menu after the factory reset completes.
For Samsung TVs, the factory reset process works similarly through their own service menu — see the Samsung TV factory data reset guide if you work across brands.
How to Find Your Onida Model Number
The model number determines which code and method apply to your TV. It is printed on a sticker on the back of the television — usually on the bottom-left or bottom-right edge of the rear panel.
The format typically looks like this: LEO32HAIN, 21DELITE, 14XS, or ONIDA43FAB.
On Android models, the model number is also accessible at: Settings → About → Device Info → Model Number.
Write the full model number down before attempting any service menu access. If you contact Onida support or a technician, they will ask for it immediately.
What to Do If the Code Does Not Work
Wrong Code for Your Model
Onida has used multiple chipset suppliers across its product range. The TV’s main board — not the model name — determines which code opens the service menu. If 2580 fails, try the alternative codes listed in the table above. Work through them one at a time.
Remote Control Problems
A remote with failing IR output will send incomplete codes. The TV receives a partial signal and ignores it. Test your remote with a phone camera as described above. If the remote is not working reliably, replace the batteries first. If it still fails the camera test, the remote needs to be repaired or replaced with an original Onida unit from an authorized service center.
If you are working on an LG TV and having similar remote issues, the LG Magic Remote not working fix guide covers IR and Bluetooth remote diagnostics in detail.
Software Updates That Changed Access
A small number of Onida Smart TV models received firmware updates that removed or relocated service menu access. If you updated the TV’s software and the code stopped working afterward, the menu may have moved or been locked. Contact Onida support to confirm.
When to Call Onida Support
If none of the codes work, the remote is confirmed functional, and the model number matches a supported type, the service menu may be locked by the authorized service center that last worked on the TV. Onida’s support line can advise on next steps. Their official support page is at onida.com/support.
Safety Rules Before You Start
Follow all of these before entering the service menu. Skipping any one of them is how easy problems turn into expensive ones.
- Write down or photograph every setting on the service menu screen before changing anything. Restoring from memory is unreliable.
- Change one setting at a time. Never adjust multiple values in a single session without testing in between.
- Do not change Panel Settings unless a panel replacement was just performed.
- Do not select any reset option unless you specifically want to wipe all settings.
- Exit correctly. Use the Menu or Exit key. Do not unplug the TV mid-session — unsaved states can corrupt stored values on some chipsets.
- Keep children away from the TV during service menu work.
- If the picture goes black or audio cuts completely after a change, press Menu/Exit immediately to back out. If that does not restore it, perform a factory reset from the Special Set menu.
Other brands share similar safety considerations. If you are working on a Philips or Panasonic set alongside an Onida, the Philips TV service menu codes guide and Panasonic TV service menu codes guide follow the same pre-entry safety logic.
Frequently Asked Questions
What is the service menu code for Onida TV?
The primary Onida TV service menu code is 2580. Press Source on the remote, go to the audio settings screen, then press 2-5-8-0. For CRT models, there is no numeric code — press DISPLAY and VSM simultaneously on the original Onida remote.
How do I factory reset an Onida TV from the service menu?
Enter the service menu using Source + 2580. Navigate to Special Set, then select Restore Factory Default and press OK. The TV resets all service and user-level settings to factory values. This action cannot be undone.
Will using the service menu void my warranty?
Yes, in most cases. Onida’s warranty terms state that the warranty is void if the set is tampered with, serviced, or repaired by any agency not authorized by the company. Accessing the service menu and making changes falls into that category. Do not use the service menu on a TV still under warranty — contact an authorized Onida service center instead.
Can I use a universal remote to access the service menu?
Generally, no. The Source + 2580 method requires the original Onida OEM remote. Universal remotes do not carry the correct IR signal profile for service mode activation on most Onida models. For CRT models, the VSM key is not present on any universal remote.
What happens if I change the wrong setting?
It depends on what you change. Adjusting picture calibration values produces visible but recoverable problems — colors shift, brightness changes. Changing panel type settings or running an EEPROM reset without correct values can cause a blank screen that requires a technician to fix. If you change something and the picture quality drops, exit the service menu immediately and use Restore Factory Default to recover. The fix TV no picture guide can help diagnose what went wrong if recovery steps don’t work.
Conclusion
The Onida TV service menu code 2580 — entered via Source on the remote — works for most LED and LCD models made after 2010. CRT models use the DISPLAY + VSM button combination on the original remote instead. Android Onida TVs try the same 2580 method first, with a front-panel button combo as a backup.
Inside the service menu, the most useful options for home users are the factory reset under Special Set and the picture calibration controls. Everything else should be left at default unless a trained technician has given you specific values to enter.
If the code does not work, check the remote first, then try the alternative codes. If none work, the issue is model-specific or firmware-locked — contact Onida support at onida.com with your full model number ready.
Looking for service menu codes for other brands? Browse the full collection: Hisense TV service menu codes, Haier TV service menu codes, JVC TV service menu codes, and Toshiba TV service menu codes.