Home Blog Page 7

How to Connect Wireless Headphones to Your TV

0
Smart TV and wireless headphones thumbnail.
Wireless headphones paired with a smart TV for immersive audio.

Watching TV with wireless headphones offers a private and immersive experience. Whether you’re avoiding noise complaints or enjoying late-night movies, this guide covers four reliable methods to connect wireless headphones to your TV. Each method suits different TV models and headphone types. Follow these steps to find the best solution for your setup. All information is current as of June 2025, ensuring you have the latest advice.

Why Use Wireless Headphones with Your TV?

Wireless headphones let you enjoy TV audio without disturbing others. They’re ideal for late-night viewing, noisy environments, or if you’re hard of hearing. You can also get better sound quality than TV speakers. The methods below work for most TVs, including smart and older models.

Method 1: Direct Bluetooth Connection

Most smart TVs, especially models from 2010 onward, have built-in Bluetooth. This is the easiest way to connect wireless headphones.

Step 1: Check If Your TV Has Bluetooth

  • Look for the Bluetooth logo on your TV, its box, or in the user manual.
  • Check the settings menu for a Bluetooth or audio output option. Navigate to Settings > Sound or Connectivity.
  • Consult the manual or manufacturer’s website, like Samsung Support or LG Support, for specific details.
TV Bluetooth settings menu with headphones.
TV screen showing Bluetooth settings for pairing headphones.

Step 2: Put Headphones in Pairing Mode

  • Check your headphones’ manual to enter pairing mode. Usually, hold the power or pairing button until a light blinks.
  • Common brands like Sony or Bose have clear instructions. For example, Sony WH-1000XM5 enters pairing mode by holding the power button for 5 seconds.

Step 3: Pair Headphones with Your TV

  • Go to your TV’s settings menu.
  • Find Bluetooth or audio output settings (e.g., Settings > Sound > Sound Output).
  • Select “Pair new device” or “Bluetooth Device.”
  • Choose your headphones from the list of available devices.

Brand-Specific Steps:

  • Samsung TVs: Navigate to Settings > Sound > Sound Output > Bluetooth Speaker List.
  • LG TVs: Go to Settings > Sound > Sound Out > Use Wireless Speaker > Bluetooth Device.
  • Sony TVs: Access Settings > Network & Accessories > Bluetooth settings.

Learn how to connect other Bluetooth devices to your Insignia TV at Connect Bluetooth Devices to Insignia TV.

Method 2: Using a Bluetooth Transmitter

If your TV lacks Bluetooth, a Bluetooth transmitter can send audio to your headphones. These devices are affordable, typically $20-$50, and work with any TV that has an audio output.

Step 1: Choose the Right Transmitter

  • Identify your TV’s audio output: Check for a 3.5mm headphone jack, RCA, or optical (TOSLINK) port.
  • Select a compatible transmitter: For example, the Mee Audio Connect ($62.99) supports optical audio.
  • Consider low-latency codecs: Transmitters with aptX Low Latency reduce audio lag for better video sync.

Step 2: Connect the Transmitter to Your TV

  • Plug the transmitter into your TV’s audio output port.
  • Use adapters if needed (e.g., RCA to 3.5mm for older TVs).
  • Power the transmitter, often via USB or a wall outlet.

Step 3: Pair Headphones with the Transmitter

  • Follow the transmitter’s instructions to enter pairing mode (often a button press).
  • Put your headphones in pairing mode.
  • Wait for the devices to connect, usually indicated by a solid light.

Tip: Some transmitters, like the Avantree Oasis Plus, support dual headphone connections for shared viewing.

Method 3: Via Media Streamers

Media streamers like Apple TV, Amazon Fire TV, or Roku often have Bluetooth capabilities, allowing you to connect headphones directly to the streamer.

Apple TV

  • Go to Settings > Remotes and Devices > Bluetooth.
  • Put your headphones in pairing mode.
  • Select your headphones from the list.

Amazon Fire TV

  • Navigate to Settings > Controllers & Bluetooth Devices > Other Bluetooth Devices.
  • Select “Add Bluetooth Devices.”
  • Put your headphones in pairing mode and select them.

Roku

  • Use the Roku app’s private listening feature. Connect headphones to your smartphone and enable private listening in the app.
  • Some Roku remotes, like the Voice Remote Pro, have a headphone jack.

Discover how to watch content on Roku at Watch Dailymotion on Roku TV.

Method 4: Dedicated TV Headphones

Dedicated TV headphones use radio frequency (RF) or infrared (IR) technology, offering low latency and reliable connections. They come with a base station that connects to your TV.

Step 1: Connect the Base Station

  • Plug the base station into your TV’s audio output (3.5mm, RCA, or optical).
  • Ensure the base station is powered, often via USB or an outlet.

Step 2: Pair Headphones with the Base Station

  • Follow the manufacturer’s instructions, typically pressing a pairing button on both devices.
  • Brands like Sennheiser and Avantree offer reliable options.

Troubleshooting Common Issues

Audio Lag or Latency

  • Bluetooth can cause audio delays, misaligning sound and video.
  • Use headphones or transmitters with aptX Low Latency for better sync.
  • Adjust your TV’s audio delay settings if available.

Connection Problems

  • Ensure headphones are in pairing mode and close to the TV or transmitter.
  • Restart both the TV and the headphones.
  • Turn off nearby wireless devices to reduce interference.

Sound Quality Issues

  • Check that headphones are fully charged.
  • Adjust TV audio settings to disable enhancements like surround sound.
  • Ensure the correct audio output is selected (e.g., PCM or stereo).

Fix TV audio issues at Fix LG TV Sound Not Working.

FAQs

Can I Connect Multiple Headphones to My TV?

Some Bluetooth transmitters, like the Avantree Oasis Plus, support dual connections. Certain TVs, like 2022 Samsung models, allow multi-device pairing.

Do All Wireless Headphones Work with TVs?

Most Bluetooth headphones work, but some are mobile-only. Check compatibility in the manual. Dedicated TV headphones are designed for TV use.

How Do I Connect AirPods to My TV?

Use the direct Bluetooth method if your TV supports it. Otherwise, use a Bluetooth transmitter.

Why Is There Audio Lag?

Bluetooth latency can cause delays. Use aptX Low Latency devices or RF headphones for minimal lag. Adjust TV audio settings for sync.

Comparing the Methods

MethodProsConsBest For
Direct BluetoothSimple, no extra devices neededLimited to Bluetooth-enabled TVsSmart TV owners
Bluetooth TransmitterWorks with any TV, affordableExtra device requiredOlder TVs without Bluetooth
Media StreamersConvenient if you already use oneLimited to streamer contentStreaming device users
Dedicated TV HeadphonesLow latency, reliable connectionMore expensive, bulkier setupGamers or those needing high-quality audio

Conclusion

Connecting wireless headphones to your TV enhances your viewing experience with privacy and better sound. Whether your TV has Bluetooth or not, you can use direct pairing, a transmitter, a media streamer, or dedicated headphones. Each method has unique benefits, so choose based on your TV and preferences. For more TV troubleshooting tips, check out Fix Samsung TV Black Screen or Fix Vizio TV Not Connecting to WiFi.

How to Find the Refresh Rate of Your TCL TV

0
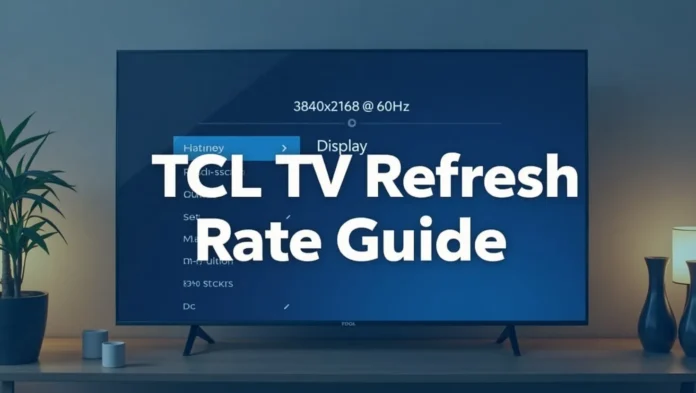
TCL TV with settings menu showing refresh rate for blog thumbnail.
TCL TV displaying refresh rate settings in a modern living room.

The refresh rate of your TV affects how smooth the picture looks. It’s especially important for fast-moving content like sports, action movies, or video games. A higher refresh rate reduces motion blur and improves clarity. TCL TVs are known for their quality and affordability, but finding the refresh rate can vary depending on whether your TV uses Android TV (including Google TV) or Roku TV. This guide provides clear, step-by-step instructions to help you find the refresh rate on your TCL TV. We’ll also cover how to check your TV’s specifications online and address common questions.

Understanding Refresh Rate on TCL TVs

The refresh rate is the number of times per second your TV updates the screen image. It’s measured in Hertz (Hz). Common refresh rates for TCL TVs are 60Hz, 120Hz, or even 240Hz on high-end models. A higher refresh rate makes motion appear smoother, which is ideal for gaming or fast-paced videos. However, the actual refresh rate depends on your TV model and the input source, like a gaming console or streaming device.

TCL TVs use different operating systems, primarily Android TV (or Google TV) and Roku TV. Each system has a unique way to access display settings. Knowing your TV’s operating system is key to finding the refresh rate. Most TCL TVs support at least 60Hz, but some premium models offer 120Hz or higher for enhanced performance.

How to Find Refresh Rate on TCL Android TV

If your TCL TV runs Android TV or Google TV, you can find the refresh rate in the display settings. Follow these steps:

  1. Press the Settings button on your remote. Look for a gear icon on the remote or screen.
  2. Go to ‘Display’ or ‘Display and sound’ settings. The name may vary slightly by model.
  3. Select ‘Resolution’ or ‘Screen resolution.’ You’ll see the current resolution and refresh rate, such as “3840×2160 @ 60Hz.”
  4. To change the refresh rate (if needed), choose a different option from the list, if your TV supports it.
TCL Android TV settings menu with resolution and refresh rate.
TCL Android TV display settings showing resolution and refresh rate.

Note: Menu options may differ based on your TV’s model or software version. If you don’t see the refresh rate, check for a “System” or “About” section in the settings, which may display additional display information.

How to Find Refresh Rate on TCL Roku TV

For TCL TVs running Roku TV, you can check the refresh rate through the input settings or by displaying the input signal information. Here’s how:

  1. While on an HDMI input, press the OK button on your Roku remote. This may display an information HUD showing the current resolution and refresh rate, like “3840×2160 60Hz.”
  2. Alternatively, check the HDMI mode:
    • Press the Home button on your remote.
    • Select Settings from the menu.
    • Choose TV inputs.
    • Select the HDMI input you’re using (e.g., HDMI 1).
    • Look for HDMI mode. It will show if it’s set to HDMI 2.0 (supports 60Hz at 4K) or HDMI 1.4 (supports 30Hz at 4K).

Note: If the OK button doesn’t show the resolution, try pressing the asterisk (*) button while watching content to access the options menu. Some apps may display resolution details, but this depends on the app.

Checking Refresh Rate via TV Model Specifications

If you can’t find the refresh rate on your TV or want to know the maximum supported rate, you can look up your TV’s specifications online. Here’s how:

  1. Locate your TV’s model number. Check the back of the TV, the original box, or go to Settings > System > About on your TV.
  2. Visit a reliable source. Go to TCL’s official website or trusted tech review sites like RTINGS.com.
  3. Search for your model number. Look for the display specifications, which will list the refresh rate (e.g., 60Hz or 120Hz).

This method is useful if your TV doesn’t display the refresh rate directly or if you’re curious about its capabilities.

Common Questions and Troubleshooting

Here are answers to common questions about TCL TV refresh rates, along with troubleshooting tips:

Does my TCL TV support 120Hz?

It depends on your TV model. Most budget TCL TVs support 60Hz, while premium models, like some QLEDs, support 120Hz or higher. Check your model’s specifications on TCL’s website or in the user manual. For 120Hz, you may need to enable “Game Mode” and use an HDMI 2.1 cable.

Why is the refresh rate option grayed out?

This can happen if your TV is set to auto-detect the resolution and refresh rate. Go to the display settings and turn off any “Auto” options. Then, manually select the desired refresh rate. Also, ensure your input device (e.g., gaming console) supports the refresh rate.

How does refresh rate affect picture quality?

A higher refresh rate makes motion smoother, reducing blur in fast scenes. This is noticeable in sports, action movies, or gaming. However, the content must support higher frame rates to fully benefit from a higher refresh rate.

My TV shows ‘STB 1080P @50Hz.’ What does this mean?

This message indicates the input source (like a set-top box) is sending a signal at 1080p resolution with a 50Hz refresh rate. Check your input device’s settings to adjust the output to match your TV’s capabilities, such as 60Hz or 120Hz.

Troubleshooting Tips:

  • Use the right HDMI cable. For 60Hz at 4K, use an HDMI 2.0 cable. For 120Hz, you may need an HDMI 2.1 cable.
  • Update your TV’s software. Go to Settings > System > System Update to ensure you have the latest firmware, which may improve display options.
  • Check the input source. Devices like streaming boxes or consoles must be set to output the desired refresh rate.
  • Enable Game Mode for gaming. This can unlock higher refresh rates on supported models.

For more help with TCL TV settings, see our related posts:

Conclusion

Finding the refresh rate on your TCL TV is simple once you know where to look. For Android TV, check the display settings to see the current resolution and refresh rate. For Roku TV, press the OK button on an HDMI input or check the HDMI mode in the settings. If you need to confirm your TV’s maximum refresh rate, look up your model’s specifications online. Adjusting the refresh rate can enhance your viewing experience, especially for gaming or fast-moving content. Follow these steps to ensure your TCL TV is set up for the best performance.

How to Connect Your Vizio TV to the Internet: Wi-Fi and Ethernet Guide

0
Vizio TV with Wi-Fi icon and Ethernet cable in a modern living room.
Vizio TV connected to Wi-Fi and Ethernet.

Connecting your Vizio TV to the internet lets you stream movies, shows, and apps like Netflix or YouTube. You can use Wi-Fi for a wireless setup or an Ethernet cable for a wired connection. This guide provides step-by-step instructions for both methods, troubleshooting tips, and solutions for connecting without a remote. All information is accurate as of June 2025, based on the latest Vizio TV models and support resources.

Why Connect Your Vizio TV to the Internet?

An internet connection unlocks your Vizio TV’s smart features. You can access streaming services, update software, and use apps like Vizio SmartCast. Whether you choose Wi-Fi or Ethernet, a stable connection ensures smooth performance. This guide covers all methods to help you get online quickly.

How to Connect Your Vizio TV to Wi-Fi

Most Vizio TVs support wireless connections, making Wi-Fi a popular choice. Follow these steps to connect your TV to your home Wi-Fi network. You’ll need your Wi-Fi name (SSID) and password.

Steps to Connect to Wi-Fi

  1. Turn on Your TV: Press the power button on the TV (usually on the back left) or use the remote’s power button (top right).
  2. Open the Menu: Press the Menu button on your remote. It’s typically four buttons below the power button.
  3. Select Network: Use the arrow buttons to highlight “Network” and press OK.
  4. Choose Wi-Fi: Select “Wireless” or “Wi-Fi” from the network options and press OK.
  5. Pick Your Network: A list of available Wi-Fi networks will appear. Select your network and press OK.
  6. Enter the Password: Use the on-screen keyboard to type your Wi-Fi password. Passwords are case-sensitive, so double-check your entry.
  7. Connect: Select “Connect” or press OK. A confirmation message should appear if successful.
  8. Test the Connection: Go to Menu > Network > Test Connection to confirm the TV is online. A download speed will display if connected.

Tips:

  • Ensure your router is on and within range (ideally within 30 feet).
  • If your network doesn’t appear, select “More Access Points” or “Hidden Network” and manually enter the SSID.
  • For faster setup, use Wi-Fi Protected Setup (WPS) if your router supports it. Press the WPS button on your router, then select WPS on the TV.

How to Connect Your Vizio TV to Ethernet

A wired Ethernet connection offers stability, especially for 4K streaming. You’ll need an Ethernet cable and a router with an available port.

Steps to Connect via Ethernet

  1. Plug in the Ethernet Cable: Connect one end of the Ethernet cable to the Ethernet port on the back of your Vizio TV. Plug the other end into an available port on your router.
  2. Turn on Your TV: Use the power button on the TV or remote.
  3. Open the Menu: Press the Menu button on the remote.
  4. Select Network: Navigate to “Network” using the arrow buttons and press OK.
  5. Choose Wired Network: Select “Wired Network” or “Ethernet” and press OK.
  6. Confirm Connection: A message will confirm the connection is complete.
  7. Test the Connection: Go to Menu > Network > Test Connection to verify the connection. A download speed indicates success.

Tips:

  • Check that the Ethernet cable is securely plugged in. Green or orange lights on the TV’s Ethernet port should light up.
  • If the connection fails, try a different cable or router port.
  • Ethernet connections don’t require a password, making setup simpler than Wi-Fi.
Back of Vizio TV with Ethernet cable plugged into the port.
Ethernet cable connected to a Vizio TV.

Troubleshooting Common Connection Issues

If your Vizio TV won’t connect to the internet, try these steps. They address common problems like weak signals or incorrect settings. For more detailed fixes, check our guide on Vizio TV Wi-Fi issues.

Common Fixes

  • Check Your Network: Use another device, like a phone, to test your Wi-Fi. If it doesn’t connect, restart your router by unplugging it for 2 minutes.
  • Power Cycle the TV: Unplug the TV from the wall for 30 seconds. Hold the power button for 15 seconds, then plug it back in and turn it on.
  • Verify Wi-Fi Password: Go to Menu > Network and re-enter your password. Check the router’s sticker for the default password if needed.
  • Enable DHCP: Go to Menu > All Settings > Network > Manual Setup > DHCP. Turn it on if it’s off, or toggle it off and on.
  • Check Signal Strength: Move the router closer to the TV or remove objects like electronics that may block the signal.
  • Update Software: Go to Menu > System > Check for Updates to ensure your TV has the latest firmware.
  • Factory Reset: As a last resort, go to Menu > Admin & Privacy > Reset to Factory Settings. This erases all settings, so use it cautiously.

Table: Common Connection Issues and Solutions

IssuePossible CauseSolution
Wi-Fi not listedRouter out of rangeMove router closer or select “Hidden Network”
Wrong password errorIncorrect or case-sensitive passwordRe-enter password carefully
No internet accessWeak signal or router issueRestart router, check signal strength
TV disconnects oftenSoftware glitchUpdate firmware or power cycle TV

Tips:

  • If using a mobile hotspot, ensure it provides a stable connection, as hotspots can be unreliable.
  • For hotel or hospital Wi-Fi, contact the IT department for access instructions.
  • If only the TV has issues, it may need repair. Contact Vizio Support for help.

Connecting Your Vizio TV Without a Remote

If you’ve lost your remote, you can still connect your Vizio TV to the internet using the Vizio SmartCast app or physical buttons on the TV. This method may require extra steps, like resetting the TV.

Steps to Connect Without a Remote

  1. Download the Vizio SmartCast App: Install the Vizio SmartCast app on your smartphone from the App Store or Google Play.
  2. Connect via Ethernet (Optional): Plug an Ethernet cable into the TV and router to establish a temporary connection.
  3. Reset the TV: Press and hold the Input and Volume Down buttons on the TV for 15-20 seconds to reset it.
  4. Pair the App: Open the app and follow the prompts to connect to your TV. You may need a code displayed on the screen.
  5. Access Network Settings: Use the app to navigate to Menu > Network and select your Wi-Fi network.
  6. Enter Wi-Fi Details: Type your Wi-Fi password using the app’s on-screen keyboard and connect.
  7. Test the Connection: Use the app to go to Menu > Network > Test Connection to confirm.

Tips:

  • If the app doesn’t detect the TV, ensure both devices are on the same network.
  • Some Vizio TVs have only one button (power). In this case, Ethernet or a universal remote may be needed.
  • For universal remote setup, see our guide on using a universal remote.
Smartphone casting to Vizio smart TV
Casting from smartphone to Vizio TV

People Also Ask: Common Questions Answered

Here are answers to common questions about connecting a Vizio TV to the internet, based on popular user searches:

How do I find network settings on my Vizio TV?

Press the Menu button on your remote, then select “Network” using the arrow buttons. You’ll see options for Wi-Fi or Ethernet.

What if my Vizio TV keeps disconnecting from Wi-Fi?

Check signal strength, restart the router, or update the TV’s software. Moving the router closer can help. See our Wi-Fi fixes guide.

Can I use a universal remote to connect my TV?

Yes, a universal remote can access the menu to set up Wi-Fi or Ethernet. Program it using your TV’s model number.

Why does my TV show “No Network Detected”?

This could be due to a weak signal, wrong password, or router issue. Try power cycling both devices or checking the password.

Conclusion

Connecting your Vizio TV to the internet is simple with Wi-Fi or Ethernet. Use the remote or Vizio SmartCast app to navigate the network settings. If issues arise, troubleshooting steps like restarting the TV or router can help. For remote-free setups, the SmartCast app or physical buttons work well. Always test the connection to ensure it’s active. For more TV tips, visit Soft4led.

How to Reset Sony Bravia TV: A Comprehensive Guide

0
Sony Bravia TV with reset icon
Sony Bravia TV Reset Guide

Sony Bravia TVs are known for their high-quality visuals and sound. However, issues like app crashes, unresponsiveness, or random shutdowns may require a reset. This guide explains how to reset your Sony Bravia TV, covering soft reset, power cycle, and factory reset methods for both Android/Google TVs and non-Android models. Follow these steps to fix your TV quickly and safely.

Types of Resets for Sony Bravia TV

There are three main ways to reset your Sony Bravia TV. Each serves a different purpose based on the issue you’re facing.

Restart / Soft Reset

A soft reset restarts the TV without deleting your settings or apps. It’s ideal for minor issues like slow apps or frozen screens.

Power Cycle / Power Reset

A power cycle involves unplugging the TV to clear temporary glitches. It’s effective for unresponsiveness or power-related problems.

Factory Reset

A factory reset restores the TV to its original settings, erasing all data, including apps, Wi-Fi settings, and custom preferences. Use this as a last resort or when selling your TV.

Reset Methods for Android/Google TVs

Most modern Sony Bravia TVs (2015 and later) run on Android or Google TV. Here’s how to reset them.

How to Perform a Restart

A restart fixes minor issues without affecting your data.

  • Using the Remote:
    1. Point the remote at the TV’s LED or status light.
    2. Press and hold the Power button for 5 seconds until a “Power off” or “Restart” message appears.
    3. Select Restart if prompted.
    4. Wait about 1 minute for the TV to reboot.
  • Using the TV Menu:
    1. Press the Home or Quick Settings button on the remote.
    2. Navigate to Settings > System > About > Restart > Restart.
    3. Alternatively, try Settings > Device Preferences > About > Restart > Restart.
    4. Wait for the TV to restart.

How to Perform a Power Reset

A power reset clears temporary issues by discharging the TV’s memory.

  1. Turn off the TV if possible.
  2. Unplug the power cord from the electrical outlet.
  3. Wait 2 minutes.
  4. Plug the power cord back in.
  5. Turn on the TV.

Alternative Method (for some Google TV models):

  1. Press and hold the Power button on the TV for 40 seconds or until the TV turns off.
  2. Wait for the TV to restart.

How to Perform a Factory Data Reset

This reset erases all data and restores factory settings.

  1. Press the Home button on the remote.
  2. Go to Settings > System > About > Reset > Factory data reset.
  3. Select Delete everything.
  4. Enter the PIN if prompted (default is often “0000”).
  5. Confirm the reset and follow the initial setup wizard.

Note: This process deletes all apps, Wi-Fi settings, and custom preferences. You’ll need to set up the TV again.

How to Perform a Forced Factory Reset

Use this when the TV is unresponsive or you can’t access the menu.

  1. Unplug the TV.
  2. Press and hold the Power button and Volume Down button on the TV (if available).
  3. Plug the TV back in while holding the buttons.
  4. Wait for a white or green LED light, then release the buttons.
  5. Wait a few minutes for the TV to reset and turn on.

Note: Check your TV model for button locations, typically on the back or side.

Reset Methods for Non-Android TVs

Older Sony Bravia TVs may not run Android or Google TV. Here’s how to reset them.

How to Perform a Power Reset

  1. Unplug the TV’s power cord.
  2. Wait 1 minute.
  3. Plug the power cord back in.
  4. Turn on the TV.

How to Perform a Factory Data Reset

When the Home Menu Is Accessible

  1. Press the Home button on the remote.
  2. Navigate to Settings > System Settings > Customer Support > Factory Settings.
  3. Select OK.
  4. Follow on-screen instructions to complete the reset.

When the Home Menu Is Not Accessible

  1. Unplug the TV for 1 minute.
  2. Plug it back in and wait 40 seconds for startup.
  3. Press and hold the Up Arrow button on the remote.
  4. While holding, press and release the Power button on the TV.
  5. Release the Up Arrow button when the initial setup screen appears.
  6. Follow the setup instructions.
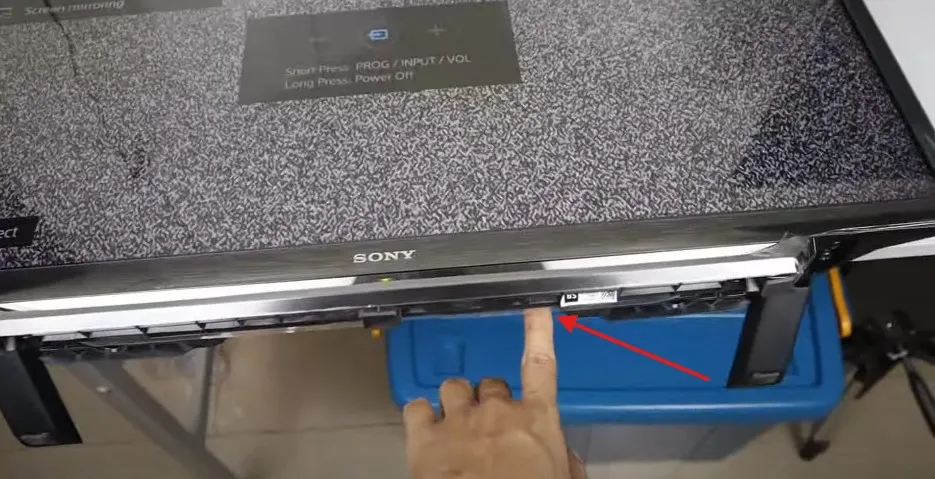
Sony Bravia TV power button
Location of Power Button on Sony Bravia TV

Resetting Sony Bravia TV Without a Remote

If you don’t have a remote, you can still reset your TV using its buttons.

For Android TVs

  1. Unplug the TV.
  2. For single-button models:
    • Press and hold the Power button.
    • Plug in the power cord.
    • Wait for a white LED light, then release.
  3. For three-button models (power and volume):
    • Press and hold the Power and Volume Down buttons.
    • Plug in the power cord.
    • Wait for a green LED light, then release.
  4. Wait for the TV to reset and turn on.

For Non-Android TVs

  1. Unplug the TV for 1 minute.
  2. Plug it back in and wait 40 seconds.
  3. Press and hold the Power button on the TV.
  4. Wait for the initial setup screen.
  5. Follow the setup instructions.

Note: A universal remote app can also access the menu for resets.

Common Issues and When to Reset

IssueRecommended Reset
App crashes or slow appsSoft Reset
Frozen screenSoft Reset or Power Reset
TV won’t turn onPower Reset
Persistent issuesFactory Reset
Unresponsive TVForced Factory Reset

For related troubleshooting, see Sony TV Freezing Fixes or Fix TV No Picture.

Precautions Before Resetting

  • Disconnect USB Devices: Remove all external USB devices to prevent data issues.
  • Backup Settings: Note your Wi-Fi and app settings, as factory reset erases them.
  • Check TV Type: Confirm if your TV is Android/Google TV or non-Android.
  • Understand Data Loss: Factory reset deletes all data, requiring a full setup.

Frequently Asked Questions

How do I know if my Sony Bravia TV is an Android TV?

Check the settings menu for the Google Play Store or Android OS. Most models from 2015 onward are Android or Google TVs. Refer to Sony TV Type Guide.

What happens after a factory reset?

The TV returns to its original settings, erasing apps, Wi-Fi, and preferences. You’ll need to set it up again, including agreeing to Google’s Terms of Service for Android TVs.

Can I reset my TV without a remote?

Yes, use the TV’s buttons for a forced factory reset or power cycle, as described above.

Why is my Sony Bravia TV unresponsive?

Try a power reset first. If it persists, a factory reset may be needed. See Sony Support for further help.

What is the default PIN for factory reset?

The default PIN is often “0000.” If it doesn’t work, check your manual or contact Sony Support.

Conclusion

Resetting your Sony Bravia TV can resolve many issues, from app crashes to unresponsiveness. Start with a soft reset or power cycle for minor problems. Use a factory reset for persistent issues, but be aware it erases all data. Always disconnect USB devices and check your TV type before resetting. If problems continue, visit Sony Support or explore related guides on Soft4led.

How to Connect Your Polk Soundbar to Your TV

0
Thumbnail of a Polk soundbar and TV connected via HDMI.
Connecting a Polk soundbar to a TV.

A Polk soundbar can make your TV’s audio sound much better. It’s great for movies, shows, or games. You can connect it to your TV in several ways: HDMI, Optical, Auxiliary (3.5mm), or Bluetooth. This guide explains each method with clear steps. It also covers setting up your remote and fixing common issues. The information is based on Polk Audio’s official support and general soundbar connection guides, ensuring accuracy as of June 2025.

Why Connect a Polk Soundbar to Your TV?

Soundbars improve your TV’s sound quality. They provide clearer dialogue and richer bass. Polk soundbars, like the DBRX or Signa series, are easy to set up. Most models support multiple connection types, so you can choose what works best for your TV. HDMI ARC is often the preferred method for its quality and ease, but Optical and Aux are reliable alternatives. Bluetooth is also an option for some models, offering wireless convenience.

Connection Methods

HDMI Connection (ARC/eARC)

HDMI ARC (Audio Return Channel) is the best way to connect your Polk soundbar to your TV. It delivers high-quality audio and lets your TV remote control the soundbar. Most TVs made after 2014 have an HDMI ARC port. Here’s how to set it up:

  1. Locate the HDMI ARC ports. Find the HDMI port labeled “ARC” or “eARC” on your TV and soundbar. It’s often color-coded.
  2. Connect the HDMI cable. Plug one end into the soundbar’s HDMI ARC port and the other into the TV’s HDMI ARC port. Use an HDMI 2.0 cable or the one provided with your soundbar.
  3. Enable CEC on your TV. Go to your TV’s settings menu. Look for Consumer Electronics Control (CEC) and turn it on. This lets your TV remote control the soundbar. Check your TV’s manual, as CEC may have a brand-specific name (e.g., Anynet+ for Samsung).
  4. Select the HDMI input. Use the soundbar’s remote to set the input to HDMI ARC.
  5. Test the connection. Play audio on your TV. The sound should come through the soundbar.

If your TV doesn’t have an ARC port, try the Optical or Aux methods below.

Optical Connection

An Optical cable provides digital audio and is a good alternative if HDMI ARC isn’t available. It’s reliable and works with most TVs and Polk soundbars. Follow these steps:

  1. Find the Optical ports. Look for the Optical output on your TV and the Optical input on your soundbar. They’re usually labeled “Optical” or “Digital Audio Out/In.”
  2. Connect the Optical cable. Plug one end into the TV’s Optical output and the other into the soundbar’s Optical input. Ensure the cable matches the port’s shape to avoid damage.
  3. Set the soundbar input. Use the soundbar’s remote to select the Optical input mode.
  4. Adjust TV settings. Go to your TV’s audio settings. Set the audio output to “Optical” or “Digital.” Turn off the TV’s built-in speakers if needed.
  5. Test the connection. Play something on your TV to check if the soundbar works.

Auxiliary Connection (3.5mm Jack)

The Auxiliary (Aux) connection uses a 3.5mm cable for analog audio. It’s a simple option for older TVs without HDMI ARC or Optical ports. Here’s how to do it:

  1. Locate the Aux ports. Find the headphone or Aux output on your TV and the Aux input on your soundbar.
  2. Connect the Aux cable. Plug one end of the 3.5mm cable into the TV’s Aux output and the other into the soundbar’s Aux input.
  3. Set the soundbar input. Use the soundbar’s remote to select the Aux input mode.
  4. Adjust TV audio settings. Set the TV’s audio output to “Headphone” or “Aux.” Turn off the TV’s speakers if possible.
  5. Test the connection. Play audio to ensure the soundbar is working.

Bluetooth Connection

Some Polk soundbars, like the Signa S2 or Command Bar, support Bluetooth for wireless audio. This is convenient but may have slight delays or lower quality compared to wired connections. Check your soundbar’s manual to confirm Bluetooth support. Here’s how to connect:

  1. Enable Bluetooth on the soundbar. Press the Bluetooth button on the soundbar or its remote. The soundbar should enter pairing mode, often indicated by a flashing LED.
  2. Turn on Bluetooth on your TV. Go to your TV’s settings and enable Bluetooth. Look for available devices.
  3. Pair the devices. Select “Polk BT” or your soundbar’s name from the TV’s Bluetooth menu. The soundbar may chime or show a solid LED when connected.
  4. Set the soundbar input. Ensure the soundbar is set to Bluetooth mode.
  5. Test the connection. Play audio to check if it plays through the soundbar.

Note: Bluetooth may not be available on all Polk models. If you face issues, try a wired connection or check Polk’s Bluetooth Guide.

Setting Up Remote Controls

When using HDMI ARC, you can often control your Polk soundbar with your TV’s remote. This requires enabling CEC in your TV’s settings. Here’s how:

  1. Access TV settings. Use your TV’s remote to open the settings menu.
  2. Enable CEC. Look for CEC or a brand-specific name (e.g., Simplink for LG). Turn it on.
  3. Test the remote. Try adjusting the volume. The soundbar should respond.

If CEC isn’t working, you may need to program your TV or cable/satellite remote to control the soundbar. Check Polk’s Remote Setup Guide for model-specific instructions.

For other connection types, use the soundbar’s remote to control volume and inputs. If you’re having trouble, see the troubleshooting section below.

Troubleshooting Common Issues

Here are solutions to common problems when connecting your Polk soundbar:

IssueSolution
No sound from soundbarCheck that the correct input (HDMI, Optical, Aux, or Bluetooth) is selected on the soundbar. Ensure the TV’s audio output is set to the correct port. Verify cables are securely connected.
Soundbar not responding to TV remoteEnsure CEC is enabled for HDMI ARC connections. Check Polk’s Remote Setup Guide. Try reprogramming the remote.
Bluetooth not connectingConfirm your soundbar supports Bluetooth. Restart both devices and re-pair. Move devices closer to avoid interference. See Polk’s Bluetooth Guide.
Poor audio qualityFor HDMI or Optical, ensure cables are high-quality. For Aux, check for loose connections. Avoid Bluetooth for high-quality needs due to potential latency.
Soundbar turns on/off unexpectedlyCheck for CEC settings conflicts. Disable CEC temporarily to test. Update soundbar firmware via Polk’s website.

For more TV audio issues, check our guide on Fixing LG TV Sound Problems.

Frequently Asked Questions

Does my Polk soundbar support HDMI ARC?

Most Polk soundbars, like the DBRX and Signa series, support HDMI ARC. Check your soundbar’s manual or the ports on the back for an “HDMI ARC” label.

What if my TV doesn’t have HDMI ARC?

Use an Optical or Aux connection. Optical offers better quality, while Aux is simpler for older TVs.

Can I connect my Polk soundbar wirelessly?

Some models support Bluetooth. Check your manual or Polk’s Bluetooth Guide. Wi-Fi may be available for models like the Command Bar using the Polk Connect app.

How do I enable CEC on my TV?

Go to your TV’s settings menu. Look for CEC or a brand-specific name like Anynet+ (Samsung) or Simplink (LG). Turn it on to sync your remote with the soundbar.

Why is there no sound after connecting?

Ensure the correct input is selected on the soundbar. Check the TV’s audio output settings. Verify all cables are secure. Restart both devices if needed.

For more TV setup tips, see our guide on Connecting Sonos Speakers to Your TV.

Conclusion

Connecting your Polk soundbar to your TV is straightforward with the right steps. HDMI ARC is the best option for most users, offering great sound and easy control. Optical and Aux are solid alternatives, and Bluetooth works for wireless setups on supported models. Follow the steps above, check your settings, and troubleshoot any issues. For more help, visit Polk Audio Support or explore our related guides on Soft4led.

Amazon Fire Stick Free Channels List: Your Ultimate Guide to Free Streaming in 2025

0
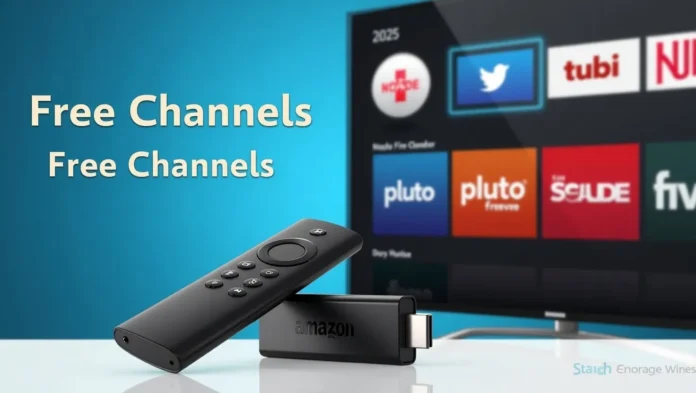
Amazon Fire Stick with TV showing free streaming apps
Discover free channels on Amazon Fire Stick in 2025.

The Amazon Fire Stick has become a go-to device for streaming enthusiasts, offering access to a vast array of content right from your TV. For those looking to cut the cord or save on entertainment costs, the Fire Stick provides numerous free channels through official apps and services. This comprehensive guide details the free channels available on the Amazon Fire Stick in 2025, focusing on legal and reliable options to ensure a safe and enjoyable streaming experience. Whether you’re into movies, live TV, sports, or news, this guide has you covered.

What is Amazon Fire Stick?

The Amazon Fire Stick is a compact streaming device that connects to your TV’s HDMI port, transforming it into a smart TV. It runs on the Fire TV operating system, allowing users to download apps and access streaming services. With Alexa voice control, you can search for content, launch apps, and control playback using simple voice commands. The Fire Stick supports both free and paid content, making it a versatile choice for entertainment.

Amazon Fire TV Stick connected to TV
Setting up your Fire TV Stick

Free Channels on Amazon Fire Stick

The Fire Stick offers a variety of free channels through official apps and services, providing ad-supported content at no cost. These channels include movies, TV shows, live TV, and more, catering to diverse interests. While third-party apps may offer additional free content, this guide focuses on official, legal channels to ensure safety and reliability. Availability may vary by region, so it’s a good idea to check the Fire Stick interface for the latest offerings.

Top Official Free Streaming Apps on Fire Stick

Below is a list of the top official free streaming apps available on the Amazon Fire Stick, each offering a unique selection of content.

Tubi

Tubi is a free, ad-supported streaming service with a vast library of over 20,000 movies and TV shows. It includes genres like action, comedy, drama, and family-friendly content, as well as live news from providers like FOX and NBC. Tubi requires no subscription, though you can register for a free account to save your watch history. To install, search for “Tubi” in the Amazon Appstore and select “Get” to download.

For a complete list of Tubi channels, visit our guide: Tubi TV Channels

Tubi app icon
Tubi offers a vast library of free movies and TV shows.

Pluto TV

Pluto TV combines live TV channels with on-demand content, offering dozens of channels across categories like news, sports, entertainment, and lifestyle. With over 1,000 on-demand movies and shows, it’s a great alternative to traditional cable TV. No sign-in is required, though registering allows you to sync your viewing preferences. Install Pluto TV via the Amazon Appstore by searching for “Pluto TV.”

Check out our detailed channel list: Pluto TV Channel List

Pluto TV on Fire Stick
Pluto TV provides free live TV channels and on-demand content.

Xumo Play

Xumo Play offers over 350 live channels and a library of 15,000+ movies and shows, all free with ads. Its content spans news, sports, movies, and kids’ programming, making it a versatile choice. No registration is needed, and the app is available in the Amazon Appstore. Search for “Xumo Play” to install it on your Fire Stick.

Amazon Freevee

Amazon Freevee, previously IMDb TV, is now integrated into the Prime Video app, offering free movies, TV shows, and live channels with ads. You don’t need an Amazon Prime subscription to access Freevee content, which includes over 590 ad-supported channels as of January 2025. Content ranges from news and sports to entertainment and kids’ programming, including Amazon Originals like Reacher and Judy Justice. Open the Prime Video app and look for the “Free with ads” section to access Freevee.

For a comprehensive list of Freevee channels, see: Amazon Freevee Channels List

Freevee section in Prime Video on Fire Stick
Amazon Freevee offers free content within the Prime Video app.

The Roku Channel

The Roku Channel is available on Fire Stick in select regions, including the USA, UK, Mexico, and Canada. It offers free live TV, movies, and shows, including Roku Originals, with over 150 live channels. To install, search for “The Roku Channel” in the Amazon Appstore. Note that availability may be limited outside these regions, but a VPN like ExpressVPN can help access it.

For more on Roku channels, check: Roku Channels List

Other Notable Apps

  • Crackle: A free, ad-supported service with a focus on movies and original series. Find Idioms Search for “Crackle” in the Appstore to install.
  • Peacock (Free Tier): Peacock offers a limited free tier with select shows, news, and sports. Availability of the free tier may vary, so check the Peacock app for details.
  • Sling Freestream: Provides free live TV and on-demand content. See our guide for more: Sling Freestream Channels List

Fire TV Channels: A Hub for Free Live TV

Fire TV Channels is a pre-installed app on most Fire Stick devices, offering over 400 free live TV channels from various providers. It organizes content into categories, making it easy to find something to watch. The app is accessible via the Fire Stick home screen or by saying “Play Fire TV Channels” with your Alexa remote.

Categories and Popular Channels

The following table highlights some popular channels available on Fire TV Channels as of 2025:

CategoryPopular Channels
NewsABC News Live, CBS News 24/7, NBC News NOW, FOX Weather, Newsmax, Bloomberg TV+
SportsCBS Sports HQ, PGA Tour, MLB, NBA, SportsGrid, USA Today Sports
EntertainmentION, The TMZ Channel, People TV, Comedy Dynamics, Bachelor Nation, Judge Judy
CookingTastemade, America’s Test Kitchen, Martha Stewart, Get Cooking!, Hungry
KidsPBS Kids, Cartoon Rewind, Moonbug Kids, Ryan’s World, Blippi
LocalABC7 New York, CBS2 Los Angeles, FOX5 Atlanta, PBS39, WHYY

Availability may vary by region, and new channels are added regularly. Explore the Fire TV Channels app for the latest lineup.

How to Access Free Channels on Fire Stick

Accessing free channels is simple and can be done in a few steps:

  1. Install Apps from Amazon Appstore:
    • Go to the “Find” section on the Fire Stick home screen.
    • Search for the app (e.g., Tubi, Pluto TV, Xumo Play).
    • Select “Get” or “Download” to install.
  2. Access Freevee through Prime Video:
    • Open the Prime Video app on your Fire Stick.
    • Navigate to the “Free with ads” section to browse Freevee content.
    • No Prime subscription is required.
  3. Use Fire TV Channels App:
    • The Fire TV Channels app is typically pre-installed.
    • If not, search for “Fire TV Channels” in the Appstore and install.
    • Open the app to browse and watch free live TV.

Tips for Maximizing Your Free Streaming Experience

To get the most out of your free channels on Fire Stick, consider these tips:

  • Use a VPN for Privacy: A VPN like ExpressVPN can protect your privacy and may help access region-locked content. Always ensure you comply with the app’s terms of service.
  • Organize Your Apps: Pin your favorite free streaming apps to the Fire Stick home screen for quick access.
  • Check for Updates: New channels and content are frequently added to apps like Freevee and Fire TV Channels, so explore regularly.
  • Explore Related Devices: For comparison, check out free channels on other devices like Roku or Google TV: Google TV Free Channels List

Conclusion

The Amazon Fire Stick in 2025 offers a wealth of free channels through official apps like Tubi, Pluto TV, Xumo Play, Amazon Freevee, and The Roku Channel, as well as the Fire TV Channels app with over 400 live TV options. These services provide a diverse range of content, from movies and shows to live news and sports, all without a subscription. By following the simple installation steps and exploring the Fire Stick interface, you can enjoy a rich streaming experience at no cost. For additional streaming options, consider checking out our guides on other platforms like Samsung TV Plus Channels or Vizio TV Channels.

How to Use Fire TV Stick Without Internet: Top Methods

0
Thumbnail of Fire TV Stick for offline use blog post
Fire TV Stick in Offline Mode

The Amazon Fire TV Stick turns any TV into a smart device for streaming movies, TV shows, and music. It typically relies on an internet connection for services like Amazon Prime Video, Netflix, and Hulu. But what if you’re traveling, in a remote area, or facing an internet outage? Can you still use your Fire TV Stick? The answer is yes, with some limitations. This guide explains how to set up and use your Fire TV Stick without internet, offering practical methods and workarounds to keep you entertained offline.

Can You Use Fire TV Stick Without Internet?

The Fire TV Stick is built for online streaming, so most of its features require a stable internet connection. Services like Amazon Prime Video, Netflix, and Disney+ won’t work without internet. However, you can use certain apps, play pre-downloaded content, or stream from a local network without internet access. Below, we detail the available offline options and how to make them work.

Amazon Fire TV Stick connected to TV
Setting up your Fire TV Stick

Setting Up Fire TV Stick Without Internet

Setting up a Fire TV Stick usually requires an internet connection to sign into your Amazon account and complete the initial configuration. However, some TVs, like certain Panasonic models, allow you to skip Wi-Fi setup during the process. Here’s how you might set it up without internet:

  1. Turn on your TV: Use your TV remote and follow the on-screen prompts.
  2. Select Language and Region: Choose your preferred settings.
  3. Choose Setup Method: Select “Set Up with Remote” instead of using the Fire TV app.
  4. Skip Wi-Fi Setup: When the network selection screen appears, press the Fast Forward button on the remote to skip Wi-Fi setup. Confirm by selecting “Skip Wi-Fi Setup.”
  5. Complete Setup: Follow the remaining prompts to reach the basic home screen.

Note: This method may not work on all TVs or Fire TV Stick models (e.g., FireStick Lite, 4K, or Cube). Some devices may still require an internet connection for initial setup or to bypass the Amazon account login. If you can’t skip Wi-Fi setup, you may need to connect to the internet briefly to complete the process.

For tips on managing your Fire TV Stick without a remote, check out our guide on using Amazon Fire TV without a remote.

Using Fire TV Stick Offline

Even without internet, you can use your Fire TV Stick for several functions. Here are the main ways to enjoy your device offline:

1. Playing Local Media with Kodi

Kodi is a free, open-source media player that lets you play videos, music, and other media stored locally or on a network share. You can install Kodi on your Fire TV Stick and use it to watch downloaded content offline.

How to Install Kodi

  • Search for Kodi: While online, go to the Amazon Appstore on your Fire TV Stick, search for “Kodi,” and install it.
  • Sideload if Needed: If Kodi isn’t available in the Appstore, you can sideload it using tools like Downloader.
  • Prepare Content: Download movies or TV shows to a USB drive (if your Fire TV Stick supports USB via an adapter) or a local network share while you have internet access.

Using Kodi Offline

  • Connect a USB drive to your Fire TV Stick or access a network share via Kodi.
  • Open Kodi and navigate to your media files.
  • Play your downloaded videos or music.

Kodi is ideal for offline use because it doesn’t rely on internet for local content playback. However, its storage is limited to the Fire TV Stick’s 8GB capacity (about 5GB usable).

Kodi interface on Fire TV Stick
Using Kodi to play local media on Fire TV Stick

2. Using Installed Apps

Some apps on your Fire TV Stick can work without internet, such as media players or offline games. Examples include:

  • VLC Media Player: Plays local video or audio files from a USB drive or network share.
  • Offline Games: Certain Android games, like puzzles or single-player games, don’t require internet.

How to Access Installed Apps

  1. Go to Settings > Applications > Manage Installed Applications.
  2. Select the app you want to launch.
  3. Open the app to use its offline features.

Tip: If you’ve lost your remote, you can control your Fire TV Stick using the Fire TV Remote App on your smartphone, provided both devices are on the same local network. Learn more in our guide on connecting FireStick to WiFi without a remote.

3. Screen Mirroring

You can mirror content from a smartphone, tablet, or computer to your Fire TV Stick without internet, as long as both devices are on the same local network (e.g., a Wi-Fi router without internet access).

For Windows 10

  1. Open the Action Center (bottom right corner of your screen).
  2. Click Project and select “Connect to a wireless display.”
  3. Choose your Fire TV Stick from the list.
  4. Enable display mirroring in Settings > Display & Sounds > Enable Display Mirroring on your Fire TV Stick if needed.

For Android

  1. Ensure your Android device and Fire TV Stick are on the same local network.
  2. Go to your device’s settings and select the screen mirroring or casting option.
  3. Select your Fire TV Stick to start mirroring.

This method lets you display videos, photos, or other content stored on your device on the TV screen.

4. Custom Launchers

The default Fire TV Stick home screen often requires internet to load content like ads or recommendations. Without internet, it may not function properly. A custom launcher, like Wolf Launcher, lets you bypass the default home screen and access apps directly.

Installing Wolf Launcher

  • Sideload the Launcher: Use tools like adbfire or apps2fire to install Wolf Launcher. Follow a reliable guide, such as XDA’s launcher installation guide.
  • Set Up: Configure the launcher to display your apps in a simple grid or list.
  • Access Apps: Launch apps directly from the custom launcher without needing internet.

Custom launchers are especially useful in offline environments, as they reduce dependency on Amazon’s internet-based interface.

5. Streaming from a Local Media Server

If you have a local media server (e.g., a computer or network-attached storage) on your home network, you can stream content to your Fire TV Stick without internet. Apps like Plex or Kodi support this feature.

Using Plex

  • Install Plex: Download the Plex app from the Amazon Appstore.
  • Set Up a Server: Install Plex Media Server on a computer or NAS on the same local network.
  • Access Content: Open the Plex app on your Fire TV Stick and browse your media library.

Using Kodi

  • Configure Kodi to access media from a network share or UPnP server.
  • Navigate to your media files and play them directly.

This method is ideal for home setups with large media libraries, as it doesn’t rely on internet connectivity. Learn more about setting up a local media server in How2Shout’s guide.

Workarounds for Limited Internet Access

If you have limited or no internet, these workarounds can help you use your Fire TV Stick:

1. Using a Smartphone Hotspot

A smartphone hotspot can provide internet to your Fire TV Stick, but it uses your phone’s data plan. Here’s how to set it up:

  1. Activate the hotspot on your smartphone (check your device’s settings).
  2. On your Fire TV Stick, go to Settings > Network.
  3. Select your hotspot’s Wi-Fi network and enter the password.
  4. Connect and use your Fire TV Stick as usual.

Caution: Monitor data usage to avoid extra charges, especially if streaming high-quality content.

2. Downloading Content for Offline Viewing

Some streaming apps, like Amazon Prime Video, allow you to download content for offline viewing while you’re online. Here’s how:

  1. Open the Prime Video app on your Fire TV Stick.
  2. Find a movie or TV show with a download option.
  3. Select Download and wait for it to complete.
  4. Access downloaded content from the “Downloads” section in the app.

Other apps may offer similar features, but availability depends on the service. Check BoostVision’s free channels list for apps that support offline downloads.

Limitations and Considerations

Using your Fire TV Stick without internet comes with significant limitations:

  • No Online Streaming: Services like Netflix, Hulu, and Disney+ require internet.
  • Limited App Functionality: Most apps need internet for full features.
  • Setup Restrictions: Some Fire TV Stick models may not allow setup without internet.
  • No Updates or New Content: You can’t update apps or download new content offline.
  • Storage Constraints: The Fire TV Stick has limited storage (8GB, with ~5GB usable), restricting how much content you can store.

If you’re in an area with no cellular coverage, smartphone hotspots won’t work, making truly offline methods (like Kodi or Plex) your best options.

Conclusion

While the Amazon Fire TV Stick is designed for online streaming, you can use it without internet for specific tasks. Playing local media with Kodi, using offline apps, mirroring screens, installing custom launchers, or streaming from a local media server are all viable options. Workarounds like smartphone hotspots or downloading content beforehand can help in low-connectivity situations. By understanding these methods and their limitations, you can make the most of your Fire TV Stick, even offline.

For related tips, explore our guides on fixing Fire TV black screen issues or using smart TVs without internet.

How Long Does an LED LCD TV Last? The Ultimate Guide

0
LED LCD TV with lifespan meter and maintenance icons
Learn how to extend your LED LCD TV's lifespan with simple tips.

Have you ever wondered how long your LED LCD TV will last? Knowing its lifespan can help you plan for replacements and get the most out of your investment. This guide covers the average lifespan of LED LCD TVs, factors that affect their longevity, and practical tips to make them last longer.

Understanding LED LCD TV Technology

An LED LCD TV combines Liquid Crystal Display (LCD) technology with Light Emitting Diode (LED) backlighting. Unlike older LCD TVs that used fluorescent lights, LED backlighting provides brighter images, better contrast, and lower energy use. This makes LED LCD TVs slimmer and more efficient, but their lifespan depends on how they’re used and maintained.

Side-by-side view of LED LCD TV and LCD TV
Comparison between LED LCD TV and traditional LCD TV.

Average Lifespan of LED LCD TVs

How long can you expect your LED LCD TV to last? Most sources estimate a lifespan of 40,000 to 100,000 hours. If you watch TV for 8 hours a day, that’s about 13 to 34 years. However, real-world experiences show that many people replace their TVs every 5 to 10 years due to technological advancements or specific issues, like screen or sound problems.

Here’s how LED LCD TVs compare to other types:

TV TypeLifespan (Hours)Approximate Years (8 hrs/day)
LED LCD TV40,000–100,00013–34 years
LCD TV30,000–60,00010–20 years
OLED TVUp to 100,000Up to 34 years
Plasma TV30,000–60,00010–20 years
  • Manufacturer Claims vs. Reality: Some manufacturers, like Samsung, claim their LED TVs can last over 15 years with proper care Samsung Insights. However, user experiences on forums suggest a shorter lifespan of 3 to 5 years due to planned obsolescence or part availability.
  • Brand-Specific Lifespans: Curious about specific brands? Check our posts on Samsung TVs and LG TVs for more details.
Bar chart of TV lifespans
Average lifespan comparison of different TV types.

Factors That Affect Your TV’s Lifespan

Several factors influence how long your LED LCD TV will last:

  1. Brightness Settings: High brightness levels wear out the LED backlight faster. Lower settings can extend lifespan.
  2. Usage Patterns: Watching TV for many hours daily reduces its lifespan. Limited use can make it last longer.
  3. Environmental Conditions: Heat, humidity, and dust can damage internal components. Keep your TV in a cool, dry place.
  4. Maintenance and Care: Regular cleaning and proper placement prevent overheating and wear.
  5. Power Quality: Power surges can harm electronics. A surge protector helps protect your TV.
Infographic on TV lifespan factors
Key factors that influence how long your TV lasts.

Signs That Your TV Is Reaching the End of Its Life

Your TV may show signs when it’s nearing the end of its lifespan. Look out for these issues:

  • Screen Problems: Flickering, horizontal or vertical lines, faded colors, or dead pixels indicate display issues.
  • Sound Issues: Crackling, distorted audio, or no sound may suggest speaker or circuit problems.
  • Performance Issues: Slow startup, frequent auto-shutdowns, or freezing can signal internal failures.
  • Increased Energy Use: An older TV may consume more power, increasing your electric bill.
  • Outdated Features: Lack of modern ports like HDMI or inability to connect new devices may make your TV obsolete.

If you notice these signs, check our guide on fixing a broken TV screen for potential solutions.

Images of TV screen issues
Common signs that your TV may need replacement.

Tips to Extend Your TV’s Lifespan

To maximize your TV’s life, follow these practical tips:

  1. Lower Brightness: Use energy-saving or standard modes instead of high-brightness settings.
  2. Ensure Ventilation: Place your TV in a well-ventilated area and avoid blocking vents.
  3. Clean Regularly: Use a microfiber cloth to remove dust from the screen and vents.
  4. Use a Surge Protector: Protect your TV from power surges with a quality surge protector.
  5. Turn Off When Not in Use: Avoid leaving the TV on for long periods when not watching.
  6. Avoid Extreme Temperatures: Keep the TV away from heat sources or direct sunlight.
  7. Update Firmware: Regularly update your TV’s software to fix bugs and improve performance.

When to Consider Replacing Your TV

Deciding whether to repair or replace your TV depends on several factors:

  • Repair Costs: If repairs cost nearly as much as a new TV, replacement may be more economical.
  • Age of the TV: Older TVs may have hard-to-find parts, making repairs difficult.
  • Technological Advancements: New TVs offer better resolution, smart features, and energy efficiency.
  • Personal Needs: A larger screen or new features like 4K resolution may justify an upgrade.

For brand-specific advice, see our posts on Samsung TVs and LG TVs.

Conclusion

LED LCD TVs typically last 5 to 10 years, or up to 34 years with minimal use and proper care. Factors like brightness, usage, and environment play a big role in their longevity. By following maintenance tips like lowering brightness and using a surge protector, you can extend your TV’s life. Watch for signs like screen or sound issues to know when it’s time to replace your TV. With this knowledge, you can make informed decisions to get the most out of your TV.

LG TV Lifespan: How Long Do They Really Last?

0
LG TV thumbnail for lifespan guide
LG TV showcasing durability in a modern living room.

LG TVs are a popular choice for their quality and advanced technology. Whether you own an LED or OLED model, you may wonder how long your LG TV will last. This guide explores the lifespan of LG TVs, factors that affect their durability, and practical tips to extend their life. We also cover signs that it’s time to replace your TV and details on LG’s warranty.

Understanding TV Lifespan

TV lifespan is measured in hours of use, but this translates to years based on daily viewing habits. LG produces two main types of TVs: LED (using LCD panels with LED backlighting) and OLED (using organic light-emitting diodes). Each has a different lifespan due to its technology. While LED TVs rely on backlights, OLED TVs use self-illuminating pixels, which impacts their longevity.

LG TV in a cozy living room
A modern LG TV enhances your home entertainment.

Lifespan of LG LED TVs

LG LED TVs are known for their durability. According to industry sources, LED TVs can last 60,000 to 100,000 hours. For a viewer watching 5 hours daily, this equals about 33-54 years. In real-world use, LG LED TVs typically last 10-15 years before issues like dimming backlights or outdated features prompt replacement. Factors like high brightness settings or heavy daily use can shorten this lifespan.

Key Factors for LED TV Longevity

  • Usage: Watching fewer hours daily extends the TV’s life.
  • Brightness Settings: High backlight settings wear out the TV faster.
  • Environment: Heat and humidity can damage internal components.

Lifespan of LG OLED TVs

LG’s OLED TVs offer superior picture quality but have unique considerations. LG claims their OLED panels can last 100,000 hours before brightness drops to 50%, which is about 30 years for 10 hours of daily use. This makes them highly durable, though brightness may gradually fade. LG has addressed burn-in concerns with features like screen savers, pixel refresh, and logo luminance adjustment, reducing the risk for average users.

Addressing OLED Burn-In

Burn-in occurs when static images, like logos, remain on-screen for too long. LG’s OLED TVs include:

  • Screen Saver: Activates after 2 minutes of static content.
  • Clear Panel Noise: Resets pixels to prevent retention (found in Picture Settings).
  • Screen Shift: Slightly moves the screen to avoid static image wear.
  • Logo Luminance Adjustment: Lowers brightness for static logos.

These features make burn-in rare for typical viewing, such as movies or varied content. For more on OLED reliability, visit LG OLED Reliability.

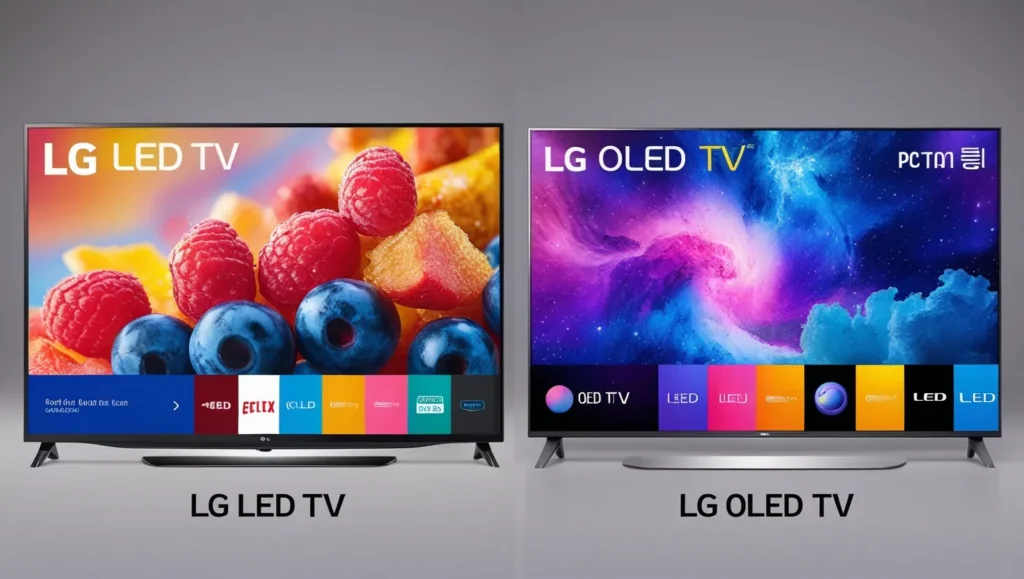
LG LED and OLED TVs side by side
Comparing LG LED and OLED TV displays. (For reference only)

Factors Affecting LG TV Lifespan

Several factors influence how long your LG TV will last:

  • Usage Patterns: Watching 10 hours daily wears the TV faster than 5 hours.
  • Brightness Settings: High brightness accelerates backlight or pixel wear.
  • Environmental Conditions: High temperatures or humidity can harm electronics.
  • Power Surges: Sudden voltage spikes can damage internal components.
  • Physical Damage: Drops or impacts can cause immediate failure.

Proper care can mitigate these factors and significantly extend your TV’s life.

How to Prolong the Lifespan of Your LG TV

To maximize your LG TV’s lifespan, follow these practical tips:

  • Reduce Brightness: Lower backlight (LED) or pixel brightness (OLED) to 75% or less.
  • Turn Off When Not in Use: Powering down saves energy and reduces wear.
  • Use a Surge Protector: Protects against voltage spikes.
  • Ensure Proper Ventilation: Place the TV in a well-ventilated area to prevent overheating.
  • Keep It Clean: Dust the TV regularly to avoid buildup in vents.
  • Update Firmware: Regular firmware updates fix bugs and improve performance. Learn more about troubleshooting issues like sound problems at Fix LG TV Sound.

Signs That Your LG TV Needs Replacement

Your LG TV may need replacement if you notice these issues:

  • Screen Problems: Flickering, dead pixels, faded colors, or horizontal lines.
  • Sound Issues: Crackling or no audio, even after troubleshooting.
  • Slow Performance: Long startup times or frequent freezing.
  • Outdated Ports: Lack of HDMI or USB ports for modern devices.
  • Higher Energy Bills: An aging TV may use more power due to a failing power supply.

If these issues persist after troubleshooting, such as resetting your TV, consider upgrading to a new model.

LG TV Warranty and Support

LG offers warranties that vary by region and model. In the US, most LG TVs come with a 1-year parts and labor warranty. Some OLED models, like the Z1, Z2, Z3, G1, G2, and G3, may have a 5-year panel warranty in certain regions, though labor is typically covered for only 12 months. Check your warranty details at LG Support. For issues like a black screen, see Fix LG TV Black Screen.

Conclusion

LG TVs, whether LED or OLED, are built to last. LED models typically last 10-15 years, while OLED models can last over 30 years with proper care, though brightness may decrease over time. By reducing brightness, using surge protectors, and maintaining your TV, you can extend its life significantly. If you notice persistent issues like screen flickering or outdated ports, it may be time to replace your TV. Always check your warranty for support options.

Also check: How Long Do Samsung TVs Last? A Comprehensive Guide

How to Use Split Screen on Roku TV

0
Thumbnail for Roku TV split screen tutorial
Guide to Split Screen on Roku TV

Watching multiple shows or apps at once on your Roku TV can enhance your viewing experience. Split screen, also known as picture-in-picture or multiview, displays two or more content sources on one screen. While Roku TVs don’t offer native split screen support, you can achieve this using external devices or specific apps. This guide provides clear, step-by-step instructions to set up split screen on your Roku TV as of June 2025. Follow these methods to watch multiple channels or apps simultaneously.

Does Roku TV Support Split Screen Natively?

Roku TVs, which run on the Roku operating system, do not have built-in split screen or picture-in-picture features. This limitation applies to most models, including those from TCL, Hisense, and other brands. Community discussions, such as a 2019 feature request on the Roku Community, show users have long desired this functionality, but Roku has not implemented it natively. Instead, you can use workarounds like laptop mirroring, multiviewer devices, or app-specific features to achieve a similar effect.

Method 1: Using a Laptop to Mirror and Split Screen

One effective way to create a split screen on your Roku TV is by mirroring a laptop’s display. You split the screen on your laptop and mirror it to the TV, showing two apps or windows side by side. This method works for both Windows and Mac laptops.

For Windows Users

  1. Connect to the Same WiFi Network:
    • On your Roku TV, press Home, go to Settings > Network > Check connection to confirm the WiFi network.
    • Ensure your laptop is on the same WiFi network.
  2. Enable Screen Mirroring on Roku TV:
    • Navigate to Home > Settings > System > Screen mirroring.
    • Set Screen mirroring mode to “Always allow.”
  3. Connect Your Laptop to Roku TV:
    • On your laptop, click the Action Center (bottom-right corner).
    • Select Connect, then choose your Roku TV from the list.
  4. Open Your Apps or Windows:
    • Launch the apps or browsers you want to display, such as Netflix and a sports streaming site.
  5. Split the Screen on Your Laptop:
    • Drag one app window to the left or right edge of the screen until it snaps into place.
    • Select another app to fill the other half of the screen.

Your laptop’s split screen will now appear on your Roku TV, showing two apps simultaneously.

For Mac Users

  1. Connect to the Same WiFi Network:
    • Check the WiFi network on your Roku TV via Home > Settings > Network > Check connection.
    • Confirm your Mac is on the same network.
  2. Enable AirPlay on Roku TV:
    • Go to Home > Settings > Apple AirPlay and HomeKit > AirPlay > Turn On.
    • Select a code option for security (e.g., one-time code).
  3. Connect Your Mac to Roku TV:
    • On your Mac, click the Control Center in the menu bar.
    • Select Screen Mirroring, choose your Roku TV, and enter the 4-digit AirPlay Passcode shown on the TV.
  4. Open Your Apps or Windows:
    • Open the desired apps or browsers, such as a streaming service and a news site.
  5. Split the Screen on Your Mac:
    • Click and hold the green full-screen button on an app window.
    • Choose “Tile Window to Left of Screen” or “Tile Window to Right of Screen.”
    • Select another app to fill the other half.

The split screen from your Mac will now be mirrored to your Roku TV.

Method 2: Using a Multiviewer Device

A multiviewer device lets you connect multiple input sources, like streaming sticks or gaming consoles, and display them on your Roku TV simultaneously. These devices are designed for splitting screens and are available at various price points.

Popular Multiviewer Devices

Device NamePriceResolution
Porta Multiviewer$85.991080p
Orei Quad Multi HDMI Viewer$159.00Up to 4K
AV Access$179.991080p & 4K

Steps to Set Up a Multiviewer

  1. Connect the Multiviewer to Your Roku TV:
    • Use an HDMI cable to connect the multiviewer’s output to an HDMI port on your Roku TV.
    • Note the HDMI port number used.
  2. Change the Input on Your Roku TV:
    • Press Home, go to Settings > TV Inputs, and select the HDMI port connected to the multiviewer.
  3. Connect Input Devices to the Multiviewer:
    • Plug devices like a streaming stick, gaming console, or another Roku device into the multiviewer’s HDMI input ports.
  4. Configure the Multiviewer:
    • Use the multiviewer’s remote or controls to select your preferred layout, such as split screen or quad view.

Your Roku TV will now display multiple inputs at once, creating a split screen effect.

App-Specific Multiview Features

Some streaming apps offer built-in multiview or split screen features, allowing you to watch multiple channels within the app. As of 2025, Fubo TV supports this on compatible Roku devices, and other apps may follow.

Using Fubo TV Multiview

  1. Install the Fubo TV App:
    • On your Roku TV, go to the Channel Store, search for Fubo TV, and add it.
  2. Check Compatibility:
    • Ensure your Roku device runs Roku OS 14 or higher and Fubo app version 5.8.0 or later.
  3. Access Multiview:
    • Open the Fubo TV app and navigate to the multiview option.
    • Select up to four live channels or events to watch simultaneously.
  4. Customize Your View:
    • Choose your preferred layout within the app, such as side-by-side or quad view.

Other apps, like YouTube TV or Sling TV, may introduce similar features. Check the app’s settings or help section for multiview options. For example, a 2021 Roku Community post noted YouTube TV offered thumbnail previews but not full multiview, though this may change with Roku’s 2025 updates.

Troubleshooting Common Issues

If you encounter problems setting up split screen, try these solutions:

  • Laptop Not Connecting to Roku TV:
    • Verify both devices are on the same WiFi network. See Vizio TV WiFi Fixes for WiFi troubleshooting tips.
    • Restart your laptop and Roku TV.
    • Update your Roku TV firmware via Home > Settings > System > System update > Check Now.
  • Multiviewer Not Displaying Correctly:
    • Check all HDMI cables are securely connected.
    • Try a different HDMI port on your Roku TV.
    • Replace faulty cables or test the multiviewer on another TV.
  • App Multiview Not Working:
    • Confirm the app supports multiview on your Roku model.
    • Update the app and Roku OS to the latest versions.
    • Contact the app’s support for specific instructions.
  • Split Screen Appears Unintentionally:
    • This may indicate a glitch, as seen in a 2024 Roku Community post.
    • Perform a factory reset: Home > Settings > System > Advanced system settings > Factory reset.
    • Contact Roku or your TV manufacturer if the issue persists.

Related Posts on Soft4led

For more Roku TV tips, check out these articles:

Conclusion

Roku TVs may not support split screen natively, but you can achieve it using a laptop to mirror a split display, a multiviewer device for multiple inputs, or apps like Fubo TV with built-in multiview features. These methods are easy to set up and let you watch multiple channels or apps at once. As Roku expands multiview support to more apps in 2025, check your favorite streaming services for updates. Try these solutions to enhance your Roku TV experience today.