Vestel is one of the largest TV manufacturers in the world. Most people have never heard of them — but they’ve probably owned one. Vestel builds TVs sold under dozens of brand names across Europe, Africa, and the Middle East. Bush, Finlux, Blaupunkt, Telefunken, Hitachi, Polaroid, Cello — many of these are Vestel inside.
The service menu is a hidden settings panel built into every Vestel TV. It gives access to calibration controls, factory reset options, panel settings, and regional configurations that don’t appear in the normal user menu. Technicians use it. Serious DIYers use it. And if your TV has a picture, sound, or signal problem that normal settings can’t fix — you may need it too.
This guide covers every known access code, how to enter the menu safely, what the key settings do, and which ones to leave alone. If you own a different brand and need similar help, the process is largely the same — you can find codes for other manufacturers in our complete guide to all LCD and LED TV service menu codes.
What Is the Vestel Service Menu?
The service menu sits behind a locked layer in the TV’s firmware. Vestel hides it from regular users because the wrong change can permanently damage display calibration or corrupt the TV’s memory.
Inside you’ll find controls for white balance, RGB gain, backlight levels, overscan, geometry, hotel mode, regional frequency settings, and more. Some of these are useful for fixing real problems. Others should stay exactly where they are.
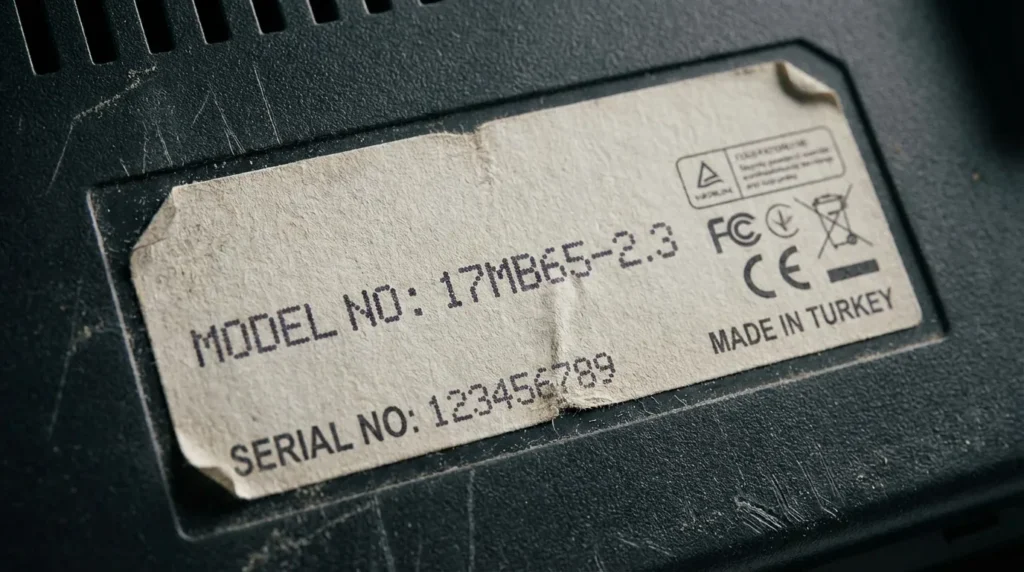
How to Find Your Vestel Chassis Model
Before entering any code, identify your chassis. The chassis type determines which code works and which settings appear inside the menu.
Where to find it:
- On a sticker on the back of the TV (look for codes like 17MB, 17MH, 11AK, 17LS)
- Inside the normal menu under Settings → About or System Info
- On the original packaging or invoice
The chassis number usually starts with a number followed by two or three letters. 17MB and 17MH are the most common across European market TVs. 11AK series appear frequently in budget LCD models sold in the UK and Africa.
All Known Vestel Service Menu Codes
Universal Codes (Work on Most Models)
These codes work across the majority of Vestel chassis types. Try them in order if you’re unsure of your model.
| Code | Method | Works On |
|---|---|---|
| 2483 | Remote keypad entry | Most 17MB / 17MH chassis |
| 2500 | Remote keypad entry | Older 17LS series |
| 1395 | Remote keypad entry | Some 11AK models |
| 4321 | Remote keypad entry | Budget OEM variants |
| 0000 | Remote keypad entry | Factory reset shortcut on select models |
Enter the code directly on the remote’s number pad while the TV is on the normal menu or home screen. No menu navigation needed first on most models.
Codes by Chassis Type
| Chassis | Code | Notes |
|---|---|---|
| 17MB60 / 17MB65 | 2483 | Most common UK/EU chassis |
| 17MB80 / 17MB85 | 2483 | Newer flat panel series |
| 17MH | 2483 | MH series shares same code |
| 11AK19 / 11AK29 | 1395 | Budget 19″–29″ LCD models |
| 17LS | 2500 | Older widescreen LCD |
| VES Series (2019+) | 2483 | Smart TV chassis |
| 23296 chassis | 4321 | Some Finlux and Cello branded units |
OEM Brand Variants and Their Codes
Vestel manufactures TVs for many brands. The service menu code is usually identical to the base Vestel code for the same chassis — but some brands use a custom code set by the retailer.
| Brand | Likely Code | Notes |
|---|---|---|
| Bush (Argos UK) | 2483 | Vestel 17MB chassis |
| Finlux | 2483 / 4321 | Depends on model year |
| Blaupunkt | 2483 | EU models |
| Hitachi (budget range) | 2483 | Not all Hitachi — check chassis |
| Telefunken | 2483 | Eastern European models |
| Polaroid | 1395 | Smaller screen models |
| Cello | 4321 | UK budget brand |
| JVC (select budget models) | 2483 | Verify chassis before trying |
If you own a Bush TV and need a dedicated walkthrough, our Bush TV service menu codes guide covers that model line in full detail. For Cello-branded units, the Cello TV service menu codes page has model-specific notes. Telefunken owners can find additional codes in our Telefunken TV service menu codes guide, and for JVC-badged Vestel units, check the JVC TV service menu codes page for confirmation.
How to Enter the Vestel Service Menu
Remote Control Method (Step-by-Step)
- Turn the TV on normally — go to any live channel or home screen
- Make sure you’re using the original Vestel remote or a compatible replacement
- Press the Menu button once
- Type the 4-digit code using the number keys (e.g., 2-4-8-3)
- The service menu opens immediately if the code is correct
- Use arrow keys to navigate between options
- Press Menu or Exit to leave without saving changes
On some models, press Menu then immediately type the code without waiting for the main menu to fully load.
Button Combination Method (No Remote)
If you’ve lost the remote, some Vestel models allow access through physical buttons:
- Hold the Volume Down button on the TV body for 5–8 seconds while powering on
- On some models: power on from standby while holding the channel down button on the set
This method is model-dependent. It doesn’t work on all chassis types. If it doesn’t open after 8 seconds, it’s not supported on that unit. If you’re dealing with a Vizio and need a similar no-remote workaround, our guide on how to turn on a Vizio TV without a remote walks through that process separately.
Code Not Working? Try These Fixes
- Wrong chassis assumption — check the sticker on the back and cross-reference the code table above
- OEM custom code — some retailers reprogram the entry code; try 2483, 1395, 4321 in sequence
- Software version locked — a firmware update on smart TV models can change the code; try 0000 or 1111
- Remote compatibility — a universal remote may not send the exact IR signal required; use the original if possible
- Timing issue — on some models the code must be entered within 3 seconds of pressing Menu
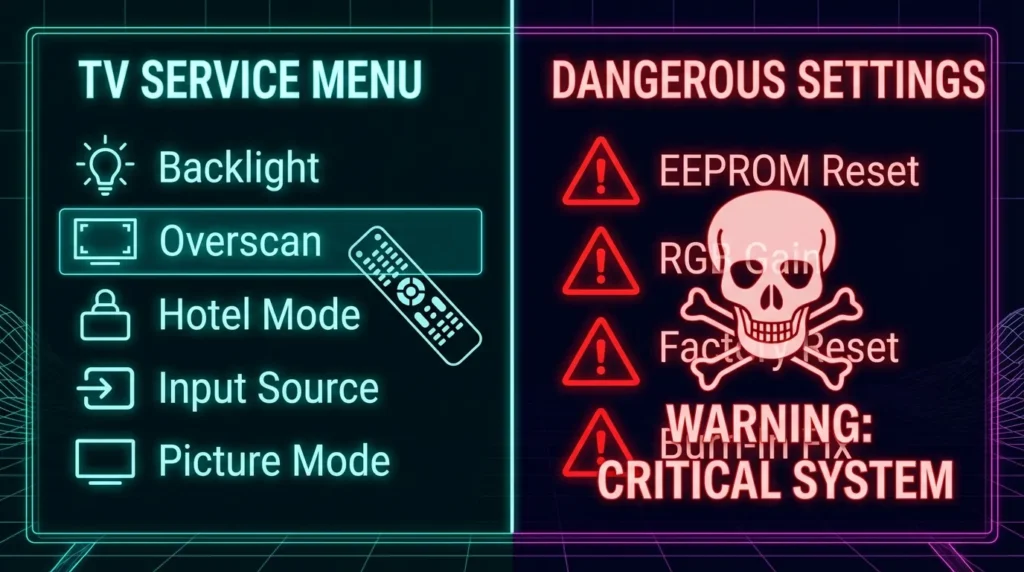
Key Settings Inside the Service Menu
Safe Settings to Adjust
These are the settings most commonly adjusted for legitimate fixes:
- Factory Reset — clears user settings without affecting panel calibration. Useful when the TV is stuck or behaving erratically
- Backlight Level — adjust maximum backlight brightness. Useful if the picture is too dim or causes eye strain
- Overscan — reduces or removes the edge cropping on the picture. Common fix for missing edges on HDMI input
- Hotel Mode — disables or enables hotel/retail demo mode that some second-hand TVs get stuck in
- Software Version — read-only. Shows your current firmware build number
- Auto Search Type — adjusts tuning mode for DVB-T or DVB-T2 signal reception
Settings You Should Not Touch
Leave these alone unless you are a trained technician:
- White Balance (RGB Gain/Offset) — wrong values cause permanent color damage to the panel
- Panel Type / Timing — incorrect panel settings can damage the display driver
- NVM / EEPROM Reset — wipes the TV’s memory entirely including factory calibration data
- Geometry Controls — on CRT-based Vestel units these affect deflection circuits
- Factory Write Mode — any option with “Write” in the name commits changes permanently
If you see a setting you don’t recognize, don’t change it. Exit the menu. If your TV has a dark or black screen problem that you’re trying to fix, read our guide on how to fix a dark TV screen before touching white balance or backlight settings in the service menu.
Common Problems You Can Fix in the Service Menu
Screen too dark: Go to Backlight or BL Level in the service menu. Increase the value in small steps — 5 units at a time. Factory default is usually around 80–100 on a 0–255 scale. If the screen is completely black rather than just dim, check our full TV no picture fix guide first to rule out hardware causes.
Picture edges getting cut off: Find Overscan. Set it to 0 or Off. This is one of the most common fixes for HDMI input display issues. Samsung TVs with the same problem have a similar fix — see our guide on how to fix Samsung TV not showing full screen if you’re also troubleshooting that brand.
TV stuck in shop/demo mode: Find Hotel Mode or Demo Mode in the service menu. Set it to Off. This is the correct fix for second-hand TVs that cycle through demo images or reset volume automatically.
No signal after region change: Some Vestel TVs are region-locked for DVB frequency bands. The service menu contains a Country or Region setting under tuning options. Change it to match your broadcast region, then re-run auto-search.
Sound too quiet at maximum volume: Look for Volume Limit or Max Volume in the service menu. Some retail-configured TVs have this capped below the hardware maximum. If you’re working on an LG instead, our LG TV sound not working fix covers that separately.
FAQ
Is it safe to access the Vestel service menu? Entering the menu is safe. The risk comes from changing settings you don’t understand. If you only adjust backlight, overscan, or factory reset — the risk is very low.
Will accessing the service menu void my warranty? In most cases, yes. Changing service menu settings — especially writing to EEPROM — can void the manufacturer warranty. Check your warranty terms before proceeding.
My Vestel TV has no brand name on it — will these codes still work? Yes. White-label Vestel TVs use the same chassis and the same codes. Identify the chassis from the back label and use the matching code from the table above.
Can I factory reset the TV from the service menu? Yes. The service menu contains a full factory reset option that’s separate from the user menu reset. It clears all user settings. It does not reset calibration data unless you also run an EEPROM/NVM reset — which you should not do unless you know exactly what you’re doing. For a Samsung-specific factory reset process, see our Samsung TV factory reset guide for comparison.
The service menu opened but all the text is garbled or in another language. Navigate to the Language or Region section first and change it. This is a common issue on TVs imported from Eastern European or Middle Eastern markets.
I need service menu codes for a completely different brand. We have dedicated guides for most major brands. See our pages for Sony TV service menu codes, LG TV service menu codes, Samsung TV service menu codes, Philips TV service menu codes, Panasonic TV service menu codes, Hitachi TV service menu codes, and Hisense TV service menu codes.
Final Word
Vestel TVs are everywhere — just under different names. The service menu works the same way across most of them. Code 2483 covers the majority of models in use today. If that doesn’t work, your chassis type or OEM configuration needs a different code — the table above covers the most common variations.
Go in, fix what you need, and get out. The service menu is a tool, not a settings playground. Change one thing at a time, note the original value before you adjust anything, and exit without saving if you’re unsure. For problems that go beyond what the service menu can fix, our TV no picture troubleshooting guide is the next step.