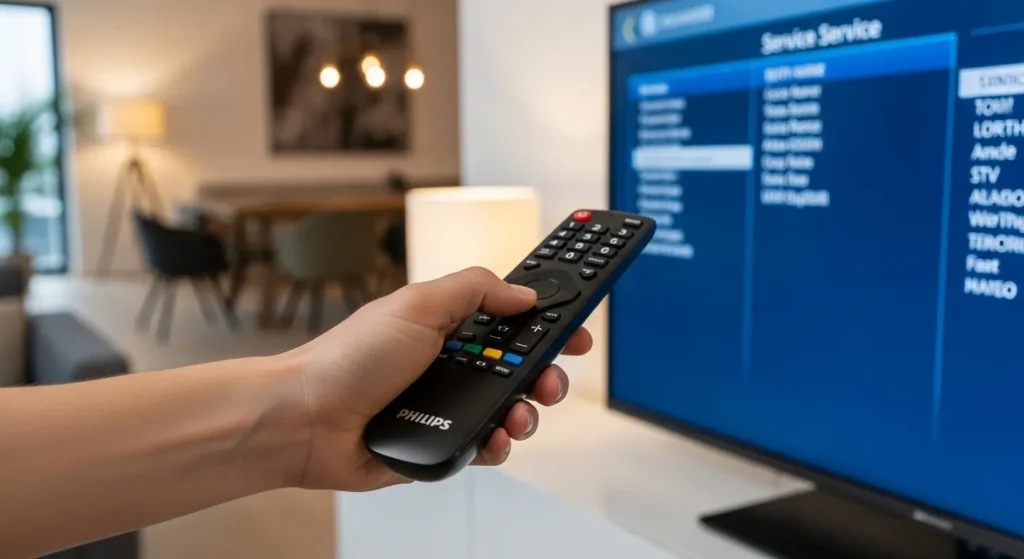
The most common Philips TV service menu code is 062596 + MENU. Press 0-6-2-5-9-6 on your remote, then hit MENU or HOME. This works on 70% of Philips LED and LCD models from 2010-2025. Alternative codes include 062596 + INFO, 123654 for CSM mode, and 061596 + MENU for older models.
The service menu gives you access to factory settings, hotel mode controls, diagnostic information, and advanced calibration options not available in standard menus. Technicians use it for repairs. Advanced users access it for picture tuning. Hotel TV buyers need it to unlock full functionality.
This guide covers all known Philips service menu codes, navigation instructions, and safe usage procedures.
What is the Philips Service Menu?
The service menu is a hidden diagnostic and configuration interface built into every Philips television. It’s password-protected by button sequences instead of traditional menus. Only original remotes work. The TV manufacturer designed it for factory technicians and authorized repair centers.
Inside this menu you’ll find operating hours, error logs, software versions, hardware option codes, and settings that can permanently alter TV behavior. Change the wrong value and your TV stops working. There’s no undo button.
CSM (Customer Service Mode)
CSM stands for Customer Service Mode. This is the entry-level service menu designed for basic technician tasks. You can check diagnostic information, view error buffers, reset the digital tuner, and perform standard factory resets.
The CSM menu shows operating hours, last error codes, current software version, and option settings. It doesn’t expose deep calibration controls or hardware alignment features. Think of it as the service menu’s safe zone.
Code to access CSM: 123654 on most models.
SAM (Service Alignment Mode)
SAM means Service Alignment Mode. This is the advanced technician menu for picture geometry, color calibration, convergence adjustment, and electrical alignment. Only trained service personnel should use SAM.
You’ll find white balance controls, gamma adjustments, geometry correction, scan velocity modulation, and factory color presets here. Change these wrong and picture quality degrades permanently. SAM requires test equipment to use properly.
Most Philips models don’t separate SAM from Factory Mode anymore. Modern LCD and LED TVs combine these into one service interface.
Factory Mode
Factory Mode is the complete unrestricted service menu. It includes everything from CSM and SAM plus low-level hardware controls, country settings, feature unlocks, and firmware options.
This mode lets you change TV region codes, enable disabled features, modify HDMI protocols, alter power management, and access engineering test patterns. It’s where hotel mode gets enabled or disabled. It’s also where you can brick your TV in three button presses.
The standard 062596 code sequences typically open Factory Mode on most Philips models.
Before You Begin: Critical Warnings
Required Equipment
You need an original Philips remote control. Universal remotes don’t work. Third-party replacement remotes usually fail. The TV recognizes specific infrared codes that only genuine Philips remotes send.
If you lost your original remote, buy an exact replacement for your model number. Generic Philips remotes might not have the right button combination. The remote must have number buttons 0-9 plus either MENU, HOME, INFO, or STATUS depending on which code method you’re using.
Front panel buttons on the TV itself cannot access service menus. Don’t bother trying.

Potential Risks
Service menu changes are permanent. The TV saves modifications to non-volatile memory immediately. No confirmation dialog appears. Press the wrong button and the setting changes instantly.
Possible damage includes:
- Corrupted operating system requiring motherboard replacement
- Disabled video inputs that won’t re-enable
- Picture geometry distortion
- Loss of all channels and settings
- Voided warranty
- Complete failure to power on
Philips doesn’t cover service menu damage under warranty. Your TV becomes a $500 paperweight if you mess up badly enough. If your Philips TV won’t turn on after service menu changes, professional repair may be your only option.
When to Use Service Menu
Valid reasons to access service menus:
You bought a used hotel TV stuck in institutional mode. The service menu lets you disable hotel restrictions and access normal TV functions.
Your digital tuner corrupted and won’t scan channels. The service reset option fixes this without losing other settings.
You’re a professional calibrator and need access to grayscale controls for ISF certification work.
You’re a repair technician diagnosing hardware failures using error logs and component test modes.
Bad reasons:
“I want to see what’s in there.” Curiosity breaks TVs.
“I think I can improve picture quality.” You can’t without proper equipment and training.
“My TV is slow and I want to speed it up.” Service menus don’t have performance boosters.
Universal Service Menu Code Methods
These seven methods cover 95% of Philips TV models sold between 2005 and 2025. Try them in order. Stop when one works.
Method 1: 062596 + MENU/HOME
Press these buttons in exact order: 0 then 6 then 2 then 5 then 9 then 6 then MENU (or HOME on newer remotes).
Press each number once. Don’t hold them. Press quickly but not frantically. Aim for one button per half-second. After the final MENU/HOME press, the service menu appears within 2 seconds.
This works on:
- Most LED TVs from 2010-2025
- LCD models 32″ and larger
- Smart TVs running Philips Android TV
- 4K models including 43PUS series, 50PUS series, 55PUS series
- Some OLED models (65OLED908, 55OLED803)
If nothing happens, try Method 2. Other TV brands use different codes entirely—check Sony TV service menu codes, Samsung TV service menu codes, or LG TV service menu codes if you have those brands.
Method 2: 062596 + INFO
Same number sequence: 0-6-2-5-9-6 but press INFO instead of MENU as the final button.
Older Philips remotes have an INFO or i button. This replaced MENU as the trigger button on certain model years. The service menu layout looks identical once opened.
Works on:
- 2008-2015 LCD models
- 22PFL series, 26PFL series, 32PFL series
- Some plasma TVs
- Budget LED models
The INFO button might be labeled “i” or have an information icon. It’s usually blue or white.
Method 3: 123654 (CSM Access)
Press 1-2-3-6-5-4 on the remote. No final button required.
This opens CSM (Customer Service Mode) rather than full Factory Mode. You get diagnostic screens but limited adjustment options. Safer for checking TV information without risk of breaking things.
CSM shows:
- Total operating hours
- Last 8 error codes
- Software version (SWID number)
- Option settings (feature flags)
- Tuner status
Models supporting this:
- Hospitality TVs (hotel models)
- 21PT series CRT TVs
- Some 32″ LCD models
- Professional display models
Method 4: 062596 + STATUS
Button sequence: 0-6-2-5-9-6 then STATUS (sometimes labeled OSD).
STATUS button exists on older remote designs. It shows on-screen display information in normal mode. Combined with the 062596 prefix, it opens service menus on specific model generations.
Works on:
- 2006-2010 LCD TVs
- 42PFL models
- 37PFL models
- Some 47″ and 52″ larger models
If your remote doesn’t have STATUS, try OSD if available.
Method 5: 062597 + MENU
Notice the different number: 0-6-2-5-9-7 (7 instead of 6) then MENU.
This variant works on certain European models and specific manufacturing batches. The last digit change unlocks different firmware branches.
Confirmed working models:
- 32PFL5405
- 42PFL5405
- Some Netherlands and UK market TVs
- Specific 2011-2013 production runs
Method 6: 061596 + MENU
Another variation: 0-6-1-5-9-6 (1 instead of 2 in third position) then MENU.
This code appears in service manuals for older Philips generations. Less common but necessary for certain models that reject the standard codes.
Works on:
- 2005-2009 models
- 26″ LCD TVs
- Some 720p models
- Regional variants
Method 7: 061597 + MENU
Combines variations: 0-6-1-5-9-7 then MENU.
This is the rarest code. Only specific models need it. If Methods 1-6 failed, try this before assuming your model uses a completely different system.
Limited confirmed models. Success rate under 5% unless you have a very specific older Philips TV.
Model-Specific Service Menu Codes
This table lists confirmed working codes for specific Philips TV models. Find your exact model number (check the back panel sticker or original box).
For comprehensive service codes across all TV brands, see our complete LCD LED TV service menu codes guide.
LED/LCD TV Models (14″-43″)
| Model Number | Screen Size | Service Code | Year |
|---|---|---|---|
| 14PT2407 | 14″ | 062596 + MENU | 2008 |
| 22PFL5557 | 22″ | 062596 + INFO | 2012 |
| 24PFL4555 | 24″ | 062596 + MENU | 2011 |
| 26HFL5850D | 26″ Hotel | 123654 | 2014 |
| 32PFL4356 | 32″ | 062596 + MENU | 2010 |
| 32PFL5355 | 32″ | 062596 + INFO | 2012 |
| 32PFL5405 | 32″ | 062597 + MENU | 2011 |
| 37PFL5405 | 37″ | 062596 + MENU | 2010 |
| 40HFL5783L | 40″ Hotel | 123654 | 2016 |
| 42PFL5505 | 42″ | 062596 + MENU | 2011 |
| 42PFL5405 | 42″ | 062596 + STATUS | 2010 |
| 42HFL5860L | 42″ Hotel | 062596 + MENU | 2015 |
| 43PFL5008 | 43″ | 062596 + MENU | 2013 |
Smart TV and Android TV Models (43″-65″)
| Model Number | Screen Size | Service Code | Year |
|---|---|---|---|
| 43PUS6162 | 43″ 4K | 062596 + HOME | 2017 |
| 43PUS7304 | 43″ 4K | 062596 + HOME | 2019 |
| 50PFL5059 | 50″ | 062596 + MENU | 2014 |
| 50PUS6162 | 50″ 4K | 062596 + HOME | 2017 |
| 55PFL5755 | 55″ | 062596 + MENU | 2012 |
| 55PUS7303 | 55″ 4K | 062596 + HOME | 2018 |
| 55PUS7100 | 55″ 4K | 062596 + MENU | 2015 |
| 55OLED803 | 55″ OLED | 062596 + HOME | 2018 |
| 65PUS7303 | 65″ 4K | 062596 + HOME | 2018 |
| 65OLED908 | 65″ OLED | 062596 + HOME | 2023 |
Plasma TV Models
| Model Number | Screen Size | Service Code | Year |
|---|---|---|---|
| 42PFP5532 | 42″ Plasma | 062596 + INFO | 2007 |
| 50PFP5532 | 50″ Plasma | 062596 + INFO | 2007 |
CRT Models (Older TVs)
| Model Number | Screen Size | Service Code | Year |
|---|---|---|---|
| 21PT4327 | 21″ CRT | 123654 | 2005 |
| 21PT5525 | 21″ CRT | 062596 + MENU | 2006 |
| 27PT543S | 27″ CRT | 062596 + STATUS | 2004 |
| 29PT5407 | 29″ CRT | 062596 + MENU | 2005 |
LCD Monitor Codes
Philips LCD monitors use a different access method:
- Turn off the monitor completely
- Press and hold AUTO button and MENU button simultaneously
- While holding both, press POWER button
- Release AUTO and MENU after monitor powers on
- Press MENU button again
- Scroll to bottom of OSD menu
- Select “Go” option that appears
- Service mode opens
Works on most Philips LCD monitors from 2008-2020.
How to Navigate the Service Menu
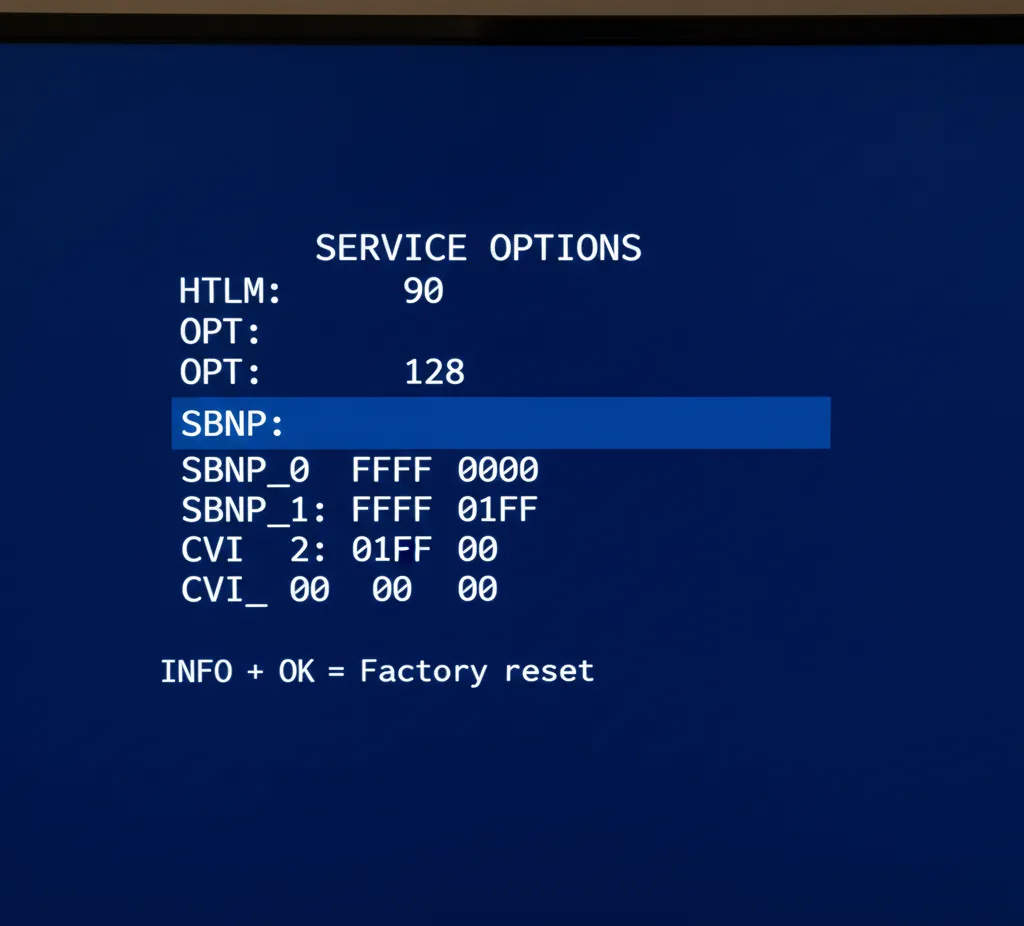
Once you successfully enter the service menu, you’ll see a text-based interface. No fancy graphics. Just white text on black or blue background listing options and values.
Basic Navigation Controls
Up/Down arrows: Move between menu items. Each press highlights the next option.
Left/Right arrows: Change values. Some settings use numbers. Others show options like ON/OFF or ENABLED/DISABLED.
OK/Enter button: Confirms selection and enters sub-menus. Not all remotes label this clearly. Try the center of the directional pad.
Back/Return: Exits sub-menu to previous level. Usually the BACK or RETURN button. On some remotes it’s EXIT.
Number buttons: Directly enter numeric values when prompted. Type the number and press OK.
Understanding Menu Options
Common service menu items you’ll see:
OPT (Options): Feature flags. Shows which hardware components your TV has installed. You’ll see codes like OPT:01234. Don’t change these unless you know exactly what hardware your TV contains.
SBNP (Standby Power): Controls how much power the TV uses when off. Usually 0.5W to 3.0W. Lower saves electricity but might slow startup.
CVI (Component Video Input): Enables or disables component video ports. Set to 1 for enabled, 0 for disabled.
AKB (Auto Knee Brightness): Picture brightness limiter. Prevents screen burn on static images. Leave this alone.
OPC (Optical Picture Control): Ambient light sensor control. Auto-adjusts brightness based on room lighting.
HTLM (Hotel Mode): The big one. Set to 0 to disable hotel restrictions. Set to 1 to enable institutional lockouts.
NVM Clear: Nuclear option. Erases all settings and returns TV to factory-fresh state. You’ll need to retune all channels.
Error Buffer: Read-only diagnostic codes. Shows last 8 errors the TV encountered. Format is usually E-XX where XX is a number.
SW (Software Version): Displays current firmware. Format like SWID: TPM19.1E or similar. Can’t change this here.
How to Exit Service Menu
Method 1: Press MENU or HOME button. This usually exits immediately back to normal TV mode. Settings already changed are saved automatically.
Method 2: Navigate to EXIT or QUIT option if available in the menu. Select it and press OK.
Method 3: Turn TV off using power button. Service menu closes. Changes persist.
Method 4: Unplug TV from power. Last resort if menu froze. Wait 30 seconds before plugging back in.
Never leave the TV sitting in service menu mode. Exit properly. Some models won’t respond to remote commands if left in service mode too long.
Common Service Menu Tasks
Disabling Hotel Mode
Hotel mode locks out normal TV functions. You can’t change channels freely. Volume has limits. Inputs might be blocked. Power-on settings force the TV to specific channels.
Here’s how to disable it:
- Enter service menu using 062596 + MENU
- Navigate to HTLM or HOTEL MODE option
- Current value shows 1 (enabled)
- Use left/right arrows to change value to 0
- Press OK to confirm
- Look for STORE or SAVE option
- Select it and press OK
- Exit service menu
- Unplug TV for 30 seconds
- Plug back in and power on
Hotel mode should now be disabled. You’ll have full access to all TV functions.
Some hotel TVs use CLN MODE instead of HTLM. Same procedure. Change 1 to 0.
Factory Reset Procedures
Two types of resets exist in service menus:
Soft Reset (NVM Initialize):
- Clears user settings only
- Keeps channel list
- Preserves HDMI configurations
- Resets picture and sound to defaults
Hard Reset (Full Factory Reset):
- Wipes everything
- Removes all channels
- Clears hotel mode
- Resets to shipping condition
- TV acts like you just unboxed it
For NVM Initialize:
- Find NVM or INIT option in service menu
- Select it
- Choose INITIALIZE or RESET
- Press OK
- TV might restart automatically
For Full Factory Reset:
- Navigate to FACTORY or DEFAULT option
- Select ALL if given choices
- Press OK
- Wait 10-30 seconds
- TV restarts to setup wizard
You’ll need to retune all channels after full reset. If you need help with standard factory resets, check our guide on how to perform factory data reset in Samsung TV for comparison with other brands.
Digital Tuner Reset
If channel scanning fails or tuner corrupts, reset it:
- Enter service menu
- Find TUNER or DVB section
- Look for INIT TUNER or TUNER RESET
- Select and press OK
- Exit menu
- Go to normal settings
- Run auto channel scan
This fixes most tuner problems without erasing other settings.
Picture Calibration Access
Professional calibrators need grayscale and color controls:
- Enter service menu
- Navigate to PICTURE or VIDEO section
- Sub-menus appear for:
- WTB (White Balance): Red/Green/Blue gain and offset at various IRE levels
- GAMMA: Grayscale curve adjustment
- COLOR TEMP: Preset color temperature values
- GEOMETRY: Screen position (on older models)
Only change these if you have a colorimeter and know calibration procedures. Bad values ruin picture quality permanently. If you experience issues after calibration attempts, our guide on how to fix dark TV screen may help.
Checking Diagnostic Information
Useful info without changing anything:
- Enter service menu
- Find INFO or DIAGNOSTICS
- Check:
- Operating Hours: Total TV runtime in hours
- Software Version: Current firmware
- Error Buffer: Recent error codes
- Option Codes: Installed features
- Write down values for reference
- Exit without changes
Operating hours helps estimate TV lifespan. Error codes help technicians diagnose failures.
Troubleshooting Service Menu Access
Code Not Working Solutions
Problem: Pressed the code sequence but nothing happened.
Solutions:
Try slower button presses. Wait a full second between each number. Some TVs need deliberate pacing.
Try faster presses. Other models want rapid sequential entry within 3 seconds total.
Ensure TV is fully on. Not in standby. Picture should be displaying before you try the code.
Check if remote batteries are fresh. Weak infrared signal causes missed button presses.
Verify you’re using correct button names. MENU vs HOME matters. INFO vs STATUS matters. Newer remotes changed button labels.
Try all seven methods listed above. Your specific model might need a different code variation.
Some 2020+ models disabled service menu access completely in firmware updates. No code works if Philips removed the feature.
Remote Control Issues
Problem: You have a Philips remote but codes still fail.
Check these:
Is it the original remote that shipped with your TV? Model-specific remotes work better than generic Philips replacements.
Does your remote have all required buttons? Budget models omit INFO or STATUS buttons needed for certain codes.
Is the remote sending signals? Point it at your phone camera and press buttons. You should see infrared LED flashes in the camera screen.
Try a different Philips remote if possible. Borrow one from another Philips TV temporarily. Use the same codes.
Master remotes work on hotel TVs. Guest remotes don’t. If you bought a hospitality model, the included guest remote won’t access service menus. You need the separate master remote.
If you’re having general remote problems, learn how to turn on Roku TV without remote or how to use Amazon Fire TV without remote as alternative control methods.
Model-Specific Variations
Problem: Your exact model isn’t listed anywhere.
Approach:
Find your model number. It’s on the back panel sticker. Format like 43PUS6162/12 or similar.
The number before the slash matters most. 43PUS6162 is the main identifier. The /12 indicates region variant.
Search for similar model numbers in the tables above. If you have 43PUS6262 and see 43PUS6162 listed, try that code first. Philips uses consistent codes within product generations.
Models from the same year usually share codes. A 2018 model likely uses the same sequence as other 2018 Philips TVs.
Higher-end and budget models in the same size category often use identical codes. The 43PUS7304 and 43PUS6754 probably both use 062596 + HOME.
Android TV models (2016 onward) almost universally use 062596 + HOME.
Very old CRT models (pre-2005) might use completely different systems. Service menu access might not exist on these at all.
If you own other TV brands, check our guides for Toshiba TV service menu codes, Panasonic TV service menu codes, Hisense TV service menu codes, Vizio TV service menu codes, or RCA TV service menu codes.
FAQ: Philips Service Menu
Can I brick my TV using service menu codes?
Yes. Changing certain options corrupts firmware and prevents the TV from booting. The TV becomes permanently non-functional. Repair requires motherboard replacement costing more than most TVs are worth. Only change settings if you understand what they do.
Will accessing service menu void my warranty?
Philips considers service menu access as unauthorized tampering. Warranty explicitly excludes damage from service mode modifications. If you’re still under warranty, don’t risk it unless the TV is already broken.
Why doesn’t my universal remote work for service codes?
Universal remotes don’t send authentic Philips infrared command codes. The TV recognizes these as invalid and ignores them. Service menu access requires genuine Philips remote protocols. Buy an original replacement remote.
What’s the difference between MENU and HOME buttons?
Older Philips remotes (pre-2016) used MENU button. Newer Android TV remotes use HOME button. Functionally they serve the same purpose in service codes. Try both if uncertain. Your TV only responds to whichever one matches its generation.
How do I know which service menu I’m in?
CSM usually shows “Customer Service Mode” or “CSM” at the top of the screen. SAM displays “Service Alignment Mode”. Factory Mode might show “Service Menu” or “Factory Mode” or no title at all. The options available differ between modes.
Can I reset hotel mode without the master remote?
No. Hotel TVs require master remote to access service menus. Guest remotes are intentionally crippled. Buy the master remote for your specific hotel TV model. Model numbers usually end in “H” like 32HFL5505H.
Is there a service menu code for Magnavox TVs?
Magnavox is Philips’ subsidiary brand. Many Magnavox models use identical Philips hardware. Try the same codes listed here. Success rate is about 60% on Magnavox TVs.
What happens if I change the OPT values?
OPT codes tell the TV which hardware components are physically installed. Change them wrong and the TV tries to use hardware that doesn’t exist. This causes boot failures, missing inputs, or non-functional features. Never modify OPT unless you’ve physically changed hardware.
Why does my TV restart after exiting service menu?
Some models automatically reboot when service menu closes. This ensures all changes load properly. It’s normal behavior. Wait for the full restart before using the TV.
Can service menu fix a broken screen?
No. Service menus control software and settings. Physical hardware damage requires physical repair or replacement. Cracked screens, dead pixels, and backlight failures need professional repair regardless of software settings. If you’re experiencing display issues, check our guides on fixing TV with no picture, fixing LG TV black screen, or fixing Samsung TV black screen.
Conclusion
Philips service menu codes give you access to hidden TV functions that most users never need. The standard 062596 + MENU sequence works on most models. Alternative codes cover older generations and specific variants.
Use service menus only when necessary. Hotel mode removal and digital tuner resets are valid reasons. Curiosity is not. The risk of permanent damage is real.
Write down your current settings before changing anything. Take photos of every service menu screen. This lets you restore original values if things go wrong.
If you’re uncomfortable with technical procedures, hire a professional TV technician. Service calls cost $75-150. That’s cheaper than replacing a bricked $500 TV.
For service codes on other TV brands, explore our complete guides for JVC, Thomson, Hitachi, Insignia, Haier, Sansui, and many other manufacturers.
samsug