The Cello TV service menu is a hidden engineer interface built into every Cello television. It sits behind a lock screen that the average user never sees. Inside it, you can adjust picture calibration, fix overscan, reset audio settings, and restore factory-level defaults that a standard factory reset won’t touch.
This guide covers every known access code for Cello TVs, how to navigate the menu safely, and what each major setting actually does. If your Cello TV has a picture problem, a sizing issue, or a fault that normal settings can’t fix — this is where you go. If you own a different brand, check the all LCD/LED TV service menu codes guide for a full brand index.
What Is the Cello TV Service Menu?
The service menu is a separate settings layer built into Cello TV firmware. It exists below the consumer interface and was designed for factory technicians and repair engineers — not everyday users.
It gives access to low-level hardware controls: backlight intensity curves, white balance calibration, overscan adjustment, and panel-specific parameters. These aren’t exposed in the normal settings menu because changing them incorrectly can permanently affect picture quality or cause display faults.
Why It’s Hidden
Cello hides the service menu deliberately. The settings inside can’t be reversed with a simple factory reset. Some changes write directly to the TV’s EEPROM — the chip that stores permanent configuration data. A wrong value in the wrong field can leave the screen unusable until a technician manually resets it.
That’s why access requires a specific button sequence or PIN. It’s a friction barrier, not a security system.
What You Can Change Inside It
- Backlight and brightness limits
- White balance (RGB gain and offset)
- Overscan percentage
- Horizontal and vertical picture geometry
- Audio delay offset
- Software version and panel identification
- Factory default restoration (deeper than a standard reset)
- Input signal calibration
Cello TV Service Menu Codes
Most Cello TVs use one of a small set of standard codes. The brand shares OEM hardware with Digihome, Finlux, and Technika — all built on similar chassis platforms. This means codes that work on one brand sometimes work on another. The same applies across many manufacturers; Vestel TV service menu codes follow a similar pattern because Vestel supplies chassis to dozens of budget TV brands sold across the UK.
Known Codes for Cello TVs
| Code | Works On |
|---|---|
| 1234 | Most Cello LED models (C32, C40, C50 series) |
| 0000 | Older Cello LCD models |
| 8888 | Some Cello Freeview HD variants |
| 1111 | Shared Digihome/Cello chassis models |
| 3308 | Specific Cello Android TV variants |
If the first code doesn’t work, try the next one down. The correct code depends on your model number and firmware version.
How to Enter the Cello TV Service Menu
The entry method varies slightly by model. Most Cello TVs follow one of two sequences.
Method 1 — Remote Button Sequence (Most Common)
- Turn the TV on and wait for the home screen to load fully
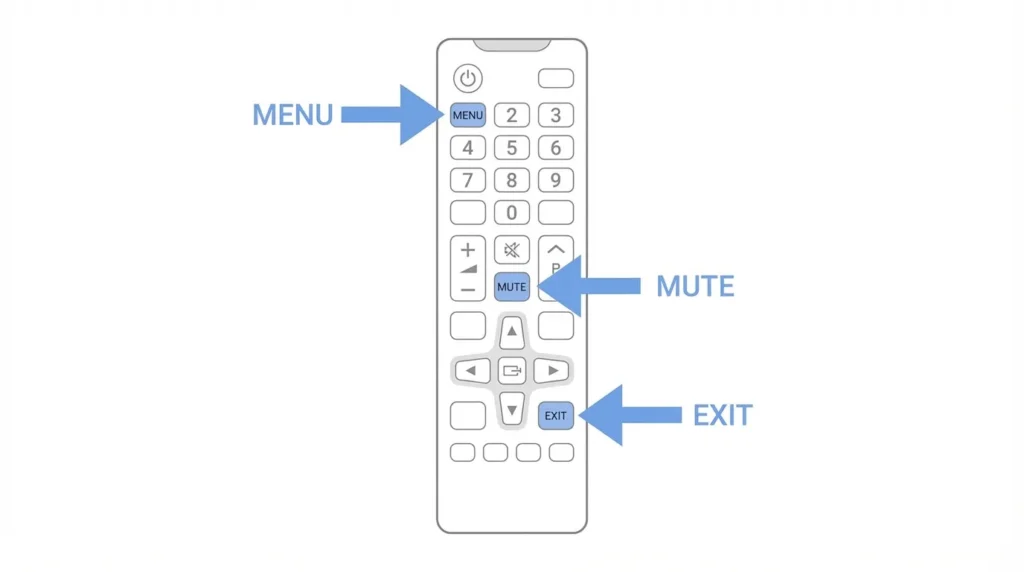
- On the original Cello remote, press Menu
- Navigate to any settings screen — this primes the remote input
- Press Exit to close the menu
- Now press Mute on the remote, followed immediately by Menu
- A PIN entry screen or service menu screen will appear
- Enter the code — start with 1234
- The service menu will open
Method 2 — Direct Code Entry
- Turn the TV on
- Press Menu on the remote
- Using the number pad, enter the code directly: 1234 (or try 0000, 8888)
- The service menu opens without additional steps
If the Code Doesn’t Work
- Make sure you’re using the original Cello remote — third-party remotes sometimes block PIN entry screens
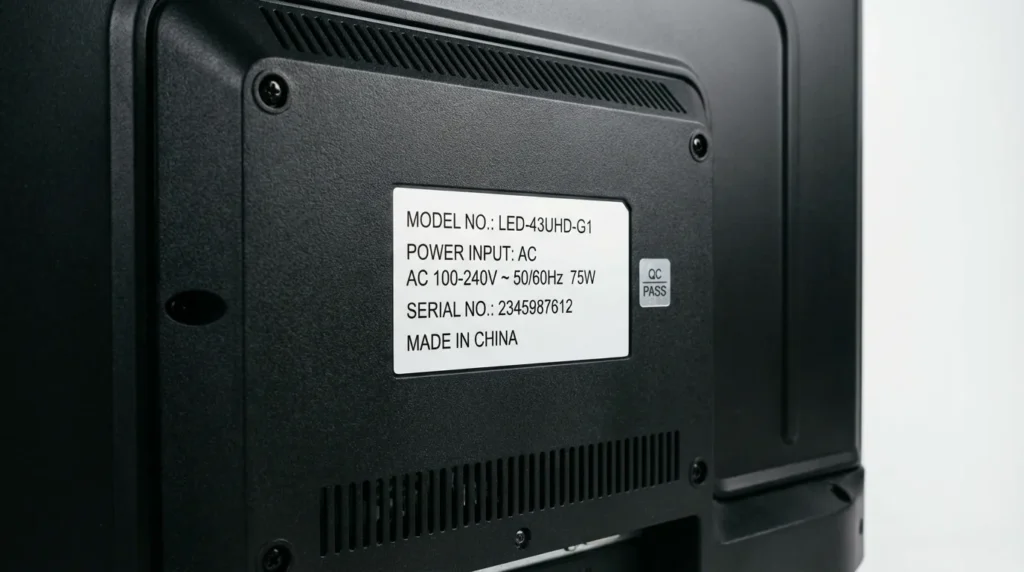
- Check your model number (printed on the back label) and cross-reference with the code table above
- Try powering the TV off completely, unplugging for 30 seconds, then repeating the sequence
- Some models require pressing Info instead of Menu to trigger the PIN screen
Other UK budget TV brands follow similar entry methods. If you also own a Bush TV, the Bush TV service menu codes guide covers its equivalent sequences in detail.
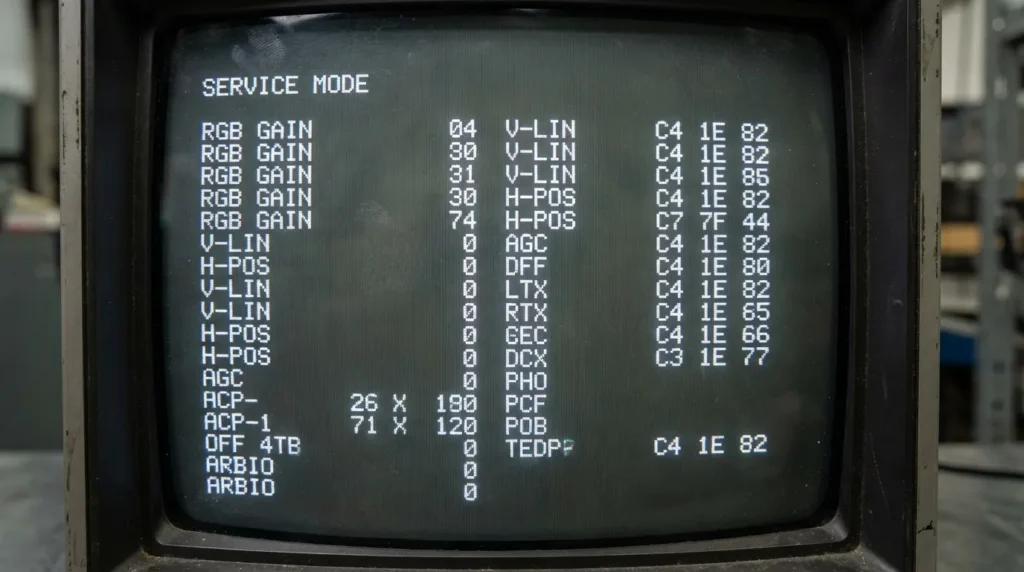
Navigating the Service Menu
Once inside, the service menu looks different from the standard Cello interface. It’s text-heavy, uses grid or list layouts, and has no visual previews.
Use the arrow keys on the remote to move between options. Use OK or Enter to select. Use the number keys to input specific values.
Key Settings Explained
Backlight / BL Level Controls the physical brightness of the LED panel. Not the same as the consumer brightness slider. Adjusting this affects power draw and long-term panel life.
White Balance (R/G/B Gain, R/G/B Offset) Calibrates colour accuracy. If your picture looks too warm (yellow/orange) or too cool (blue), small adjustments here fix it. Change values in increments of 1–2. Don’t make large jumps.
Overscan Sets how much of the picture is cropped at the edges. Most TVs ship with overscan between 3–5%. Setting it to 0 gives you a pixel-perfect image — useful for PC use or gaming.
H. Position / V. Position Horizontal and vertical picture alignment. Only relevant if the image is physically shifted on screen.
Factory Reset (Service Level) This is a deeper reset than the consumer option. It wipes EEPROM-stored calibration values back to factory defaults. Use this only if you’ve made changes you can’t reverse. For a standard consumer-level reset on Samsung TVs, the process is completely different — see this guide on how to perform a factory data reset on a Samsung TV for comparison.
Software Version Read-only field. Shows your current firmware build. Useful when contacting Cello support or checking if a firmware update applies to your unit.
What to Avoid Touching
- Panel Type / Panel ID — Changing this to the wrong value can cause a blank screen on startup
- ADC calibration values — Set per-unit at the factory; changing them without test equipment causes colour distortion
- LVDS settings — Controls communication between the main board and screen panel; incorrect values cause flickering or no image
- Any field labelled Test Mode or Aging Mode — These are factory testing states, not for home use
Common Fixes Using the Service Menu
Fix 1 — Overscan Cutting Off Screen Edges
Go to Overscan or Screen Size in the service menu. Set the value to 0 or the minimum available. This removes the border crop and shows the full picture. This is a common complaint on budget LED panels — if you’ve run into a similar issue on a Samsung, this guide on fixing Samsung TV not full screen covers the consumer-side equivalent.
Fix 2 — Picture Looks Too Yellow or Too Blue
Navigate to White Balance. Adjust RGB Gain values gradually. For a picture that’s too yellow, reduce Red Gain by 2–3 points. For a cool/blue picture, reduce Blue Gain slightly or increase Red Gain. Make one change at a time and check the result. If you’re dealing with a dark picture rather than a colour issue, the TV dark screen fix guide covers that separately.
Fix 3 — Audio Out of Sync
Look for Audio Delay or AV Offset in the service menu. Increase or decrease the value in small steps — typically in milliseconds. Most sync issues resolve with a 50–150ms adjustment.
Fix 4 — Picture Settings Won’t Save After Power Off
This points to EEPROM corruption or a factory reset issue. Use the Factory Reset (Service Level) option to wipe stored settings and rebuild from defaults. If the TV still has no picture after this process, the fix TV no picture guide covers hardware-level causes.
How to Exit the Service Menu Safely
Saving Changes
Most Cello service menus save changes automatically as you make them. There’s no separate save button. Once you change a value and move away from the field, it’s written.
Exiting
Press Exit or Return on the remote repeatedly until the service menu closes. The TV returns to the normal picture.
If the TV doesn’t respond to Exit, press the physical power button on the TV body to perform a soft restart. Changes made before the restart will still be saved in most cases.
Forcing Exit Without Saving (If Something Goes Wrong)
If you’ve made a change that breaks the picture and can’t navigate back:
- Unplug the TV from the wall immediately
- Wait 60 seconds
- Plug back in — the TV reloads from last stored values
- If the picture is still broken, re-enter the service menu and use Factory Reset (Service Level)
If the screen stays black after all of this, the fix TV black screen guide walks through the diagnostic steps for panel-level faults — the same principles apply across brands.
Risks and Warnings
The service menu is not dangerous if you follow one simple rule: only change settings you understand and have a specific reason to change.
What Can Go Wrong
- Incorrect white balance values cause permanent colour shifts not visible without calibration equipment
- Wrong panel type selection can cause a black screen that looks like hardware failure
- Enabling aging or test modes locks the TV into a looping test pattern that most users mistake for a hardware fault
When to Call a Technician Instead
Stop and contact a Cello-certified repair centre if:
- The TV shows a black screen before you’ve entered the service menu
- You changed a value and now have no picture at all
- The service menu shows error codes or fault flags
- The TV restarts on its own when you access the service menu
Cello’s UK support and their authorised service centre list is available at cello.co.uk.
Frequently Asked Questions
What is the default service menu code for a Cello TV?
The most common default code is 1234. If that doesn’t work, try 0000, 8888, or 1111 depending on your model.
Can I brick my Cello TV using the service menu?
Yes — in rare cases. Changing panel ID or LVDS settings to incorrect values can produce a blank screen. This is recoverable by a technician but not always fixable at home.
Does entering the service menu void the warranty?
Cello’s warranty terms don’t explicitly mention service menu access. However, if a technician finds evidence of modified calibration values, it could affect a warranty claim on picture quality issues.
My Cello TV remote doesn’t trigger the service menu. What now?
Use the original remote only. Check the IR receiver on the TV isn’t obstructed. Some Cello models require the remote to be within 1 metre of the TV for the PIN screen to register correctly.
Is the Cello service menu the same as a factory reset?
No. A factory reset from the consumer settings menu restores user preferences. The service-level reset inside the engineer menu wipes EEPROM calibration data and returns the panel to its original factory state.
Do other budget TV brands use the same codes?
Often yes. Brands like Logik, Telefunken, and Hisense share chassis designs with similar service menu structures. Codes like 1234 and 0000 appear across multiple brands.
Conclusion
The Cello TV service menu gives you real control over hardware-level settings your standard menu never touches. The most common access code is 1234, with 0000 and 8888 as fallbacks for older or variant models. Use the menu for specific fixes — overscan, white balance, audio sync — and leave everything else alone. Exit cleanly, avoid test modes, and only change values you understand. For anything that looks like a hardware fault rather than a calibration issue, Cello’s support network is the right next step.
For service menu codes across other brands, the complete LCD/LED TV service menu codes index covers every major manufacturer in one place.
Why is my cello TV just BBC stations what’s is the problem