Home Blog Page 12

Fix Spectrum App Not Working on Samsung TV: Easy Solutions

0
Thumbnail for fixing Spectrum app issues on Samsung TV
Troubleshoot Spectrum App on Samsung TV

Is the Spectrum app not working on your Samsung TV? You’re not alone. Many users face issues like the app freezing, not loading, or crashing. This guide offers clear, step-by-step solutions to get the app running again. We’ve analyzed top resources and user experiences to provide up-to-date fixes as of June 2025.

Why the Spectrum App Might Not Work

Understanding the cause can help you find the right fix. Here are common reasons:

  • Compatibility Issues: Older Samsung TVs (2012-2016) may no longer support the Spectrum app.
  • Internet Problems: A weak or unstable connection can disrupt streaming.
  • Outdated Software: The TV’s firmware or the app itself may need updates.
  • App Glitches: Bugs or corrupted data can cause the app to malfunction.
  • VPN Interference: A VPN might block the app’s connection.
  • Service Outages: Spectrum’s servers may be down temporarily.

How to Fix the Spectrum App on Samsung TV

Try these solutions in order, starting with the simplest. Each step addresses a specific issue based on official guides and user feedback.

1. Check TV Compatibility

Ensure your Samsung TV supports the Spectrum app. Most models from 2012 or later are compatible, but Spectrum has ended support for 2012-2016 models.

Steps:

  1. Press the Menu button on your remote.
  2. Go to Support > About This TV.
  3. Note the model number.

If your TV is pre-2012, use a streaming device like Roku or Xumo Stream Box.

Samsung TV settings screen with model number.
Finding the model number on your Samsung TV

2. Test Your Internet Connection

A stable internet connection is essential for streaming. A weak signal can cause buffering or app failures.

Steps:

  1. Go to Settings > General > Network > Network Status.
  2. Check if the TV is connected.
  3. Restart your router if needed.
  4. Run a speed test on another device to ensure sufficient bandwidth (at least 5 Mbps for streaming).

For more on fixing Wi-Fi issues, see our guide on Vizio TV Wi-Fi problems.

3. Power Cycle Your TV

Restarting your TV can clear temporary glitches.

Steps:

  1. Turn off the TV.
  2. Unplug it from the power outlet.
  3. Wait 1 minute.
  4. Plug it back in and turn it on.

4. Clear App Cache

Corrupted cache data can cause app issues. Samsung TVs don’t always allow clearing cache for individual apps, but you can try system-wide options.

Steps:

  1. Go to Settings > Support > Device Care > Manage Storage.
  2. Look for the Spectrum app and select Clear Cache if available.
  3. If not, proceed to reinstalling the app.

Learn more about clearing cache in our Sharp Roku TV guide.

5. Reinstall the Spectrum App

Reinstalling the app can fix glitches or corrupted files.

Steps:

  1. Go to Apps on your TV.
  2. Select the Spectrum app.
  3. Choose Delete or Uninstall.
  4. Return to Apps, search for “Spectrum,” and select Install.
  5. Log in and test the app.

6. Update TV Firmware

Outdated firmware can cause app compatibility issues.

Steps:

  1. Go to Settings > Support > Software Update.
  2. Select Update Now.
  3. Follow prompts to install updates.
Spectrum app interface on Samsung TV
The Spectrum app running on a Samsung Smart TV.

7. Disable VPN

A VPN can interfere with the Spectrum app’s connection.

Steps:

  1. Check if a VPN is active on your network.
  2. Disable it via your router or device settings.
  3. Test the app again.

8. Check for Spectrum Outages

Server issues on Spectrum’s end can disrupt the app. Check for outages on DownDetector or Spectrum’s official site.

Steps:

  1. Visit Spectrum’s website or social media for outage updates.
  2. Use DownDetector to see if others report issues.
  3. Wait for resolution if an outage is confirmed.

9. Factory Reset Your TV

A factory reset erases all data and restores default settings. Use this as a last resort.

Steps:

  1. Go to Settings > Support > Self Diagnosis > Reset.
  2. Enter the PIN (default: 0000).
  3. Confirm the reset.
  4. Set up the TV and reinstall the app.

For reset tips, check our Toshiba TV reset guide.

10. Contact Spectrum Support

If issues persist, Spectrum’s support team can help with account-specific problems or app updates.

Steps:

  1. Visit Spectrum’s support page or call their helpline.
  2. Provide your TV model and describe the issue.
  3. Follow their guidance.

Additional Tips

  • Older TVs: For 2012-2016 models, use a streaming device like Roku or Xumo Stream Box, as Spectrum may no longer support these TVs.
  • Ethernet Connection: Use a wired connection for better stability.
  • Regular Updates: Keep your TV and app updated to prevent issues.

Frequently Asked Questions

Why is the Spectrum app not working on my Samsung TV?

It could be due to compatibility, internet issues, outdated software, or app glitches.

How do I check if my TV is compatible?

Go to Settings > Support > About This TV to find the model number. Models from 2012 or later are typically supported.

What if the app freezes?

Power cycle the TV, clear cache, or reinstall the app.

Can I use the app on older TVs?

For 2012-2016 models, you may need a streaming device due to discontinued support.

How do I update the Spectrum app?

The app updates automatically, but reinstalling it ensures the latest version.

Conclusion

A non-working Spectrum app on your Samsung TV can disrupt your viewing, but these steps should help. Start with basic fixes like checking compatibility and internet, then try advanced solutions like reinstalling or resetting. If all else fails, Spectrum support is your next step. Save this guide for quick reference and enjoy seamless streaming!

Explore more:

Motorola Edge 40 Gets Android 15 Stable Update: Features & Installation

0
Motorola Edge 40 Gets Android 15 Stable Update: Features & Installation

The Motorola Edge 40 is now receiving the Android 15 stable update, a significant upgrade that enhances your smartphone experience. At Soft4led, we’re here to guide you through everything you need to know about this update, from its new features to how to install it safely. Whether you’re eager to try the latest software or curious about potential issues, this post has you covered.

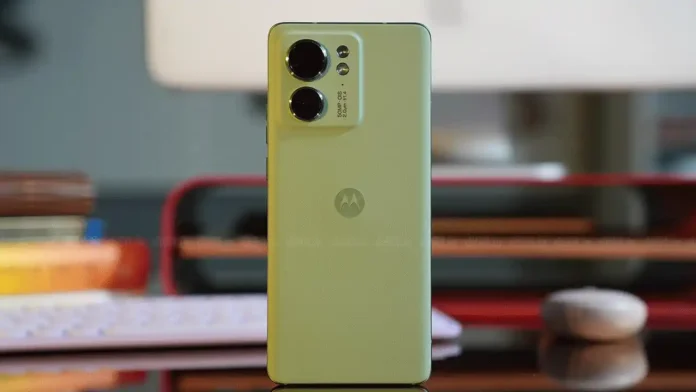
Motorola Edge 40 Android 15 update thumbnail
Motorola Edge 40 receiving Android 15 update

Update Details

Motorola began rolling out the Android 15 stable update for the Edge 40 on June 21, 2025. The rollout is phased, meaning it’s reaching users in stages based on region and software channel. Users in India, particularly those on the RETIN channel, have reported receiving the update with build number V1TL35.73-60-3. The update is approximately 3.1GB in size, so ensure your device has enough storage space.

The rollout is expected to expand to other regions, including Japan (RETJP), Latin America (LATAM), and Europe (EMEA), in the coming weeks. Carrier-locked devices, such as those on Movistar or Telcel, may experience delays of up to several months. To check your software channel, go to Settings > About phone > Software channel.

DetailInformation
Update TypeAndroid 15 Stable
Build Number (India)V1TL35.73-60-3
Download Size~3.1GB
Initial Rollout DateJune 21, 2025
Regions ReportedIndia (RETIN), others pending

For more details, visit Motorola’s Support Page.

New Features in Android 15 with Hello UI

The Android 15 update introduces a range of features, enhanced by Motorola’s Hello UI, a custom interface that adds unique functionality to the Edge 40. Here’s what you can expect:

  • Lock Screen Customization: Choose from new clock styles, fonts, and widgets like weather or alarms to personalize your lock screen.
  • Updated Quick Panel: Access settings faster with a redesigned quick panel that’s more intuitive.
  • Gen AI Emojis: Use AI-generated emojis that adapt to your messages for a fun, expressive experience.
  • New Emoji Stickers: Enjoy fresh emoji stickers to spice up your chats.
  • Improved Connections: Benefit from enhanced Bluetooth and Wi-Fi for better connectivity.
  • Private Space: Store sensitive apps in a secure, hidden area protected by extra authentication.
  • Theft Protection: Advanced security features help safeguard your data if your device is stolen.
  • App Archiving: Save storage by archiving unused apps without losing data.

Hello UI brings additional Motorola-specific features:

  • Moto Gestures: Quick actions like twisting your wrist to open the camera or chopping to turn on the flashlight.
  • Smart Connect: Use your phone as a webcam, share files with your PC, or stream apps seamlessly.

These features make the Edge 40 more versatile and user-friendly.

How to Install the Update

Installing the Android 15 update is straightforward. Follow these steps:

  1. Open Settings on your Motorola Edge 40.
  2. Scroll to System and tap it.
  3. Select System updates.
  4. Tap Check for system updates.

If the update is available, you’ll see an option to download and install it. Connect to Wi-Fi and ensure your phone has at least 50% battery to avoid interruptions. Back up important data before proceeding to prevent any potential loss.

Android 15 update on Motorola Edge 40

What If the Update Isn’t Available?

If you don’t see the update, it may not have reached your region or software channel yet. Here’s what you can do:

  • Check Software Channel: Go to Settings > About phone > Software channel to confirm your channel (e.g., OPENMX, OPENPE).
  • Wait for Rollout: Phased rollouts can take weeks, so check periodically.
  • Manual Update: Some users suggest using the Motorola Software Fix Tool, which has worked for devices like the Edge 50 Fusion.

Known Issues and Troubleshooting

While the Android 15 update brings exciting features, some users have reported issues, including:

  • Overheating: Occurs during intensive tasks like gaming.
  • UI Animation Stutters: Animations may lag occasionally.
  • Slow Charging: Issues with third-party chargers or cables.

To address these problems, try these steps:

  • Restart Your Device: A simple reboot can fix minor glitches.
  • Clear Cache Partition: Boot into recovery mode and clear the cache (instructions on Motorola’s Support).
  • Update Apps: Ensure all apps are updated via the Google Play Store.
  • Check Accessories: Use original or compatible chargers to avoid charging issues.

If problems persist, contact Motorola support or join discussions on Lenovo’s Forum to share experiences and solutions.

Conclusion

The Android 15 stable update for the Motorola Edge 40, paired with Hello UI, offers a refreshed and feature-rich experience. From enhanced security to personalized customization, this update makes your device more powerful and enjoyable. While the phased rollout means some users may wait longer, the wait is worth it for the improvements Android 15 brings.

This update is likely the final major OS upgrade for the Edge 40, which launched with Android 13 in May 2023 and has now received Android 14 and 15. However, Motorola will continue providing security updates to keep your device safe. For more tech news, check out our post on the Samsung Galaxy A24 One UI 7 Update.

Stay tuned to Soft4led for the latest updates, and let us know in the comments if you’ve received Android 15 on your Edge 40!

Samsung Galaxy A24 Receives One UI 7 Update: Everything You Need to Know

0
Thumbnail for Samsung Galaxy A24 One UI 7 blog post
Samsung Galaxy A24 One UI 7 Update

The Samsung Galaxy A24 is now receiving the One UI 7 update, based on Android 15. This major software update brings a fresh user interface, new features, and improved performance to enhance your smartphone experience. As of June 2025, the update is rolling out in select regions, with more countries expected to follow. This guide covers everything you need to know about the update, including its availability, key features, and how to install it on your Galaxy A24.

Availability of the One UI 7 Update

The One UI 7 update for the Samsung Galaxy A24 began rolling out in June 2025. It’s currently available in South Korea, Africa, and Asia, with plans to expand to other regions soon. The rollout schedule may vary depending on your country and carrier, so keep checking for updates if it’s not available yet.

Regions and Rollout Schedule

  • South Korea: The update is live with build version A245NKSU6DYE6, requiring a 3.3GB download.
  • Africa and Asia: The update is available with firmware version A245FXXU8DYE5, sized at 3,404.47MB.
  • Other Regions: Samsung has not announced exact dates for other countries, but the update is expected to reach global markets in the coming weeks.

To stay updated, visit Samsung’s official support page or check your phone’s settings regularly.

Key Features of One UI 7 for Galaxy A24

One UI 7 introduces a range of improvements to the Galaxy A24, focusing on a modern design and better usability. While flagship devices may get advanced AI features, the Galaxy A24 receives core enhancements tailored for mid-range phones. Below are the key features confirmed for the Galaxy A24.

One UI 7 home screen with new icons and widgets
One UI 7 home screen on Galaxy A24

New User Interface

One UI 7 brings a refreshed look to the Galaxy A24. You’ll notice:

  • Redesigned Icons: Updated icons for apps and settings for a modern appearance.
  • Separate Panels: Notifications and quick settings are now in distinct panels for easier access.
  • Vertical App Drawer: A new layout for the app drawer makes finding apps simpler.
  • Larger Home Screen Folders: Folders can hold more apps and are easier to organize.
  • Better Widget Customization: Customize widgets to fit your home screen layout.

These changes make navigating your phone more intuitive and visually appealing.

Now Bar

The Now Bar is a standout feature of One UI 7. It displays important information on your lock screen without needing to unlock your phone. For example:

  • Check weather updates.
  • See calendar events.
  • Control music playback.

This feature saves time by giving you quick access to tools and apps right from the lock screen.

Now Bar on Galaxy A24 lock screen

Live Notifications

Live Notifications enhance how you interact with alerts on your Galaxy A24. They provide real-time updates and may include interactive options, such as replying to messages directly from the notification shade. This feature makes managing notifications faster and more convenient.

Performance Improvements

The One UI 7 update optimizes the Galaxy A24’s performance. Key improvements include:

  • Smoother Animations: Transitions between apps and screens feel fluid.
  • Enhanced Stability: The update includes the May 2025 security patch to protect your device.

These changes make your phone feel faster and more reliable for daily use.

How to Install the One UI 7 Update on Galaxy A24

Installing the One UI 7 update is straightforward. Follow these steps to ensure a smooth process.

Check for Update

  1. Open the Settings app on your Galaxy A24.
  2. Scroll to Software Update.
  3. Tap Download and install.

Your phone will check for the One UI 7 update. If it’s available, you’ll see the option to download it.

Download and Install

  • Connect to Wi-Fi: The update is around 3.3GB, so use Wi-Fi to avoid data charges.
  • Charge Your Phone: Ensure your battery is at least 50% or plug in your charger.
  • Back Up Data: Save important files, photos, and contacts to prevent data loss. Use Samsung Cloud or another backup service.
  • Install the Update: Once downloaded, tap Install now. Your phone will restart and apply the update.

After installation, check the build version in Settings > About phone to confirm you have A245NKSU6DYE6 (South Korea) or A245FXXU8DYE5 (Africa/Asia).

For advanced users, you can use Odin software on a Windows PC to manually install the update. However, this method is not recommended for most users due to its complexity.

Additional Information

General One UI 7 Features

While the Galaxy A24 gets core One UI 7 features, flagship devices like the Galaxy S24 series may receive additional AI tools, such as:

  • Google Gemini Integration: For advanced voice commands.
  • Writing Assist: For summarizing text.
  • Drawing Assist: For creating illustrations.

These features are not confirmed for the Galaxy A24, as mid-range devices typically receive a streamlined version of One UI 7.

Frequently Asked Questions

Is One UI 7 available for my Galaxy A24?

As of June 2025, it’s available in South Korea, Africa, and Asia. Check your Settings for updates if you’re in another region.

What are the new features in One UI 7?

For the Galaxy A24, expect a new interface, Now Bar, Live Notifications, and smoother performance.

How do I know if I have the update?

Check your build version in Settings > About phone. Look for A245NKSU6DYE6 or A245FXXU8DYE5.

Will the update affect my data?

Updates usually preserve data, but back up your phone to be safe.

Tips for a Smooth Update

  • Free up storage space before downloading the update.
  • Avoid using your phone during installation to prevent interruptions.
  • Contact Samsung Support if you encounter issues.

Conclusion

The One UI 7 update brings significant improvements to the Samsung Galaxy A24, making it faster, safer, and easier to use. With a new user interface, features like Now Bar and Live Notifications, and the May 2025 security patch, this update enhances your smartphone experience. If you’re in South Korea, Africa, or Asia, check for the update now. For other regions, keep an eye on your Settings for availability. Update your Galaxy A24 today to enjoy the latest features and performance boosts.

Fix SuperSonic TV Not Turning On: Easy Solutions

0
Troubleshooting a SuperSonic TV that won’t turn on.

Is your SuperSonic TV not turning on? This is a common issue that many TV owners face. Fortunately, there are several simple steps you can take to fix it. This guide provides a clear, step-by-step approach to troubleshoot and resolve the problem. Whether it’s a power issue, a remote problem, or something else, we’ve got you covered.

Common Reasons Your SuperSonic TV Won’t Turn On

Several issues can prevent your SuperSonic TV from turning on. Understanding these can help you pinpoint the problem:

  • Power Supply Issues: A loose power cord, faulty outlet, or damaged internal power supply can stop the TV from powering on.
  • Remote Control Problems: The remote may have dead batteries or may not be communicating with the TV.
  • Software or Memory Issues: Corrupted software or full internal memory can cause the TV to fail to start.
  • Hardware Failures: Faulty components like capacitors or the power board may require professional repair.

Step-by-Step Troubleshooting Steps

Follow these steps in order to diagnose and fix your SuperSonic TV. Each step is designed to be simple and effective.

Check Power Connections

A common reason for a TV not turning on is a power issue. Here’s how to check:

  • Ensure the TV is securely plugged into the power outlet.
  • Try a different power outlet to rule out a faulty socket. You can test the outlet with another device, like a phone charger.
  • Inspect the power cord for visible damage, such as frayed wires. If damaged, replace the cord with a compatible one.
Person unplugging TV power cord.
Unplugging the TV from the power outlet.

Perform a Power Reset

A power reset can resolve many TV issues by clearing residual power. Follow these steps:

  • Unplug the TV from the power outlet.
  • Wait for 1-2 minutes to allow residual power to drain.
  • Press and hold the power button on the TV (not the remote) for 30 seconds.
  • Plug the TV back in and try turning it on.

If the power light is on but the TV doesn’t start, try this alternative reset:

  • Unplug the TV.
  • Press and hold the power button for 60 seconds.
  • While holding the power button, plug the TV back in and continue holding for another 60 seconds.
  • Release the button and try turning on the TV.
Close-up of TV power button.
Locating the power button on your TV.

Check the Remote Control

Sometimes, the issue lies with the remote rather than the TV. Here’s what to do:

  • Replace the batteries with new ones. Ensure they are inserted correctly.
  • Try turning on the TV using the physical power button on the TV itself, usually located on the side or bottom.
  • If the TV turns on with the physical button, the remote may need repair or replacement.
Person replacing remote control batteries.
Replacing the batteries in your remote control.

Perform a Factory Reset

A factory reset can fix software issues but will erase all settings. Try this if the power reset doesn’t work:

  • Locate the “Menu” and “Volume” buttons on the TV’s side panel.
  • Press and hold both “Menu” and “Volume Down” buttons.
  • While holding, press and release the “Power” button.
  • Continue holding “Menu” and “Volume Down” for 5 seconds, then release.
  • If your TV has no “Menu” button, try holding “Input” and “Volume Up” instead.

Note: Factory reset procedures may vary by model. Check your TV’s manual or the SuperSonic FAQ page for specific instructions.

Check for Overheating

Overheating can cause the TV to shut off or not turn on. To address this:

  • Ensure the TV is in a well-ventilated area, away from walls or enclosed spaces.
  • Check the TV’s vents for dust and clean them with compressed air or a soft brush.
  • Move the TV to a cooler location if it feels hot to the touch.

Update Firmware

Outdated firmware can cause startup issues. To update:

  • Check if the TV can be turned on to access the settings menu.
  • Navigate to the firmware or software update section (refer to your TV’s manual).
  • Follow on-screen instructions to update the firmware.
  • If the TV won’t turn on, contact SuperSonic support for guidance on updating firmware manually.

Contact Support or Professional Repair

If none of the above steps work, the issue may be a hardware failure, such as a faulty power supply or capacitor. Here’s what to do:

  • Contact SuperSonic support at SuperSonic Technical Support or call (323) 201-5067.
  • If under warranty, provide your TV’s serial number and purchase details.
  • Alternatively, take the TV to a local repair shop for a diagnosis and cost estimate.

Conclusion

A SuperSonic TV that won’t turn on can often be fixed with simple troubleshooting steps like checking power connections, performing a reset, or replacing remote batteries. If these don’t work, professional repair or contacting SuperSonic support may be necessary. For more TV troubleshooting tips, check out related articles on Soft4led.

Related Articles:

How to Fix LG TV Black Screen Issues in 2025

0
LG TV black screen troubleshooting guide.

A black screen on your LG TV can be frustrating, especially when you’re eager to watch your favorite show or movie. This issue, sometimes called the “black screen of death,” prevents you from accessing live TV, apps, or settings. Fortunately, many cases can be fixed at home with simple steps. This guide covers the causes, troubleshooting steps, specific scenarios, and when to seek professional help. We’ll also share tips to prevent future issues, ensuring your LG TV stays in top shape. See How to Fix YouTube TV Black Screen.

Common Causes of LG TV Black Screen

Understanding why your LG TV screen goes black is the first step to fixing it. Here are the most common reasons, based on user reports and expert advice:

  • Loose or Faulty Cables: If HDMI or other video cables are loose or damaged, the TV may not receive the video signal, resulting in a black screen.
  • Incorrect Input Source: If the TV is set to the wrong input (e.g., HDMI 2 instead of HDMI 1), it won’t display content from your device.
  • Software Glitches: Bugs in the TV’s software or apps, like Netflix or YouTube, can cause display issues.
  • Overheating: Poor ventilation or prolonged use can overheat the TV, leading to a black screen to prevent damage.
  • Hardware Failures: Components like the backlight, main board, T-con board, or power supply can fail, causing the screen to go black.
CauseDescriptionLikelihood
Loose/Faulty CablesDisconnected or damaged cables block video signals.High
Incorrect Input SourceWrong input setting prevents content display.High
Software GlitchesBugs in firmware or apps disrupt the display.Medium
OverheatingExcessive heat causes the TV to shut down or go black.Medium
Hardware FailuresFaulty backlight, main board, or power supply stops the screen from working.Low
LG TV HDMI cable connection
Checking HDMI cables on an LG TV.

Step-by-Step Troubleshooting Guide

Before calling a repair technician, try these steps to fix your LG TV’s black screen. They’re simple and often resolve the issue quickly.

1. Check Power and Connections

  • Ensure the TV is plugged into a working power outlet. Test the outlet with another device.
  • Verify that all cables (HDMI, AV, etc.) are securely connected to the TV and external devices like cable boxes or streaming sticks.
  • Replace any damaged cables with new ones.

2. Verify Input Source

  • Use your LG TV remote to check the input source. Press the “Input” or “Source” button and select the correct input (e.g., HDMI 1 for a streaming device).
  • If you’re using a home theater system, ensure it’s set to output from the correct device.

3. Restart the TV

  • Unplug the TV from the power outlet and wait for 30–60 seconds to drain residual power.
  • Plug it back in and turn on the TV. This soft reset can fix temporary glitches.

4. Update Firmware

  • Go to the TV’s settings menu: Settings > General > About This TV > Check for Updates.
  • Install any available updates to fix software bugs. Ensure a stable internet connection during the update.
  • Check LG Support for the latest firmware for your model or check this post LG TV Firmware Download.

5. Perform a Factory Reset

  • As a last resort, reset the TV to its original settings: Settings > General > Reset to Initial Settings.
  • Note: This will erase all customized settings, so write down your preferences first.
LG TV settings menu screen
Accessing the settings menu on an LG TV.

Addressing Specific Black Screen Scenarios

The black screen issue can vary depending on the situation. Here are solutions for common scenarios reported by users.

Black Screen with Sound

If you hear audio but see no picture, the issue is likely with the backlight or T-con board.

  • Flashlight Test: Shine a flashlight on the screen while the TV is on. If you see a faint image, the backlight is faulty, and the issue may involve the LED strips or power supply.
  • Try adjusting the backlight settings: Settings > Picture > Backlight. Lowering the brightness might help temporarily.

For similar issues with other TVs, see our guide on Fix Element TV Black Screen.

Black Screen After LG Logo

If the LG logo appears briefly before the screen goes black, the main board or software may be at fault.

  • Check all video inputs (HDMI, AV, etc.) to ensure they’re working.
  • Try a firmware update or factory reset as described above.

Flickering Screen Then Black

A screen that flickers before going black often points to loose connections or failing LED strips.

  • If comfortable, open the TV (unplugged) and check for loose cables, especially to the LED strips. Secure any loose connections.
  • Be cautious, as this can void your warranty.

Internal Link: Learn about related display issues in our post on Fix Sanyo TV Snowflake Screen.

Screen Mirroring Black Screen

Black screens during screen mirroring may result from compatibility issues or software glitches.

  • Ensure screen mirroring is enabled: Settings > Network > Screen Share.
  • Update the mirroring app on your phone or computer and the TV’s firmware.
  • Check AirBeamTV for mirroring troubleshooting tips.

App-Specific Black Screen (e.g., Netflix, YouTube)

If the black screen occurs only with certain apps, the issue may be app-related.

  • Reinstall the app: Go to the LG Content Store, uninstall the app, and reinstall it.
  • Check for app updates in the LG Content Store.
  • For YouTube issues, see LG TV YouTube Troubleshooting.
LG TV Content Store interface
Reinstalling apps on an LG TV.

DIY Fixes for Advanced Users

If you’re comfortable with electronics, you can attempt these repairs. Be cautious, as opening your TV can void the warranty and pose safety risks.

  • Replace Power Supply Board: A faulty power supply can cause black screens. Replacement boards are available online but must match your TV model. Follow a guide like those on iFixit.
  • Replace LED Strips: If the backlight is faulty, replacing LED strips may fix the issue. This requires disassembling the TV and handling delicate components.
  • Reseat Connections: Loose internal connections can cause black screens. Unplug the TV, open the back, and ensure all cables and boards are secure.

Safety Tips:

  • Always unplug the TV before opening it.
  • Discharge capacitors to avoid electric shock.
  • If unsure, consult a professional to avoid damaging the TV.

When to Seek Professional Help

If troubleshooting doesn’t work, the issue may require professional repair.

  • Check Warranty: If your TV is under warranty, contact LG Support for free or discounted repairs. Register your product at LG Product Registration for faster service.
  • Certified Technician: For out-of-warranty TVs, find a local certified technician. Repair costs for backlights or main boards can range from $100–$500, depending on the model and issue.
  • Replacement Consideration: If repairs cost more than half the price of a new TV, consider replacing it.

For sound-related issues, see our guide on Fix LG TV Sound Not Working.

Preventing Black Screen Issues

To minimize future black screen problems:

  • Update Software Regularly: Check for firmware updates monthly to keep your TV running smoothly.
  • Ensure Ventilation: Place the TV in a well-ventilated area to prevent overheating.
  • Use Surge Protectors: Protect your TV from power surges with a quality surge protector.
  • Adjust Brightness: Lower the backlight setting to extend the life of LED strips.

Answering Common User Questions

Based on online discussions, here are answers to frequent questions about LG TV black screen issues:

Why does my LG TV screen go black but I can still hear sound?

This is often due to a backlight or T-con board failure. Try the flashlight test to confirm, then consider professional repair.

Is the black screen issue common in LG TVs?

Yes, user forums like Reddit and iFixit report it, especially in older models (3–5 years old), often due to backlight or board issues.

Can I fix it myself, or do I need professional help?

Simple fixes like checking cables or updating firmware can be done at home. Hardware repairs require technical skills or professional help.

Are there recalls for LG TVs with black screen issues?

No recent recalls were found as of June 2025, but check LG Support for updates.

Conclusion

A black screen on your LG TV doesn’t have to ruin your viewing experience. Start with basic checks like cables and inputs, then try restarting or updating the TV. For specific issues like black screens with sound or app problems, follow the targeted solutions above. If you’re comfortable with DIY repairs, you can attempt fixes like replacing boards, but always prioritize safety. If all else fails, contact LG support or a technician, especially if your TV is under warranty. By keeping your TV updated and well-maintained, you can prevent future issues and enjoy uninterrupted entertainment.

Explore more:

How to Mirror YouTube Music to Any TV: Easy Steps

0
Smartphone mirroring YouTube Music to TV
Casting YouTube Music to a TV

Want to enjoy YouTube Music on your TV? This guide covers all the ways to play YouTube Music on any TV. Whether you have a smart TV or an older model, you can use the YouTube app, cast from your phone, mirror your screen, or add hardware. Follow these steps to get started.

Why Play YouTube Music on Your TV?

YouTube Music offers millions of songs and videos. Playing it on your TV gives you a bigger screen for music videos and better sound through your TV’s speakers. You might want to:

  • Watch music videos with friends.
  • Browse playlists on a large screen.
  • Use your TV’s audio system for music.
  • Play ad-free music with a YouTube Music Premium subscription.

Method 1: Using the YouTube App on Smart TVs

Most smart TVs have a YouTube app with a Music section. This is the simplest way to play YouTube Music.

Steps to Use the YouTube App

  1. Check for the YouTube app: Go to your TV’s app store. If the YouTube app isn’t installed, download it.
  2. Open the app: Launch the YouTube app on your TV.
  3. Sign in: Use your Google account to sign in, especially if you have a YouTube Music Premium subscription.
  4. Go to the Music section: Use your TV remote to navigate to the Music tab on the left menu.
  5. Play music: Browse playlists, albums, or songs and start playing.

Tips

  • Ensure your TV is connected to the internet.
  • The Music section personalizes content if you’re signed in.
  • Use your TV remote to control playback.
YouTube Music section in TV app
YouTube app Music section on a smart TV

Method 2: Casting from a Mobile Device

Casting sends YouTube Music from your phone to your TV. The TV plays the content, and your phone acts as a remote. This works with TVs that support Chromecast or AirPlay.

For Android Devices

  1. Connect to Wi-Fi: Ensure your phone and TV are on the same Wi-Fi network.
  2. Open YouTube Music: Launch the YouTube Music app on your Android phone.
  3. Tap the cast icon: Look for the cast icon (a rectangle with a Wi-Fi symbol) at the top.
  4. Select your TV: Choose your TV from the list of devices.
  5. Play music: Select a song or playlist. It will play on the TV.

For iOS Devices

  1. Connect to Wi-Fi: Ensure your iPhone or iPad and TV are on the same Wi-Fi network.
  2. Open YouTube Music: Launch the YouTube Music app.
  3. Tap the cast or AirPlay icon: Find the icon at the top (AirPlay is a triangle with circles).
  4. Select your TV: Choose your TV if it supports AirPlay or has a casting device like Chromecast.
  5. Play music: The music or video will play on the TV.

Tips

  • Chromecast-enabled TVs or devices like Google TV Streamer work best for Android.
  • AirPlay-compatible TVs include recent models from Samsung, LG, and Sony.
  • You can use your phone for other tasks while casting.

Method 3: Screen Mirroring from a Mobile Device

Screen mirroring shows your phone’s entire screen on the TV, including the YouTube Music app. This is useful for browsing the app on a big screen.

For Android Devices

  1. Check TV compatibility: Ensure your TV supports Miracast or a brand-specific mirroring feature (e.g., Samsung’s Smart View).
  2. Open settings: Go to Settings > Connected devices > Connection preferences > Cast.
  3. Select your TV: Tap your TV’s name from the list.
  4. Connect: Follow any on-screen prompts to connect.
  5. Open YouTube Music: Launch the app and play music. Your phone’s screen appears on the TV.

For iOS Devices

  1. Check for AirPlay: Ensure your TV supports AirPlay (e.g., Roku, Samsung, LG TVs).
  2. Open Control Center: Swipe down from the top-right corner on your iPhone.
  3. Tap Screen Mirroring: Look for the icon with two overlapping rectangles.
  4. Select your TV: Choose your TV from the list.
  5. Open YouTube Music: Play music, and your screen mirrors to the TV.

Tips

  • Mirroring uses more battery than casting.
  • Some TVs require you to enable mirroring in settings (e.g., Roku: Settings > System > Screen mirroring).
  • For specific TV brands, check our guides on Vizio TV fixes or Roku TV settings.
Phone mirroring YouTube Music to TV
Screen mirroring YouTube Music to TV

Method 4: Using Additional Hardware for Non-Smart TVs

If your TV isn’t smart, you can use devices like Chromecast, Roku, Apple TV, or an HDMI cable to play YouTube Music.

Using Chromecast

  1. Set up Chromecast: Plug it into your TV’s HDMI port and follow setup instructions.
  2. Connect to Wi-Fi: Ensure your phone and Chromecast are on the same network.
  3. Cast YouTube Music: Follow the casting steps for Android or iOS above.

Using Roku

  1. Enable mirroring: Go to Settings > System > Screen mirroring > Enable on your Roku.
  2. Mirror from phone: Use Android’s Cast or iOS’s AirPlay to mirror your screen.
  3. Play YouTube Music: Open the app on your phone. Learn more about Roku in our Roku guide.

Using Apple TV

  1. Set up Apple TV: Connect it to your TV and sign in.
  2. Use AirPlay: On your iPhone, use Screen Mirroring or cast via AirPlay.
  3. Play YouTube Music: The content appears on your TV.

Using an HDMI Cable

  1. Get the right cable: For Android, use a USB-C to HDMI adapter. For iOS, use a Lightning to HDMI adapter.
  2. Connect devices: Plug the cable into your phone and TV’s HDMI port.
  3. Switch TV input: Select the correct HDMI input.
  4. Play YouTube Music: Your phone’s screen appears on the TV.

Tips

  • Chromecast is affordable and easy to set up.
  • HDMI provides a stable connection but limits mobility.
  • Check device compatibility before buying adapters.

Troubleshooting Common Issues

  • No cast icon? Ensure your phone and TV are on the same Wi-Fi network.
  • Mirroring not working? Check if your TV supports Miracast or AirPlay. Enable mirroring in TV settings.
  • No YouTube app? Update your TV’s firmware or use a streaming device.
  • Choppy playback? Restart your router or reduce network congestion.

Conclusion

Playing YouTube Music on your TV is easy with the right method. Use the YouTube app for smart TVs, cast from your phone, mirror your screen, or add hardware for older TVs. Each method suits different needs, so choose what works best for you. Enjoy your music on the big screen!

Explore more:

How to Connect Your Smart TV to Alexa: Step-by-Step Guide

0
Smart TV with Alexa thumbnail
Smart TV and Alexa connection

Controlling your smart TV with Alexa makes watching TV easier. You can use voice commands to turn on the TV, change channels, adjust volume, or search for shows. This guide explains how to connect your smart TV to Alexa. It includes general steps, brand-specific instructions, voice commands, and troubleshooting tips. Whether your TV has Alexa built-in or needs an external device, we’ve got you covered.

Prerequisites

Before starting, ensure you have:

  • Compatible Smart TV: Brands like Samsung, LG, Sony, TCL, Hisense, Vizio, and Insignia often support Alexa. Check your TV’s manual or look for the “Works with Alexa” label.
  • Alexa Device: An Amazon Echo, Echo Dot, Echo Show, or similar device.
  • Same Wi-Fi Network: Both your TV and Alexa device must connect to the same Wi-Fi.
  • Alexa App: Download the app from the Apple App Store or Google Play Store.

General Steps to Connect Your Smart TV to Alexa

For most smart TVs, the connection process is similar. Follow these steps:

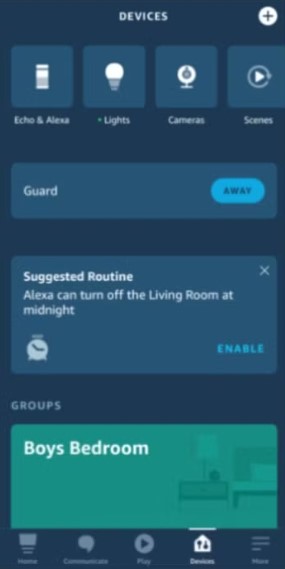
  1. Open the Alexa App: Launch the app on your phone or tablet.
  2. Go to Devices: Tap the “Devices” tab at the bottom.
  3. Add a Device: Tap the “+” icon, then select “Add Device.”
  4. Select TV: Scroll down and choose “TV.”
  5. Choose Your Brand: Pick your TV brand (e.g., Samsung, LG, Sony).
  6. Follow Instructions: The app will guide you. This may include enabling a skill or signing into your TV’s account.
Alexa app devices tab screenshot
The Devices tab in the Alexa app.

Brand-Specific Instructions

Some TVs require unique steps. Below are instructions for popular brands.

Samsung

Samsung TVs may have Alexa built-in or need the SmartThings app.

For TVs with Built-in Alexa:

  1. Turn on your TV and go to the settings menu.
  2. Find “Voice Assistant” or “Alexa.”
  3. Sign in with your Amazon account to activate Alexa.

For TVs without Built-in Alexa:

  1. Download the SmartThings app.
  2. Open the app and add your TV.
  3. In the Alexa app, go to “Skills & Games.”
  4. Search for and enable the SmartThings skill.
  5. Link your SmartThings account.
  6. Go to “Devices,” tap “+,” and select “Add Device.”
  7. Choose “TV” and select “Samsung.”
  8. Follow the app’s prompts.

Note: Without built-in Alexa, control may be limited to basic functions like power and volume.

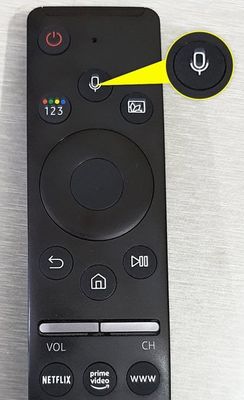
Samsung TV remote Alexa button
Samsung TV remote with Alexa button.

LG

LG TVs with built-in Alexa use the LG Magic Remote. For others, use the general steps or an external device.

For TVs with Built-in Alexa:

  1. Connect your TV to the internet.
  2. Press and hold the Alexa button (2021/2022 models) or Prime Video button (2020 models) on the LG Magic Remote.
  3. Sign in with your Amazon account.
  4. Enable Hands-Free mode via the TV’s Alexa app, if available.

For TVs without Built-in Alexa: Follow the general steps above or use a device like a Fire TV Stick.

Internal Link: For more details, see our guide on Connect Alexa to LG TV.

Sony

Sony TVs use a specific skill for Alexa setup.

  1. Press the Home button on your TV remote.
  2. Go to “Apps” or “Your Apps.”
  3. Select “TV Control with Smart Speakers” or “TV Control Setup with Amazon Alexa App.”
  4. In the Alexa app, go to “Settings” > “Skills & Games.”
  5. Enable the Sony TV skill.
  6. Follow the instructions, which may require a Google account login.

Vizio

Vizio SmartCast TVs support Alexa via a skill.

  1. Open the Alexa app and go to “Skills & Games.”
  2. Search for and enable the Vizio SmartCast skill.
  3. Sign in with your Vizio account.
  4. Follow the app’s prompts to link your TV.

TCL

TCL TVs often use Roku or Android TV platforms.

  1. Open the Alexa app and go to “Devices.”
  2. Tap “+” and select “Add Device.”
  3. Choose “TV” and select “TCL” or “Roku” if applicable.
  4. Enable the appropriate skill and follow the instructions.

Voice Commands for Your TV

After setup, use these voice commands to control your TV. Commands vary by TV model and apps.

  • Power:
    • “Alexa, turn on the TV.”
    • “Alexa, turn off the TV.”
  • Channels:
    • “Alexa, change to channel 5.”
    • “Alexa, go to ESPN.”
  • Playback:
    • “Alexa, play.”
    • “Alexa, pause.”
    • “Alexa, rewind 30 seconds.”
  • Volume:
    • “Alexa, volume up.”
    • “Alexa, set volume to 50%.”
    • “Alexa, mute.”
  • Apps:
    • “Alexa, open Netflix.”
    • “Alexa, launch YouTube.”
  • Search:
    • “Alexa, find comedies on Netflix.”
    • “Alexa, play The Office.”

Troubleshooting Common Issues

If you face problems, try these solutions:

  • TV Not Connecting:
    • Confirm both devices are on the same Wi-Fi.
    • Verify your TV’s compatibility with Alexa.
    • Ensure the skill is enabled in the Alexa app.
    • Restart your TV and Alexa device.
  • Voice Commands Not Working:
    • Speak clearly and ensure Alexa can hear you.
    • Check if the TV is on and connected.
    • Verify the command is supported.
    • Rephrase the command.
  • Alexa Not Finding TV:
    • Go to “Devices” in the Alexa app and select “Discover Devices.”
    • Ensure the TV is on and online.
    • Re-link the skill if needed.

For specific issues, visit your TV manufacturer’s support page or Amazon Alexa Help.

People Also Ask

Here are answers to common questions:

Does my TV support Alexa?

Check your TV’s manual or manufacturer’s website. Look for “Works with Alexa” or Alexa built-in features.

What can Alexa do with my TV?

Alexa can control power, volume, channels, playback, and apps. It can also search for content.

Can I use Alexa without a remote?

Some TVs support hands-free Alexa. Otherwise, you need an Alexa device like an Echo.

Why isn’t my TV connecting?

Ensure both devices are on the same Wi-Fi, the skill is enabled, and your TV is compatible.

Conclusion

Connecting your smart TV to Alexa is simple and enhances your viewing experience. Follow the steps for your TV brand, use voice commands, and troubleshoot any issues. Check your TV manufacturer’s website for the latest instructions. Enjoy hands-free control of your TV!

Explore more:

How to Fix YouTube TV Black Screen: Complete Guide

0
Smart TV with YouTube TV black screen and device icons
Troubleshoot YouTube TV black screen issues with our guide.

Are you ready to watch your favorite show on YouTube TV but stuck with a black screen? This issue is common and can happen on smart TVs, streaming devices, mobile phones, or computers. Don’t worry—there are simple ways to fix it. This guide provides step-by-step solutions to get you back to streaming quickly. We’ll cover general fixes, device-specific tips, and ways to prevent future problems.

Understanding the YouTube TV Black Screen Issue

The black screen problem on YouTube TV can be frustrating. It might show a completely black screen, play audio without video, or freeze the app. Here are common causes:

  • App Glitches: Temporary software issues in the YouTube TV app.
  • Internet Problems: Slow or unstable internet connections.
  • Device Issues: Malfunctions in your TV, streaming device, or phone.
  • Outdated Software: Old app versions or device firmware.

Recent user reports, like those on X, suggest this issue persists, especially on Samsung TVs. Understanding the cause helps you choose the right fix.

General Troubleshooting Steps

These steps work for most devices and should be your first try.

1. Check Your Internet Connection

A stable internet connection is key for streaming. YouTube TV needs at least 3 Mbps for standard definition and more for HD. Test your speed at Speedtest.net. If it’s slow:

  • Restart your router by unplugging it for 30 seconds.
  • Move your device closer to the router.
  • Stop other devices from using the network.

2. Restart Your Device

Restarting can fix temporary glitches. Turn off your device, wait 30 seconds, and turn it back on. This works for TVs, streaming devices, phones, and computers.

3. Update the YouTube TV App

Outdated apps can cause issues. Check for updates in your device’s app store:

  • Smart TVs/Streaming Devices: Go to the app store or channel store.
  • Mobile Devices: Visit Google Play Store or Apple App Store.
  • Computers: Ensure your browser is updated if using the web version.

4. Clear App Cache

Corrupted cache data can cause black screens. Clear it like this:

  • Smart TVs/Streaming Devices: Find the option in settings or app management.
  • Android: Settings > Apps > YouTube TV > Storage > Clear Cache.
  • iOS: You may need to reinstall the app to clear cache.
  • Computers: Clear browser cache in settings.

5. Reinstall the App

If clearing cache doesn’t work, uninstall and reinstall the app:

  • Smart TVs/Streaming Devices: Remove the app and download it again.
  • Mobile Devices: Delete the app and reinstall from the app store.
  • Computers: Refresh the browser or try a different one.

6. Check for Device Software Updates

Ensure your device’s operating system is current. Updates fix bugs that may cause streaming issues:

  • Smart TVs: Check settings for software updates.
  • Streaming Devices: Look for firmware updates in settings.
  • Mobile Devices: Settings > About > Software Update.
  • Computers: Update via system settings.
StepActionDevicesNotes
1Check InternetAllMinimum 3 Mbps needed
2Restart DeviceAllWait 30 seconds
3Update AppAllCheck app store
4Clear CacheAllVaries by device
5Reinstall AppAllFixes persistent issues
6Update SoftwareAllCheck settings

Device-Specific Solutions

If general steps don’t work, try these fixes for your device type.

Smart TVs (e.g., Samsung, LG, Vizio)

Smart TVs may have issues with built-in apps. Recent X posts, like this one, note problems on Samsung TVs.

1. Power Cycle the TV

  • Unplug the TV from the power outlet.
  • Wait for 30 seconds.
  • Plug it back in and turn it on.

2. Reset Network Settings

  • Go to your TV’s settings.
  • Find network settings and reset or forget the network.
  • Reconnect to Wi-Fi.

3. Adjust Audio Settings

Some users report that disabling 5.1 surround sound fixes the issue, as suggested in an X post:

  • Open YouTube TV app.
  • Go to Profile Picture > Settings > 5.1 Surround.
  • Turn off 5.1 audio.

4. Use an External Streaming Device

If the TV’s app keeps failing, use a Roku, Amazon Fire TV, or Apple TV. These devices often have more stable apps. See our guide on pairing devices with Roku.

Streaming Devices (e.g., Roku, Fire TV, Apple TV)

External streaming devices can also face black screen issues.

1. Restart the Device

  • Unplug the device from power.
  • Wait 30 seconds.
  • Plug it back in and turn it on.

2. Update Device Firmware

  • Check for firmware updates in the device’s settings.
  • Install any available updates.

3. Reinstall YouTube TV App

  • Uninstall the app.
  • Reinstall from the device’s app store.

Mobile Devices (Android, iOS)

For smartphones or tablets, try these steps.

1. Force Stop the App

  • Android: Settings > Apps > YouTube TV > Force Stop.
  • iOS: Double-click home button, swipe up on app.

2. Clear App Cache and Data

  • Android: Settings > Apps > YouTube TV > Storage > Clear Cache/Data.
  • iOS: Reinstall the app to clear data.

3. Reinstall the App

  • Delete the app.
  • Reinstall from Google Play Store or Apple App Store.

4. Check for OS Updates

  • Go to Settings > About > Software Update.

Computers (Windows, Mac)

If using YouTube TV on a browser, try these fixes.

1. Check Browser Settings

  • Disable ad blockers or extensions that block video playback.
  • Ensure JavaScript is enabled.

2. Clear Browser Cache

  • Go to browser settings and clear cache/cookies.

3. Try a Different Browser

  • Switch to another browser like Chrome, Firefox, or Edge.

4. Update Browser and OS

  • Check for browser and system updates.

Advanced Troubleshooting

If the issue persists, try these steps.

1. Check YouTube TV Server Status

Outages can cause black screens. Check YouTube TV’s official X account or help pages for updates.

2. Contact YouTube TV Support

Reach out via the YouTube TV Help Center for personalized help.

3. Look for Error Messages

If an error code appears, search it on the YouTube TV Community for specific fixes.

Preventive Measures

To avoid black screens in the future:

  • Update Regularly: Keep YouTube TV and device software current.
  • Stable Internet: Ensure your connection meets streaming needs.
  • Avoid Ad Blockers: They can disrupt playback.

FAQ

Why is my YouTube TV screen black?

It’s likely due to app glitches, internet issues, or outdated software. Try restarting your device or updating the app.

How do I fix YouTube TV black screen on my smart TV?

Power cycle the TV, reset network settings, or disable 5.1 audio in the app settings.

What if YouTube TV shows a black screen but audio plays?

This may be a video rendering issue. Restart the app, update it, or reinstall it.

How can I prevent YouTube TV black screen issues?

Keep apps and devices updated, maintain a strong internet connection, and avoid ad blockers.

Conclusion

A black screen on YouTube TV can disrupt your viewing, but these solutions should help. Start with general fixes like checking your internet or restarting your device. If needed, use device-specific steps or contact support. For more TV troubleshooting, check our related articles below. Share your tips or questions in the comments!

Related Articles

Philips TV Won’t Turn On: Comprehensive Troubleshooting Guide

0
Person fixing a Philips TV with a black screen.
Troubleshoot your Philips TV that won’t turn on.

A Philips TV that refuses to turn on can disrupt your entertainment plans, but many issues can be resolved with simple troubleshooting. This guide compiles solutions from official Philips support and user experiences to help you diagnose and fix the problem. We’ll cover common causes, step-by-step troubleshooting, and when to seek professional help, all in clear, easy-to-follow language.

Common Causes of Philips TV Not Turning On

Several factors can prevent your Philips TV from powering on:

  • Power supply issues: A faulty power cord, outlet, or internal power board can disrupt power delivery.
  • Remote control problems: Dead batteries, signal interference, or a broken remote may be the culprit.
  • Standby mode issues: The TV might be stuck in standby, appearing unresponsive.
  • Software glitches: Outdated or corrupted firmware can cause startup failures.
  • Hardware failures: Issues with the main board, power board, or capacitors may require professional repair.

Basic Troubleshooting Steps

Start with these straightforward steps to identify and possibly resolve the issue.

Check the Power Supply

A secure power connection is essential. Follow these steps:

  • Ensure the power cord is firmly plugged into both the TV and a wall outlet.
  • Try a different power cord to rule out a defective one.
  • Avoid using power strips or surge protectors during testing, as they may interfere.
Person plugging power cord into Philips TV and wall outlet.
Securely connect the power cord to your Philips TV and outlet.

Try Different Outlets

A faulty outlet can prevent the TV from receiving power. Test the outlet with another device, like a lamp, to confirm it’s working. If the outlet is loose, consider replacing it.

Power Cycle the TV

A power cycle resets the TV’s internal systems:

  • Unplug the TV from the power source.
  • Wait at least 60 seconds to allow residual power to drain.
  • Plug the TV back in and attempt to turn it on.

This step resolves about 30% of power-related issues.

Check Remote Control and TV Buttons

If the remote doesn’t work, try these steps:

  • Replace the remote’s batteries with new ones.
  • Stand about 3 feet from the TV and point the remote at the sensor, avoiding bright lights like fluorescent bulbs or sunlight, which can interfere.
  • Use the TV’s power button, typically located on the back or underside, to turn it on manually.
Philips TV with power button highlighted on the side.
Locate the power button on your Philips TV.

Look for Indicator Lights

Check for any LED lights on the TV’s front panel:

  • A steady or pulsing light may indicate the TV is in standby or loading mode, especially for 2015-2016 models.
  • No light suggests a power supply issue.
  • Refer to your user manual for model-specific light indications.

Advanced Troubleshooting

If basic steps don’t work, try these more technical solutions.

Unplug All Devices

External devices can cause conflicts:

  • Disconnect all HDMI cables, USB drives, or other accessories.
  • Attempt to turn on the TV without any devices connected to isolate the issue.

Perform a Factory Reset

A factory reset can resolve software issues but will erase all settings:

  • Unplug the TV from power.
  • Hold the power button while plugging it back in, continuing to hold until a recovery menu appears (if available).
  • Use the volume buttons to navigate to “Wipe data/factory reset” and confirm.
  • If no recovery menu appears, check your user manual for model-specific reset instructions.

Check for Software Updates

If the TV powers on, update its firmware:

  • Visit the Philips Support website to download the latest software or check this post: Philips TV Firmware Downloads.
  • Follow the instructions to install the update via USB or the TV’s menu.
  • Note that software updates may not be possible if the TV doesn’t turn on.

Understanding Philips TV Blinking Light Codes

Blinking LED lights often indicate specific error codes:

  • Three blinks: May suggest a power supply issue, such as a faulty diode.
  • Four blinks: Could indicate internal errors or outdated firmware.
  • Other patterns: Vary by model and may relate to main board or protection mode issues.

Since error codes differ across models, note the blinking pattern and consult your user manual or Philips Support for accurate interpretation.

Blinking PatternPossible IssueSuggested Action
2 BlinksPower board issueCheck power supply, contact support
3 BlinksFaulty diode or power supplyInspect power board, seek professional repair
4 BlinksFirmware or internal errorUpdate software, perform factory reset
6+ BlinksMain board failureContact professional technician

Philips TV Shows Logo Then Turns Off

If your TV displays the Philips logo briefly before shutting off:

  • Perform a power cycle by unplugging the TV for a few minutes.
  • Disconnect all external devices and try again.
  • Attempt a factory reset as described above.
  • If the issue persists, it may indicate a main board failure, requiring professional repair.

When to Seek Professional Help

If troubleshooting fails, the problem may involve hardware:

  • Power board issues: Faulty capacitors or diodes can prevent power delivery.
  • Main board failure: A defective main board may cause the TV to shut off or not start.
  • Repair costs: Fixing a power or main board can cost $100-$300, depending on the model and technician fees.

Contact Philips Support or a local repair shop for a diagnosis. Be cautious with DIY repairs, as opening the TV can be dangerous and may void the warranty.

Preventive Measures

To avoid future issues:

  • Regularly check for software updates on the Philips Support website.
  • Use a surge protector to protect against power surges.
  • Keep the TV in a well-ventilated area to prevent overheating.
  • Avoid connecting too many devices to the same outlet.

Frequently Asked Questions

Why won’t my Philips TV turn on?

Common reasons include power supply issues, remote control problems, or software glitches. Follow the troubleshooting steps above to diagnose the issue.

What do the blinking lights on my Philips TV mean?

Blinking lights indicate error codes, which vary by model. Check your user manual or contact Philips support for specific meanings.

How do I perform a factory reset on my Philips TV?

Unplug the TV, hold the power button while plugging it back in, and follow the recovery menu instructions if available. Check your manual for details.

Can I fix a Philips TV that shows the logo then turns off?

Try a power cycle, disconnect devices, or perform a factory reset. If these fail, it may be a main board issue requiring professional repair.

Related Resources

Explore more troubleshooting tips on Soft4led:

Conclusion

If your Philips TV won’t turn on, start with basic checks like the power supply and remote control. Advanced steps like a factory reset or software update may resolve software issues. If blinking lights or persistent problems occur, consult your user manual or a professional technician. For the latest support, visit Philips Support.

How to Fix a Broken or Cracked TV Screen: DIY and Professional Tips

0
How to Fix a Broken or Cracked TV Screen: DIY and Professional Tips

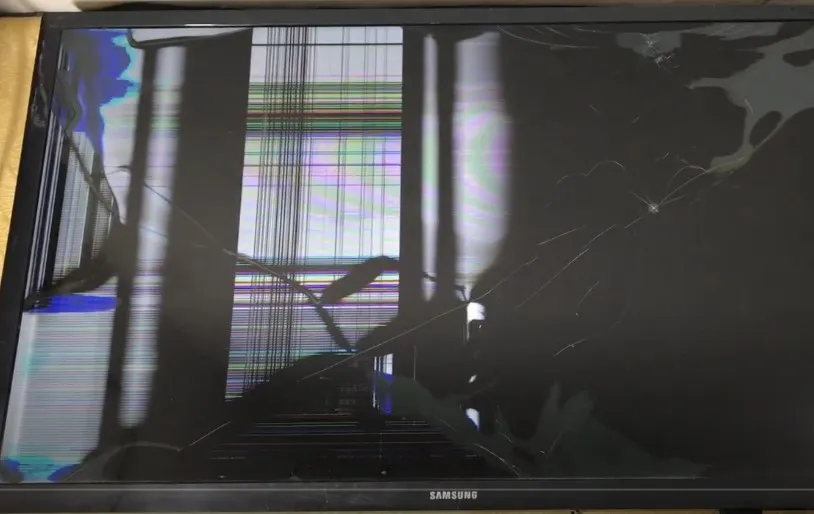
A cracked TV screen can ruin your viewing experience. Whether it’s a small scratch or a major shatter, you may wonder if you can fix it yourself or if it’s time for a new TV. This guide covers the causes of cracked screens, DIY repair methods, professional options, costs, and preventive tips. We’ll help you decide whether to repair or replace your TV.

Causes of Cracked TV Screens

TV screens can crack or break for several reasons. Understanding these causes can help you prevent future damage.

  • Physical Impact: Dropping the TV or hitting it with an object can cause cracks.
  • Pressure: Placing heavy items on the TV or leaning on it may damage the screen.
  • Temperature Changes: Extreme heat or cold can weaken the screen, making it more prone to cracking.
  • Manufacturing Defects: Rare faults in production can lead to weakened screens.
  • Age and Wear: Older screens may become fragile over time.
  • Incorrect Installation: Improper mounting can stress the screen.
How to Fix a Broken or Cracked TV Screen: DIY and Professional Tips

Can You Fix a Cracked TV Screen?

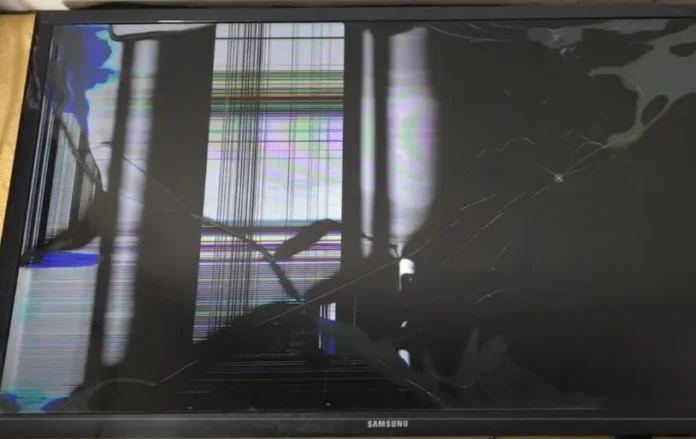
The ability to fix a cracked TV screen depends on the damage. Minor cracks or scratches may be manageable with DIY methods. Major damage, like large cracks or shattered screens, often requires professional repair or replacement. The type of screen—LCD, LED, or OLED—affects repair options. For example, OLED screens are costlier to fix than LCDs.

DIY Methods to Fix Minor Damage

For small cracks or scratches, you can try these DIY methods. These are temporary fixes and may not fully restore the screen. Always handle the TV carefully to avoid worsening the damage.

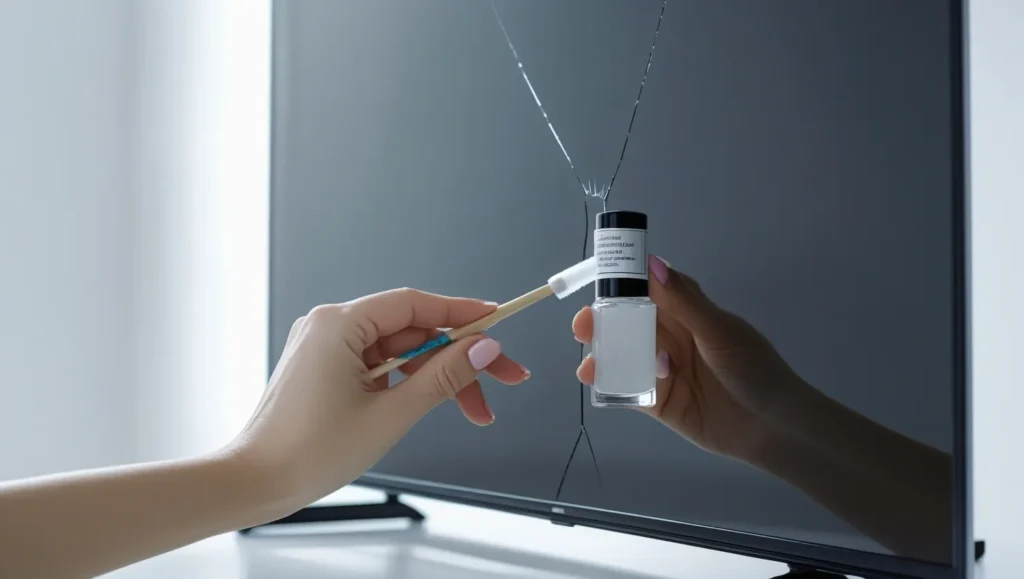
  • Clear Nail Polish:
    1. Clean the screen with a soft cloth.
    2. Apply a thin layer of clear nail polish over the crack.
    3. Let it dry for several hours.
    4. Wipe away excess polish gently.
  • Petroleum Jelly:
    1. Clean the screen thoroughly.
    2. Rub a small amount of petroleum jelly into the crack.
    3. Wipe off excess jelly with a soft cloth.
  • Screen Repair Kits:
    1. Purchase a TV screen repair kit online.
    2. Follow the kit’s instructions to apply resin or adhesive.
    3. Allow the solution to set as directed.
Hand applying clear nail polish to a cracked TV screen.
Applying clear nail polish to a small crack on a TV screen. (AI-generated)

Note: These methods are for minor damage only. For significant cracks, seek professional help. DIY fixes may not work for all screen types, such as OLED.

Professional Repair Options

For severe damage, professional repair is the best option. Here’s how to proceed:

  • Contact the Manufacturer: Many brands, like Samsung, offer repair services. Visit their support page to find a service center. For TVs 32 inches or smaller, mail-in repair may be available.
  • Visit a Local Repair Shop: Search for reputable TV repair shops in your area. Technicians can assess the damage and provide a cost estimate.
  • Check Warranty: Some warranties cover manufacturing defects but not accidental damage. Extended warranties may include screen repairs.

For other TV issues, such as black screens, check our guide on Fixing Element TV Black Screen.

Costs of Repair vs. Replacement

Repairing a TV screen can be costly. Costs depend on the TV model, screen type, and damage severity. Here’s a breakdown:

Type of DamageRepair CostReplacement Cost
Minor Crack$100 – $300N/A
Major Crack$300 – $800Varies
Shattered ScreenOften not repairableCost of new TV

For example, fixing an OLED screen can cost $300–$800, while a new 55-inch LED TV might cost $400–$600. If repair costs exceed 50% of the TV’s original price, replacement is often more economical.

For related issues, see our post on Fixing TV No Picture.

Warranty and Insurance

Most standard TV warranties do not cover cracked screens caused by accidents. However, manufacturing defects may be covered. Check your warranty terms or contact the manufacturer. Extended warranties or home insurance plans might include screen damage. Review your policy to confirm coverage.

Preventive Measures to Avoid Damage

Prevent future screen damage with these tips:

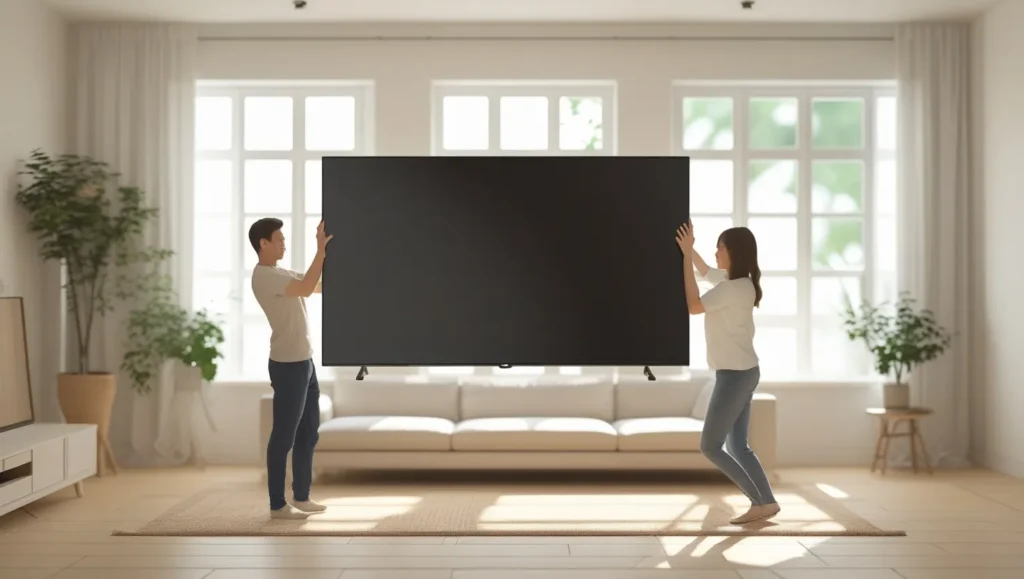
  • Handle Carefully: Move or install the TV with care, holding it by the edges.
  • Avoid Heavy Objects: Don’t place items on or near the TV.
  • Control Temperature: Keep the TV away from extreme heat or cold.
  • Use Screen Protectors: Consider a TV screen protector for added safety.
  • Secure Mounting: Ensure wall mounts are sturdy to prevent falls.
  • Keep Pets and Kids Away: Prevent accidental bumps or knocks.
Two people carefully lifting a TV.
Properly handling a TV to avoid screen damage.

For more TV care tips, read Fixing Sanyo TV Snowflake Screen.

When to Replace Your TV

Consider replacing your TV if:

  • Repair costs are more than 50% of the TV’s original price.
  • The TV is old or outdated.
  • Damage is too severe to repair.
  • You want a newer model with better features.

New TVs are often affordable, especially during sales. For example, a 65-inch 4K TV can cost as little as $300 during promotions.

Conclusion

A cracked TV screen doesn’t always mean the end of your TV. Minor damage can sometimes be fixed with DIY methods like clear nail polish. For major cracks, professional repair or replacement is usually necessary. Compare repair costs to the price of a new TV to make the best decision. Use preventive measures to protect your TV in the future.

FAQs

Can I fix a cracked TV screen myself?

For small cracks, try DIY methods like clear nail polish or petroleum jelly. These are temporary fixes. For major damage, contact a professional.

How much does it cost to repair a TV screen?

Costs range from $100 to $300 for minor repairs and $300 to $800 for major ones. Screen replacement can cost 50–80% of the TV’s price

Is it worth repairing a cracked TV screen?

If repair costs are over half the price of a new TV, replacement is often better. Consider the TV’s age and features.

What should I do if my TV screen is cracked?

Assess the damage. Try DIY fixes for minor cracks. For major damage, contact a repair service or consider a new TV.

How can I prevent TV screen damage?

Handle the TV carefully, avoid heavy objects, use a screen protector, and secure mounts properly.