The JVC service menu sits one layer below the standard user interface — accessible only through specific button sequences on the original remote. It controls picture calibration, factory reset, white balance, and firmware data that the normal settings menu never exposes. This guide covers every known access method, organized by TV generation, so you can find the right code for your model in under two minutes.
What Is the JVC Service Menu?
The JVC service menu — also called factory mode or service mode — is a hidden diagnostic layer built into the TV’s firmware. It is designed for factory calibration and authorized repair technicians, not regular users. That’s why JVC doesn’t advertise it.
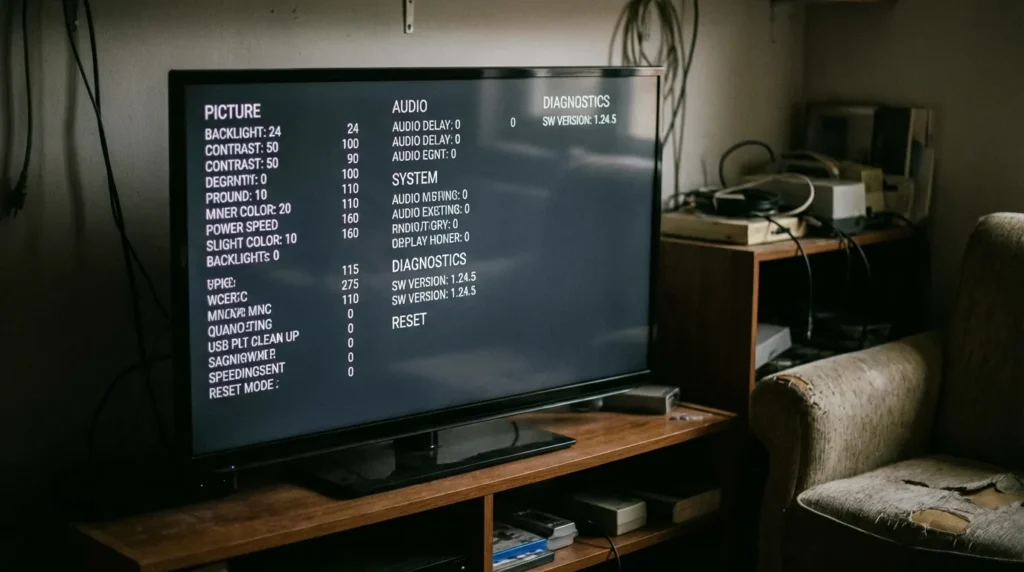
Inside, you’ll find low-level controls: RGB and white balance values, geometry correction (on CRT models), color temperature presets, channel data resets, software version numbers, and full factory restore functions. These are settings the standard picture menu doesn’t touch.
What you can do in the service menu: adjust picture calibration, check firmware version, perform a full factory reset, fix channel tuning problems, and reset EEPROM data. Other TV brands use the same concept — you can compare how it works on Samsung TVs, Sony TVs, and LG TVs if you work across brands.
⚠ Critical Warning
Changing values blindly inside the service menu can cause permanent display damage or render the TV unbootable. Always write down existing values before touching anything. If you’re not sure what a setting does — leave it alone.
Before You Start — Read This First
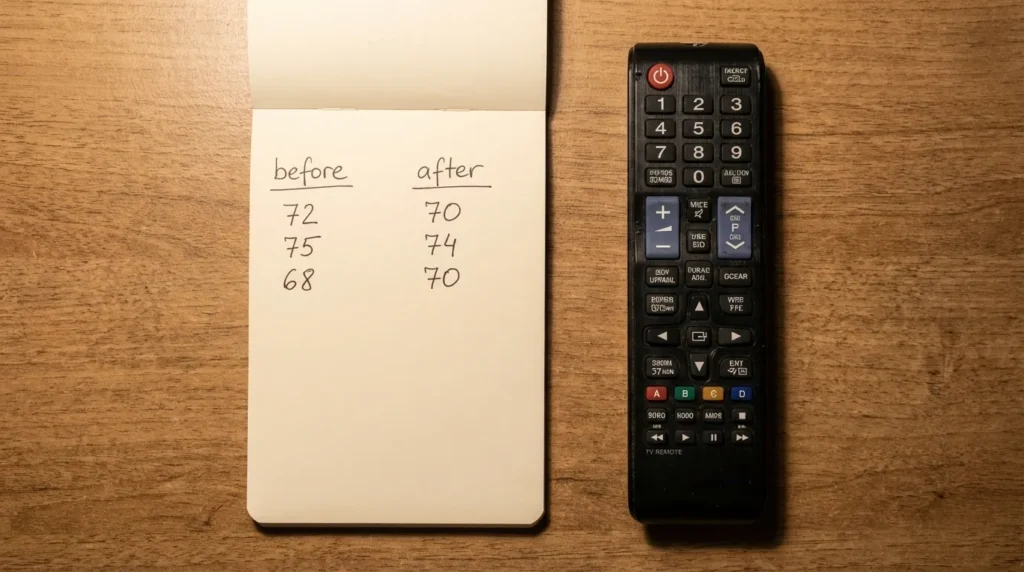
Write Down Current Values
Before changing any setting, note the current value on paper. If something goes wrong, you can restore the original figure manually. This takes 30 seconds and prevents a lot of problems.
Do Not Change Unknown Settings
Service menus contain registers that control convergence, overscan, backlight power limits, and panel drive voltage. On CRT TVs, incorrect geometry values can damage the deflection yoke. On LED/LCD panels, wrong backlight values shorten display lifespan. If a setting doesn’t relate to your specific problem, skip it entirely.
If the issue you’re trying to fix is a black screen or total power failure rather than a calibration problem, the service menu likely isn’t the right tool — see our guide on fixing a JVC TV that won’t turn on first.
Power Stability
Don’t attempt service menu access during a thunderstorm or on an unstable power supply. A sudden power cut mid-save can corrupt EEPROM data and brick the TV. Use a surge protector.
What You Need — Remote Requirements
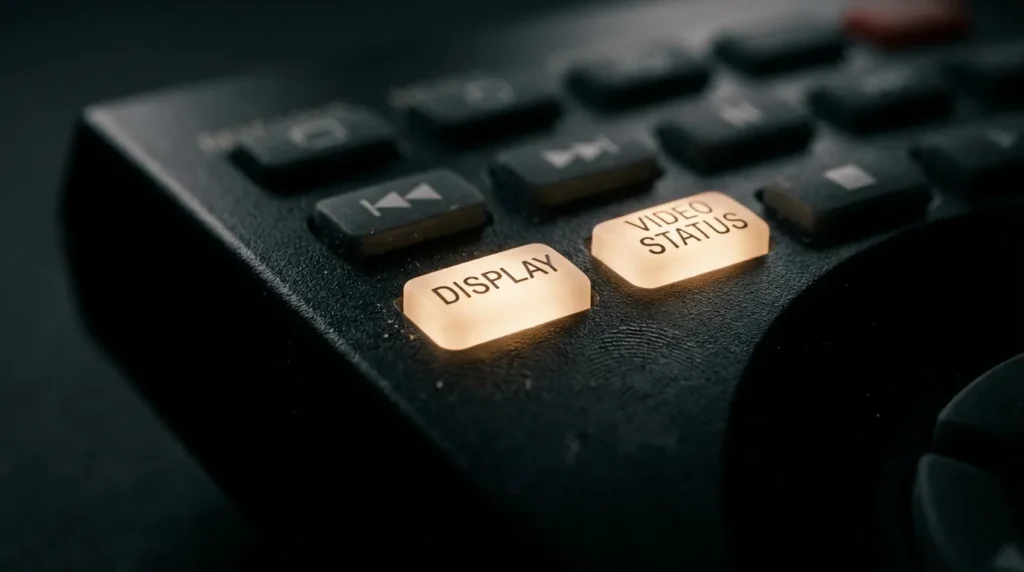
Nearly all JVC service menu methods require the original OEM remote that shipped with the TV. Universal remotes often lack the dedicated buttons — such as VIDEO STATUS or DISPLAY — that trigger the entry sequence.
No Original Remote?
If you’ve lost the original JVC remote, you have two options. First, try a JVC-compatible replacement remote for JVC TVs that replicates the full button layout, including the VIDEO STATUS and DISPLAY keys that most universal remotes omit. Second, check if your specific model accepts numeric code sequences (Method 3 below), which can sometimes be entered via a universal remote with number keys.
💡 If Methods 1 & 2 fail without the original remote
Both methods require physical DISPLAY and VIDEO STATUS buttons that generic remotes don’t carry. A dedicated JVC replacement remote is the most reliable fix — it restores full button access for all service menu methods, not just numeric ones.
Vestel-Based JVC TVs — Special Note
Many JVC LED TVs sold in Europe and the UK from 2018 onward are built on Vestel mainboards (commonly the 17MB171 series). These TVs use entirely different service menu codes from classic JVC models. If you own an LT-32CA120, LT-32DD52J, LT-43VF, or a similar recent model and the standard methods fail, skip straight to the Vestel section below. For a full breakdown of how Vestel’s service system works across brands, see our dedicated Vestel TV service menu codes guide.
Other Brand Service Menu Guides
- Samsung TV Service Menu Codes
- Sony TV Service Menu Codes
- LG TV Service Menu Codes
- Panasonic TV Service Menu Codes
- Hisense TV Service Menu Codes
- Hitachi TV Service Menu Codes
- All LCD/LED TV Service Menu Codes
Method 1 — Display + Video Status (Most Common)
This is the primary method for most JVC LCD and LED TVs produced between 2000 and 2018. It works on the majority of LT-series and AV-series models with an original remote.
Method 1 — Step by Step
- Turn the TV on and wait for a picture to display.
- Press DISPLAY and VIDEO STATUS on the remote simultaneously.
- The service menu appears on screen.
- Use MENU UP / MENU DOWN to select an item.
- Use < or > to adjust the selected value.
- Press EXIT to return to the previous menu. Press EXIT again to leave service mode entirely.
Navigation: UP/DOWN = select item | LEFT/RIGHT = adjust value | EXIT = back/exit
Method 2 — Sleep Timer Method
This variant is an alternative entry point that also works on many older JVC LCD models. Use it when Method 1 alone doesn’t produce a response.
Method 2 — Step by Step
- Press MENU on the original remote and navigate to the User Menu screen.
- Highlight Picture Control using the arrow indicator.
- Confirm that the top remote buttons are set to TV (not VCR).
- Press SLEEP and set the sleep timer to 0 minutes.
- While the sleep timer is still displayed on screen, press VIDEO STATUS and DISPLAY simultaneously.
- The service menu appears.
- Use number keys 1–9 to select a category.
- Use CH+ / CH– to scroll through options.
- Use VOL+ / VOL– to change a value.
- Press MUTING to save the setting.
- Press BACK to exit the service menu.
Save method: MUTING | Exit: BACK
Method 3 — Menu + 1147 (Smart TV / LED)
This numeric code method works on a range of JVC LED and Smart TV models. It’s one of the few methods compatible with some universal remotes, since it only requires a MENU button and number keys.
Method 3 — Step by Step
- Turn the TV on.
- Press MENU on the remote.
- Quickly press 1 1 4 7 in succession.
- The service menu appears.
- Press EXIT or turn off the TV to leave service mode.
Alternative code for some models: MENU → 8 8 9 3 | Also try: MENU → 8 5 2 3 (from audio settings screen)
If 1147 doesn’t work, try 8893. A small number of JVC smart TV variants respond to 8523 entered from the audio settings page instead of the main menu screen.
Method 4 — Info + Menu + Mute + Power
This sequence is documented for specific JVC LED models where the Display/Video Status combination produces no result.
Method 4 — Step by Step
- With the TV in standby, point the remote at the TV.
- Press INFO → MENU → MUTE → POWER in sequence (do not hold simultaneously — press each one after the other quickly).
- The TV powers on directly into service mode.
- Press POWER to exit service mode and return to normal operation.
Timing matters here — each button press should follow the last within 1–2 seconds.
Method 5 — Clock Set to 3:21 AM (Pre-2000 CRT Models)
This method applies only to JVC CRT televisions made in 1995 and earlier. It’s largely obsolete today but documented here for repair technicians working on vintage sets.
Method 5 — Step by Step
- Begin setting the TV’s clock as you normally would.
- Set the time to 3:21 AM.
- As the clock starts and the “Thank you” message is flashing on screen, press MUTE.
- Immediately press MENU UP or MENU DOWN just after pressing MUTE.
- The service menu opens.
- Use UP / DOWN to select options and LEFT / RIGHT to adjust.
- Settings are saved automatically when you exit.
Method 6 — JVC Projector Service Menu
JVC projectors use a different entry method entirely. This applies to DLA-series and older D-ILA projector models.
Method 6 — Projector Step by Step
- With the projector on and displaying an image, press UP DOWN RIGHT LEFT on the remote in sequence.
- Press ENTER.
- The service menu appears.
- To exit, turn the projector off.
JVC Smart TV & Vestel Board — Special Instructions (2024–2026)
Since roughly 2017, JVC TVs sold in Europe and the UK are manufactured by Vestel, a Turkish OEM electronics company. The board inside your JVC may be labeled 17MB171 or a similar Vestel part number. These TVs do not respond to any of the classic JVC methods above — they use Vestel’s own service menu code system. For the complete Vestel service menu code database including all board variants, see our full Vestel TV service menu codes guide.
Models confirmed to use Vestel boards include the LT-32CA120, LT-32DD52J, LT-43VF, LT-55VU83B, and most LT-series panels sold through UK retailers from 2018 onward.
Vestel-Based JVC Service Menu Codes
Vestel Method A (Primary)
- Turn the TV on.
- Press MENU on the remote.
- Quickly press 4 7 2 5 in succession.
- The Vestel service menu opens.
Alternative codes if 4725 fails: try 4726 → then 1325 → then 7935 (Hotel TV menu)
Vestel Method B (Mute + Code)
- Turn the TV on.
- Set volume to 0.
- Press MUTE.
- Quickly press 9 8 7 6 in succession.
- The service menu appears.
Important — Vestel Input Mode
The TV must not be on a DTV channel when entering the Vestel service menu. Switch to an HDMI input, AV input, or analogue channel first. Attempting the code while on a DTV source will fail silently with no error message.
Android-Based JVC Smart TVs
Some JVC Smart TVs released from 2022 onward run a licensed Android TV OS. On these models, a traditional service menu may not exist in the same form. Instead, a developer/diagnostic menu is accessible via Settings → About TV → Build Number (tap 7 times to unlock developer options). Full low-level calibration on Android JVC TVs typically requires a manufacturer service tool connected via USB.
How to Navigate & Exit the JVC Service Menu
Category Selection
In service menus that use numbered categories, press 1 through 9 on the remote to jump to a specific section. Categories typically cover picture, audio, channel, system, and diagnostics data.
Adjusting Values
Use CH+ / CH– to move between items. Use VOL+ / VOL– or the < / > directional buttons to increment or decrement a value. Changes take effect immediately on screen in most cases, so you can judge visually before saving.
Saving Changes
On older JVC models using Method 2, press MUTING to save. On CRT models using Method 5, settings save automatically on exit. On Vestel-based models, changes are saved when you exit normally — do not power-cut the TV mid-session.
Exiting Safely
Press EXIT or BACK repeatedly to step out of the menu. Do not unplug the TV or force a power cut while inside the service menu — this risks EEPROM corruption. If the menu freezes, wait 30 seconds before pressing power.
What’s Inside the JVC Service Menu?
The specific contents vary by model and board generation, but most JVC service menus contain the following categories:
| Category | What It Controls | Who Needs It |
|---|---|---|
| Picture / ADC | RGB white balance, color temperature offsets, contrast ceiling | Calibrators, tech users |
| Geometry | Horizontal/vertical size, position, keystone (CRT only) | CRT repair technicians |
| Factory Reset | Restores all user and service values to factory defaults | Anyone resetting the TV |
| Channel Data | Regional tuning, channel scan reset, signal level display | Installers, region changers |
| Software / Version | Firmware build number, EEPROM version, board ID | Repair shops, diagnostics |
| Audio | Low-level audio offsets, speaker calibration | Technicians |
| Diagnostics | Panel hours, error log, backlight run-time | Repair technicians |
If you’re using the service menu specifically to fix a dark or dim picture problem, our guide on how to fix a dark TV screen covers what the backlight settings actually do before you change them.
JVC Service Menu Not Working? Fix It Here
Wrong Remote Type
The most common reason. A universal remote mapped to JVC codes still often lacks the physical VIDEO STATUS or DISPLAY buttons. If your remote doesn’t have those exact keys, Methods 1 and 2 will never work. Try Method 3 (numeric code) instead, which only needs MENU and number keys. If that also fails, a JVC replacement remote that includes those dedicated buttons is the most direct solution.
Timing Issues
For simultaneous button presses (Methods 1 and 2), the timing window is tight — typically under half a second. If nothing happens, try pressing one button a fraction before the other rather than perfectly simultaneously. Some users find it easier to press DISPLAY first and then tap VIDEO STATUS while holding it.
Vestel vs. Classic JVC Confusion
If you own a JVC TV bought in the UK or Europe after 2017 and none of the standard methods work, the unit almost certainly runs a Vestel board. Go directly to the Vestel methods (MENU → 4725). The classic JVC sequences are completely inoperative on Vestel hardware.
DTV Input Block
On Vestel-based JVC TVs, the service menu is blocked when the TV is tuned to a digital broadcast channel. Switch to HDMI 1 or AV input before entering the code.
Android TV Limitation
Newer Android-based JVC Smart TVs do not have a traditional factory service menu accessible by remote. The standard service menu sequences produce no result on these models. Contact JVC support or use the Android developer options workaround described in the Vestel section above.
TV Won’t Power On at All
If the TV isn’t turning on in the first place, the service menu isn’t accessible regardless of the code. Check our dedicated guide on how to fix a JVC TV that won’t turn on before attempting any service menu work.
Related TV Fix Guides
- Fix TV No Picture
- Fix Dark TV Screen
- Fix LG TV Black Screen
- Fix Samsung TV Black Screen
- Fix JVC TV Won’t Turn On
JVC Model Quick Reference Table
| Model / Series | TV Type | Method to Use | Notes |
|---|---|---|---|
| AV-2186 / AV-2196 / AV-2973 | CRT | Method 1 or Method 2 | Original remote required |
| Pre-2000 JVC CRT | CRT | Method 5 (Clock 3:21 AM) | 1995-era sets only |
| LT-26 / LT-32 (pre-2017) | LCD/LED | Method 1 or Method 3 | Try 1147 if Display key absent |
| LT-32CA120 | LED (Vestel 17MB171) | Vestel Method A (4725) | Must use HDMI/AV input |
| LT-32DD52J | LED (Vestel) | Vestel Method A (4725) | Original remote required |
| LT-55VU83B / LT-49VU83B | Smart TV (Vestel) | Vestel Method A or B | Try 4725 first, then 9876 |
| LT-43VF / LT-50VF series | Smart TV (Vestel) | Vestel Method A (4725) | European market models |
| JVC Android TV (2022+) | Android Smart TV | Developer Options only | No traditional service menu |
| JVC DLA Projectors | Projector | Method 6 | UP/DOWN/RIGHT/LEFT + ENTER |
More Service Menu Guides by Brand
- Philips TV Service Menu Codes
- Toshiba TV Service Menu Codes
- Haier TV Service Menu Codes
- Hisense TV Service Menu Codes
- Thomson TV Service Menu Codes
- Bush TV Service Menu Codes
- Cello TV Service Menu Codes
- Telefunken TV Service Menu Codes
FAQs
Can I enter the JVC service menu with a universal remote?
In most cases, no. Methods 1 and 2 require buttons — specifically DISPLAY and VIDEO STATUS — that most universal remotes don’t carry. Method 3 (MENU + 1147) is the exception; if your universal remote has a MENU key and number pad mapped to JVC codes, it can sometimes work for that method only. For reliable access to all methods, a JVC replacement remote with the full original button layout is the most practical fix.
Will entering the service menu void my JVC warranty?
Accessing the service menu alone typically doesn’t void a warranty. Changing calibration values that cause damage to the panel or incorrectly flashing firmware can void it. If your TV is still under warranty, contact JVC support first rather than adjusting service menu settings yourself.
What does a factory reset in the JVC service menu do?
It restores all settings — both user preferences and service-level calibration data — to the values loaded at the factory. This erases custom picture settings, channel lists, and any service adjustments made previously. Use it as a last resort when the TV behaves abnormally and standard resets haven’t worked.
My JVC TV is stuck in the service menu. What do I do?
Press EXIT or BACK repeatedly. If it’s unresponsive, wait 60 seconds and try again. As a last resort, hold the physical power button on the TV itself (not the remote) for 5 seconds to force a shutdown. The service menu does not persist after a normal restart on most models.
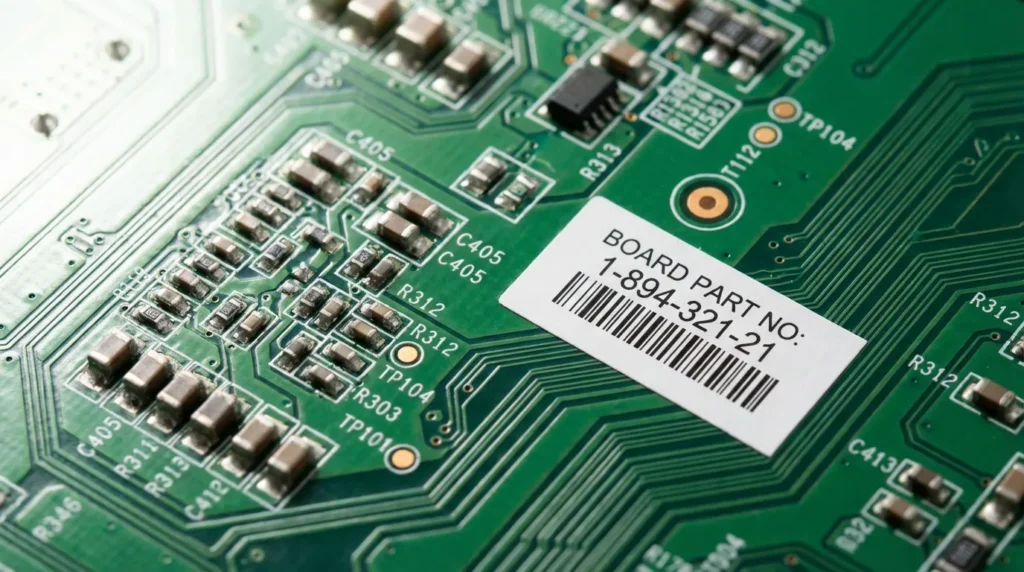
How do I know if my JVC TV has a Vestel board?
Check the model number. JVC TVs with LT-series model numbers sold in the UK and Europe from roughly 2017 onward are almost all Vestel OEM units. You can also check the sticker on the back panel — Vestel boards carry a part number starting with 17MB or 23MB. Our Vestel service menu guide covers all variants.
Is the JVC service menu the same as a factory reset in the user settings?
No. The user settings factory reset returns picture, sound, and network settings to defaults. The service menu factory reset goes deeper — it also resets white balance calibration, panel-level adjustments, and EEPROM configuration data that the standard user reset doesn’t touch.
Do other brands use similar service menu codes?
Yes — most TV manufacturers hide a service menu behind a button sequence or numeric code. The access methods vary by brand. If you also work on other brands, see our guides for Samsung, Sony, LG, Panasonic, and the full LCD/LED TV service menu code database.
The right JVC service menu method depends entirely on the TV’s hardware generation. Classic JVC sets from the CRT and early LCD era use the Display + Video Status combination. JVC LED and Smart TVs from 2017 onward are overwhelmingly Vestel-built — they need the MENU + 4725 sequence instead. Android-based JVC models don’t have a traditional service menu at all. Match your method to your model, write down existing values before changing anything, and exit cleanly using the EXIT or BACK key rather than cutting power mid-session.
For the same process on other TV brands, the complete TV service menu codes index covers over 25 manufacturers in one place.